INTERIOR IDEAS
The interior of modern vehicles can be difficult to fit the accessories needed to make a good touring car, so this should give a few ideas where to place things along with some other modifications as well. Don't forget that this is a RHD, but doing it in the mirror image might work just as well.
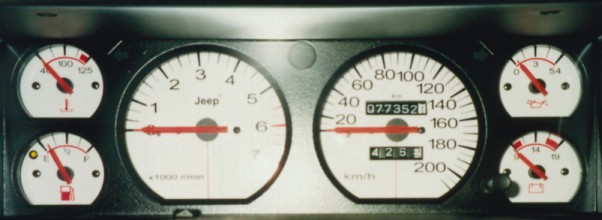
White instrument background
Below are my gauges in metric measures.
The gauges in MPH and imperial
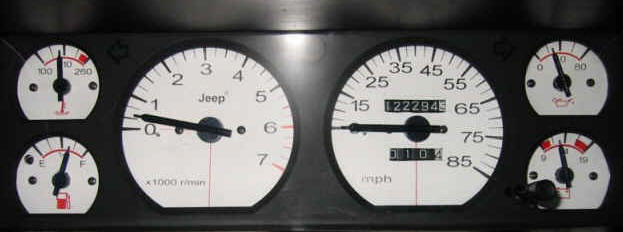
This not only makes it easier to read but looks in keeping with the Sport model as well. To read the instructions and to obtain the file for $10.00 U.S., click here to order the file so you can make your own. I have made two versions with US measures with one the speedo out to 85 and 95 miles/hr and another one to105 miles/hr with "Jeep" added to the tachometer. There is also a version that will allow you to convert all your 'imperial' gauges to metric. Please state which version when ordering. You can make the background color anything you choose by simple using colored gloss paper to print it on.
Stainless steel gauge surround
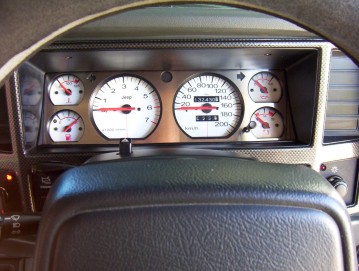
This is simply a stainless steel piece that just drops in over the top of your gauge surround. I was bought off eBay from Speedhut and just gives that area a lift. I have written a story on it here.
Carbon Fibre film
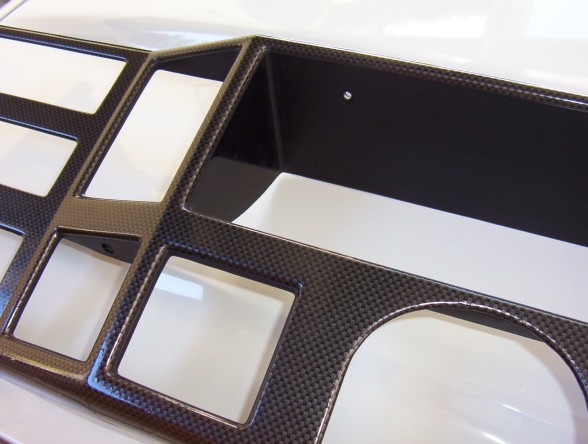
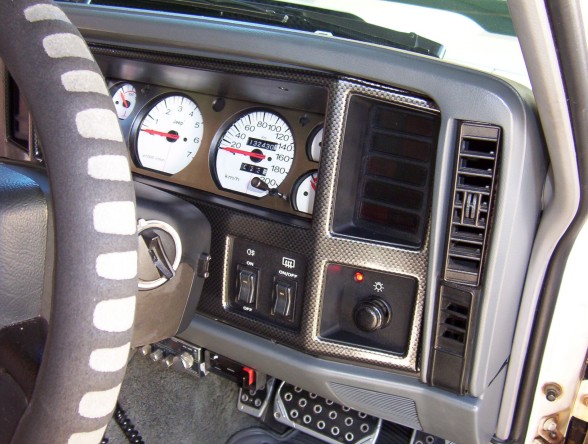
This is a film that I added to the dash panel to make it a bit more individual. I have more information and instructions on how I did here.
Subwoofer, fire extinguisher and CD stacker

This is where I mounted the fire extinguisher and the 12 stack CD player. The stacker can be loaded from the hatch or the back door and is well protected with the wheel arch below it. I made the subwoofer enclosure out of 20 mm MDF with the back matching the angle of the seat so it took as little space as possible but still had the right volume for that speaker. The angled back is also good for the reflections along with the acoustic filling. Velcro strips are attached to the bottom and back to stop it moving around while still making it easy to remove. The amplifier is mounted under the dash behind the fuse box out of harms way with good cooling. If you build a bigger enclosure for a ported speaker you can place the amplifier inside because it will get air flow from the speakers pulsing. I chose non-ported because it needs less space and is more efficient at the low volumes I mainly listen to.
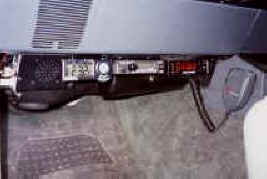
CB, brake controller and amplifier
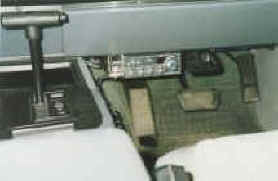
The CB was mounted here within easy reach and the mike mounted on the side of the console. The brake controller for the electric brakes on my offroad tent trailer was mounted next to it along with the amplifier behind the fuse box which you can just see above the accelerator. None of them have ever got in the way. The mounting of the aerial and wiring is shown here on this page.
OZ Trip computer, UHF CB and Temperature
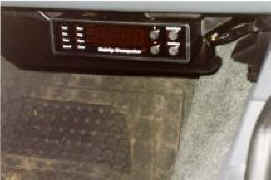
This is a trip computer that comes in kit form at $139 ($75 U.S.) back in 1999 or you can buy it assembled. It has 27 different functions in metric, imperial or US measures. It has things like a tachometer and speedo (which will be accurate even if yours isn't), three trip meters as well as distance to empty based on average or current consumption. You enter the capacity of your tank and then you can watch it disappear 100ml. at a time. It is very easy to wire in with only power, injector and speed pulse wires needed. For the full story on the install go to the write up here or for more information and to purchase it go to the company web site or email them. There has been some availability problems of this of late. I found a very impressive replacement that reads your codes and removes them if you have a 1996 or later running OBDII ECU. It just plugs into your OBDII port and will read all you gauges digitally as well as have the full trip functions. Go to http://scangauge.com Next to this is a 50 channel UHF FM radio that is used a lot in Australia as it is much clearer than AM. These units run at the 477 MHz which is unique to here and is also used by the police so I have the top 10 channels scanning their channels. This GME TX3400 has a remote head that you see mounted to the left of the computer and the main unit mounted to the far left behind the inside and outside thermometer.
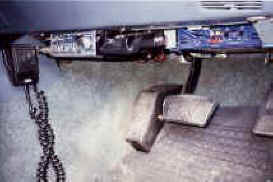
Pedals
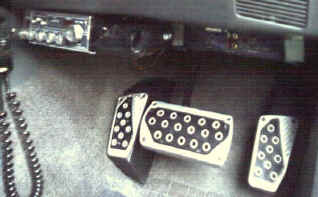
I had worn the rubber down quite a bit on the right hand side of the brake as I often hit it with only part of my foot supported. By adding these pedal covers I could position it closer to the right so I have my whole foot now supported which gives better feel and control. I bought two sets so I could do the dead pedal as well to give a more balanced look. Of course it just looks that much better even if the above reason wasn't enough!
[Index]