Trip Computer Install
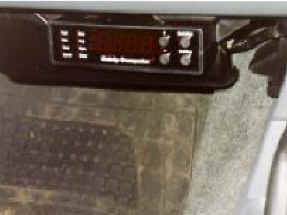
This is a trip computer that comes in kit form at $139 ($75 U.S.) or you can buy it assembled. It has 27 different functions in metric, imperial or US. measures. It has things like a tachometer and speedo (which will be accurate even if yours isn't), three trip meters as well as distance to empty based on average or current consumption. You enter the capacity of your tank and then you can watch it disappear 100ml. at a time. I found it very accurate with the fuel calculation only point 1 out and the litres left in the tank within 1 litre. You can change the calibration at any time to make it even more accurate.
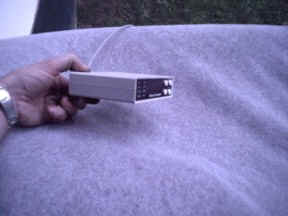
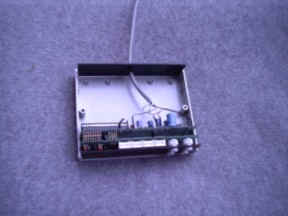
This is what you end up with after assembling it yourself or buy it complete. As you can see there is plenty of room in the back of the case if you have EFI, ( otherwise there is another card at the back for the fuel flow meter ). The standard box is 135x35x110 in size which is about the size of a CB and can be made even shorter.
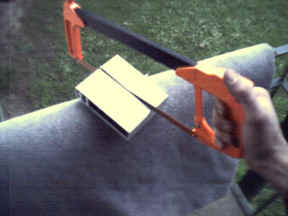
I needed the extra room so I shortened it until just behind the case screws leaving enough room to glue the backing plate against them. The total depth is now only 62 mm. I have fitted it under the dash below the glove box and changed the buttons for black ones as well as painting the case black to make it blend it in a bit better. I have done one since and left the buttons white and it still looked quite good. You can use a small angle bracket on each side for mounting it making sure that the screws end up between the circuit boards or counter sink some screws into the top half of the case and re-attach the bottom half along with the hardware. I know of one that has been installed in the overhead console as well.
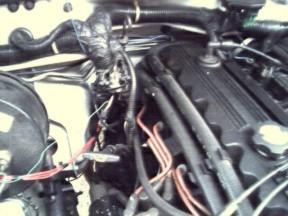
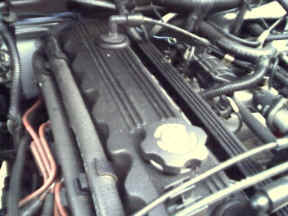
The wiring is fairly straight forward and not as hard as one would think. The black wire from the trip computer goes to the speed pulse wire which I picked up at the top of the firewall and on the XJ '95's I have done was a white wire with an orange stripe, ( left picture above dip stick ). I had located this by following the wires from the speedo drive at the transfer case and then jacked up the rear wheels and had someone turn them while I probed the speedo wires until I found the one that pulsed with my multimeter. The brown wire from the trip computer goes to the injector and you just connect to the wire which is not common among the others which in my case is light green with a black stripe, ( right picture next to pcv valve ). It does not matter which one of the injectors you choose so I used the one closest to the firewall. For the remaining wires I tapped them all into the plug that went to the door buzzer module which I had disconnected the first day I got the car home. The orange wire goes to permanent 12 volts which was the black with yellow stripe. The green wire goes to ground which connected to the all black wire and the blue wire and white wires I connected to the white with black stripe which was 12 volts accessories. The white wire from the computer can also be connected to the headlight switch so it only dims the display when you have them on but found the display way to bright even in the middle of the day so leave it permanently dimmed by wiring it as shown.
Now all thats left to do is calibrate the computer and it is done by pushing the down and set/clear buttons at the same time and entering the calibration number you want. The fuel ( No.1 ) is done by the computer counting the number of pulses it receives every time the injector opens and the length of time it is open for over a tank full. This is then divided by the number of fuel you have added which you enter in. This number should be written down as you can enter it in manually at calibration No.2 should you ever loss power or want to modify it. On the two computers I have done it was 436 which you can enter now at calibration No.2 instead of doing the above and see if it is spot on and if not you can always just change it up or down. The distance is calibration is No.3 where it counts the pulses over a known distance which is then divided by it or you can enter 204 at calibration No.4 to have it the same as mine. The last is for the tacho if you have EFI and enter 120 at calibration No.5.
I find this has been a fantastic way of knowing where you have to fill up on trips and lets me know straight away if something is a miss if I start to use more fuel. It is also a way where you can see how much influence driving style and using airconditioning, load etc. effect your economy instantly. For more information and to purchase it go to the company web site or email them.
There has been some availability problems of this of late. I found a very impressive replacement that reads your codes and removes them if you have a 1996 or later running OBDII ECU. It just plugs into your OBDII port and will read all you gauges digitally as well as have the full trip functions. Go to http://scangauge.com
[Index]