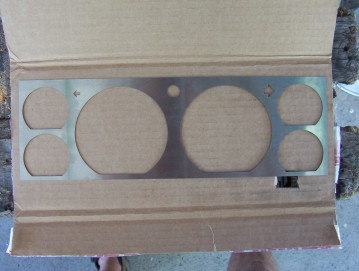
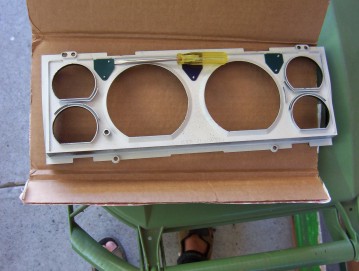
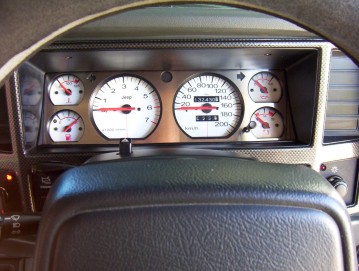
Stainless steel gauge surround
I was going to cut out and make my own dash surround from either stainless steel or aluminium. But then I saw them on eBay being sold brand new for a buy it price at the time of $11.99. It just was not worth the effort even though I like to do all I can myself it would be really hard to make it that good being that they are cut out with a plasma so no distortion. So I bought this one from Speedhut and they were great to deal with.
I chose stainless over aluminium as it will keep it's shine much longer and not tarnish. They were not listed to suit XJ's that have the reset button but it is a simple matter of drilling an extra hole. It drops straight in and is a very neat fit around the gauge holes.
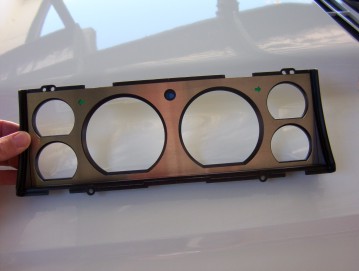
To get to the gauge bezel out you can follow the write up on fitting the white backgrounds. One thing I did not like was the size of the indicator arrows. They were a bit small for my model so I just filed them out as you can see on the right above.
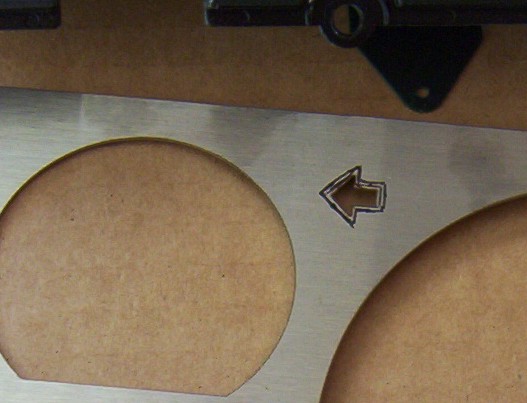
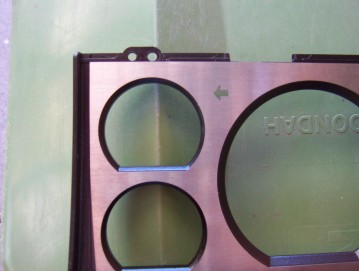
The first thing to do is to pop off the coloured plastic pieces which you do by carefully levering them with a screw driver. Then I just placed the bezel in place and flipped it over and marked them from behind. That gave me the inside size which I then filed out to. Now after that I hand drew the shape a bit wider all the way around like shown and filed out to that checking along the way so that it matched up with the chamfer outside edge. Also did the headlight lamp which only needed a touch to make it match as well.
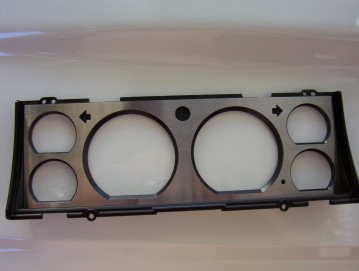
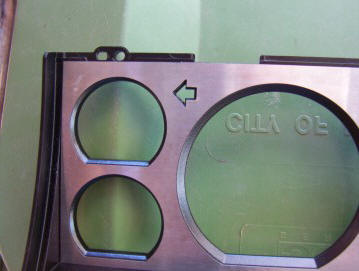
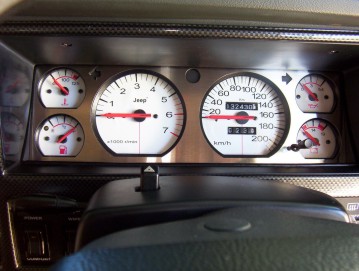
Here you can see it filed out and also the hole for the trip reset button drilled which was marked the same way as the arrows. To hold it in place they provide double sided tape which you cut up and place around the bezel. I thought it would be neater to super glue it in which worked until the first very cold morning when the different contraction rates between the plastic and stainless steel caused it the let go. I tried also the double sided tape but that let go after while too but is was not the provided one as lost or used that some where else in the mean time. Gluing it with silicon I have just done and is working really well so far as it stays flexible so will update here if any problems arise. It that does not work for some reason I will just rivet it in place.
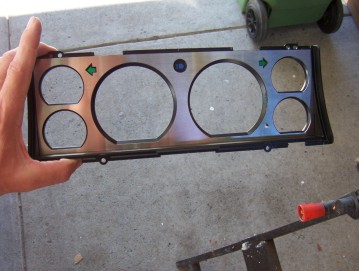
So there you go, makes it look just that more individual. Another note too, be careful that you take off the coloured plastic pieces before wiping it down with anything. I found out the hard way when re-fitting this later on when I dripped some methylated spirits on to the turn signal pieces and when I rubbed it off, it took all the colour with it! Well I found that changing the bulbs for the turn signals to amber ones and then etching the now clear plastic with acetone, that it looks really good now and flash amber now instead.
[Index]