Changing your coils springs
![]()
![]()
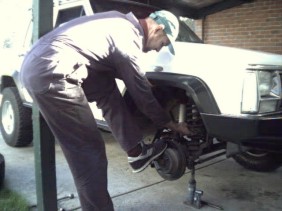
To fit new coils, jack the axle up without using packers so you can later drop the jack to the lowest possible. Support the frame just behind the lower control arm brackets on both sides and then remove the swaybar links. Remove the shocks as well so you can get maximum droop and then the coil retainer shown at the end of the spanner in the shot.
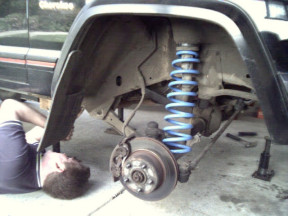
Lower the jacks and remove them. Now if you have stock coils and no raised bumpstops then I can pull the coils out by pulling up on the coil and the flare for stability and pushing down with my foot on the disc. I had to re-take this photo later on to show the position I use. It will also help if you rotate the coil while it is pulled onto the back of the coil seat and wind the coil until it slips off. I was not as lucky as I have 2 1/2" metal bumpstop extension welded in place so had to remove the control arms one side at a time and trackbar to get enough droop. Try just the lowers first and then the others if needed. It is much safer doing it this way than using coil compressors.
![]()
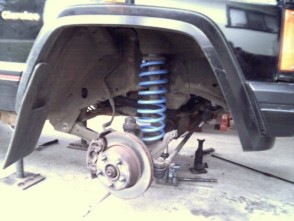
You will then be able to pull off the isolator but might need some leverage with a screwdriver if it is the first time it's been apart. You wont have the aluminium rings that I had in to level the car left to right and now replacing with a new plastic one. Put the coil as far up the upper mount first as shown. I have 4" TJ coils ( XJ stuff is very hard to get here in Oz ) which give 3" by themselves and even 4" if they are heavy duty ones plus the spacers. If one coil is taller than the other then use that on the right side as XJ's ( ZJ's & TJ's too ) sit lower on the front right. This is due to the fact that the coil bucket on the axle sits higher on the left side to clear the diff centre housing!
![]()
Use the same technic as above to get the coil back in and rotating the coil the opposite way on the seat will get it over. Make sure the coil end is in the end of the depression. If you removed the control arms then the axle will have slid back so to get the arms back in I jack the axle forward as shown. First attach the upper and then the lower when it lines up. Jack it up until the coil is fully seated and put the coil retainer back on.
![]()
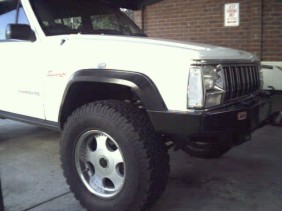
To get the trackbar back in I used the above method to move it across but getting someone to turn the steering wheel while you hold it up and tell them when to stop also works but I was by myself as usual. Don't forget join the swaybar back up and check that all bolts are tight and go over them again after a 100 miles. As you have added a taller coils then check to make sure that where the swaybar bush sits is level otherwise it will not work as well and can hit the coil spring. Use adjustable swaybar disconnects like JKS makes or extend the stock ones like I did here. You can also use a threaded socket that you screw on and then a piece of all thread into that. Some use a wing nut in place of the standard nut so you can have cheap disconnects as well. Don't forget to do an alignment which I show you how to here.
If you measure from the wheel centre to the bottom of the flare you will see how much you gained. Stock is 17 1/2" inches at the front and 17" at the rear. If you have removed your flares you can then measure from the flat round bumpstop area inside at the bottom of the coil spring up to the top of the spring isolator, where it meets the bottom of spring tower at the front. Front stock is 11 1/4" this way. For the rear you can measure from the top of the axle to the bottom of the frame rail, right above the bump stop. Stock is 6 1/4" for the D35 and 6" for the 8.25 and D44.
[Index]