Wheel Alignment
On all solid axle front ends the only things that are adjustable are caster, ( which is the tilt of the steering knuckles or upper and lower ball joints ) and toe, ( the amount that the front of the wheels are closer than the rear ). The camber is also adjustable but only if the upper and or lower ball joints are replaced with offset ones which will not be covered here as it normally only needs doing if the axle has been bent or wasn't assembled properly in the first place. I used to work at a 4WD shop that specialized in doing alignments and learnt from that experience. I had just put this lift on and went for a test drive and got bad shaking at 50 mph and had to brake hard to stop it .I did the alignment below as soon as I got back and those shakes it had have never returned. I have had this technique used by many now with great results. One guy told me he did it this way and then had it checked by an alignment place on two occasions and both times they had to change anything so he doesn't bother to have it double checked anymore.
Toe adjustment
On Jeeps with Select-a-trac where you have the option of driving in permanent 4WD, i.e. you can drive on paved roads while in 4WD, then it is easy to check your toe settings as it is supposed to be 0 degrees. This means that the distance between the back of the wheels is the same as the distance between the front. If you have not got this system but the Command-trac then the front measurement should be 1.5 or 1/16" to 3 mm or 1/8" closer at the front.


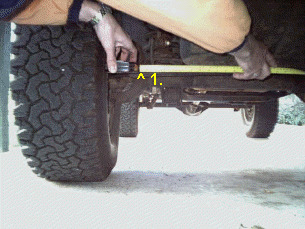
Measure between the front tyres on the widest part both front and rear. I hold the tape level with the bash plate on the front and against the underside of the lower control arms at the back. Make sure you stay off the raised lettering on both tyres. Just hold the back of the tape case against the tyre and read it from there, ( No 1 ) without adding the width of the tape case as it doesn't matter so long as you do the same thing at both ends. If you have a difference then you will have to adjust the length of the tie rod by first loosening the two clamps ( 1/2" ) on it.
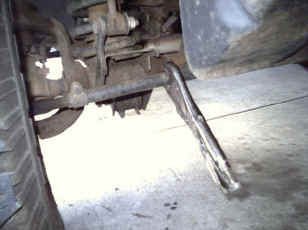
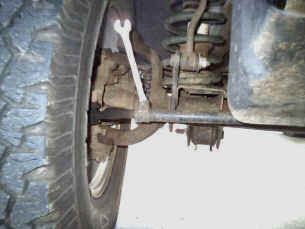
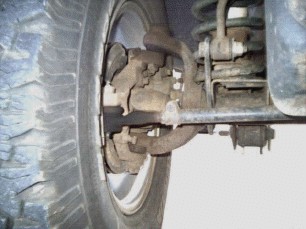
You can then use some grips to rotate the tie rod to either increase or decrease the length of the tie rod depending on which direction you rotate it. You will only have to move it half the distance of the difference you measured. Re-check the measurements until they are the same and then tighten the clamps back up. Sometimes the threads seize and need to be soaked with a penetrating oil and or the clamps slid out of the way a hit with a hammer where it enters the tube while holding another hammer on the opposite side. Even using a plumber's wrench also called a 'monkey' wrench or stilton
Caster adjustment
Caster needs checking when there has been a change in suspension height, hopefully because it is now higher. This also effects your pinion angle as the axle is rotated and therefore has to be right as vibration from the universals can result otherwise. As you lift the Jeep then the top of the diff will rotate forward so to overcome this the lower control arms need to be lengthened. This can be done by adding packers or shims into the arms frame brackets as shown below. Caster also effects your straight line stability especially camber changes or dips in the road etc. and also your return to centre strength. So if you have these problems then it could be your caster.
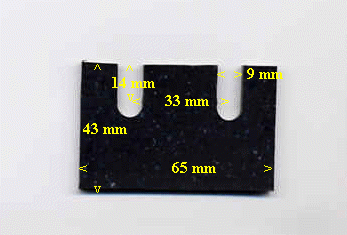
I have used steel, aluminium and plastic to make my packers with good results as it has very little force applied to it as the main bolt holds everything in place. I just drill the two 9 mm holes 14 mm from the top and then cut down to them with a hacksaw to make the slots. You might have a factory shim to use as a template to make it easier.
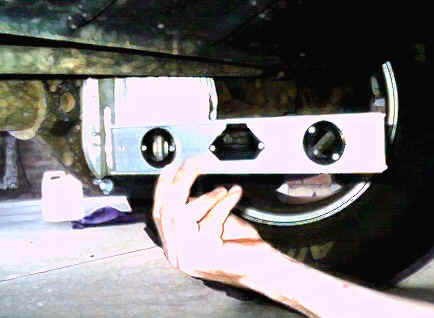
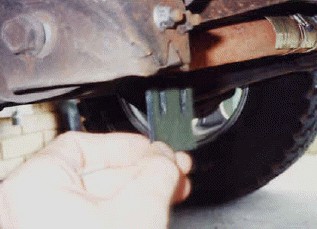
I check caster by using a bevel square ( adjustable square ) with a level on it against the diff cover bolt heads that are above and below the axle or use the flat round area next to this. Then use a protractor the read the degrees. Better still, and what I now use, is a angle finder. I have checked many XJ's including one that was still on the showroom floor and providing you are on level ground then it should read 87.5 degrees for stock if done as shown. This is not the true caster angle as the steering knuckles are at a different angle but they will always be relative to this angle so it is used as a reference point. But with these Dana 30 hi pinion's, you can work out the caster using the table I made below.
This table to compares diff degrees to true caster for a high pinion D30 as used of XJ's 85-99 and low pinion as used in 00-02. The low pinions have a greater difference between the diff angle and the true caster due to the diff uni needing to point up higher towards the transfercase. They also run an extra 1/2 degree of caster to start with. In brackets is the recommended caster for different lift heights. The reason recommended caster reduces as the lift height increases is the uni angles get too steep as the lift increase, so can introduce vibes. Always run as much caster as you can without vibes, but below is a guide I have found works for most. Diff degrees shows two sets of figures depending if reading off the vertical or horizontal.
|
Diff degrees |
True Caster Hi Pinion |
True Caster Low Pinion |
| 87.5 or 2.5 | 6.5 ( 0-2" ) | 9.5 |
| 87.0 or 3.0 | 6.0 ( 3" lift ) | 9.0 |
| 86.5 or 3.5 | 5.5 ( 4" lift ) | 8.5 |
| 86.0 or 4.0 | 5.0 ( 5" lift ) | 8.0 |
| 85.5 or 4.5 | 4.5 ( 6" lift ) | 7.5 |
| 85.0 or 5.0 | 4.0 | 7.0 ( 0"-2" ) |
| 84.5 or 5.5 | 3.5 | 6.5 ( 3" lift ) |
| 84.0 or 6.0 | 3.0 | 6.0 ( 4" lift ) |
| 83.5 or 6.5 | 2.5 | 5.5 ( 5" lift ) |
| 83.0 or 7.0 | 2.0 | 5.0 |
| 82.5 or 7.5 | 1.5 | 4.5 |
| 82.0 or 8.0 | 1.0 | 4 |
| 81.5 or 8.5 | 0.5 | 3.5 |
| 81 or 9.0 | 0.0 | 3.0 |
The nuts ( 1/2" ), should be loosened as well as the main bolt ( 13/16" ), until they are at the end of their thread. 6.5* is the stock caster but when you start getting over 4" of height then you can start to get vibes from the front uni being to steep so might have to back off from this angle until vibes are gone. I run 5.5 degrees with my 4.5" lift for instance.
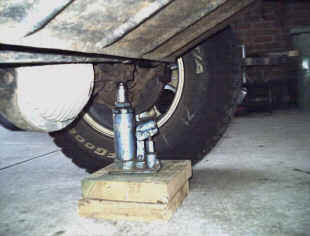
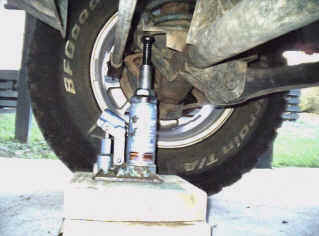
You can do one side at a time after and the best way to get the spacers in is to put the jack under the coil mount on one side and the trackbar at the other ( don't forget that I have a RHD ) once the bolts shown above have been loosened on both sides. The main bolt is in a slotted hole and will move forward as you jack the front as shown. You will find that there are two 'U' shapes inside each other with the inside one moving forwards as the main bolt slides in it's slot. You then add the packers between the two. It is then just a matter of adding packers of different thickness until you have the 87.5* back after releasing the jack. Then tighten everything back down starting with the 1/2 nuts first before the main bolt. Do a final check of the angle to make sure it hasn't changed with the tightening. I found that with mine and a few others after a 3" lift that 3mm or 1/8" packer was required.
Steering wheel adjustment
With changes to the suspension height the steering wheel wont be centred anymore. Once you have driven on a straight level road and noted where the steering wheel sits, make sure you have it in this position before starting the next adjustment. You can get it reasonably close by sighting down along the tyres to make sure they are the same both sides when comparing their position to the rears.
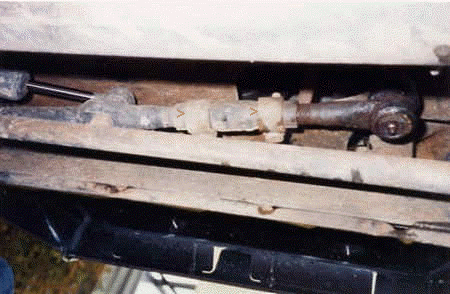
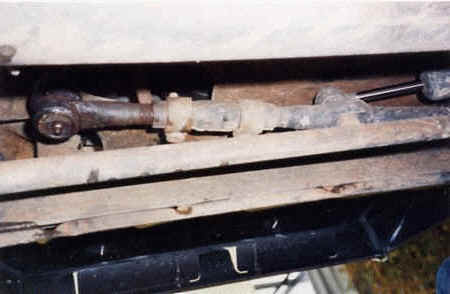
You will have to lengthen the link that runs from your pitman arm that comes out of your steering box. This adjustment will only effect the steering wheel position and not anything else. The Picture on the left is as I see it but for the left hand drives it will look like the right hand picture. You will need the keys in the ignition to release the steering lock. Then loosen the two clamps shown, ( 15 mm on RHD ) and then rotate the sleave that the clamps are on until the steering wheel is back to centre. It helps if someone is sitting in the car but not touching the wheel to let you know if you are going in the right direction and when it is level again. Tighten the clamps back up and then test on the level road again and make any necessary adjustment to get it dead on.
There you go and that's all there is to it and you will save some money and have a better handing XJ to boot.
Just a little note for Australian owners or any RHD ones, if you have trouble of it always pulling left following the camber of the road, check your wheel base left to right and you will find that the left side is 10 mm shorter than the right! This is so it will run straight on USA or on the right side of the road which of course is the opposite of what we want. I had to add an extra 10 mm shim to the left side LCA and also remove the UCA, weld up the diff end holes of it and re-drill them 10 mm forward so that my wheel base is the same left to right. It still follows a steeply cambered road a small amount but on freeways it is perfect. To follow the Jeep logic for this you would need to extend a further 10 mm to have the same as their stock setup! My tyres now wear nice and evenly too.
[Index]