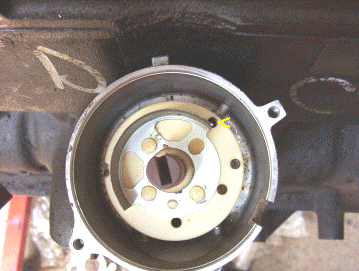

With the cap and rotor removed you can then lift off the Cam Position Sensor, CPS, which is the black disc covering the lower half. The distributor can be pulled from the old block without having the No.1 piston at Top Dead Centre, TDC. Once out you rotate the shaft until the hole at the end of the curved piece of metal, ( it is what the CPS reads off ) lines up with a hole in the alloy housing. I have it marked with a yellow arrow and the ridge in the alloy underneath it has the hole in the housing. Once lined up drop a 5 mm alley key or punch into it to prevent the shaft turning without the housing when installing as shown in the second picture.
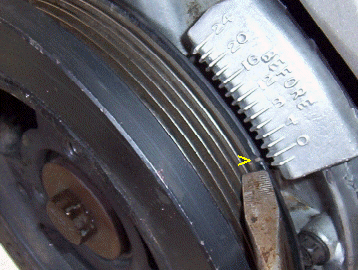
Next job is to get the No.1 piston at TDC on the compression stroke. Stick your finger in the No.1 spark plug hole and get someone to rotate crank until you fell the air rushing past your finger. As soon as you fell the air stop rotating the crank. Then carefully rotate the crank until the little notch in the back of the crank pulley lines up with the 0 on the timing marks. It is just in front of the end of the screw driver and has a yellow arrow pointing to it. Might take a few rotations to get the feel of which is the compression stroke verses the exhaust one.

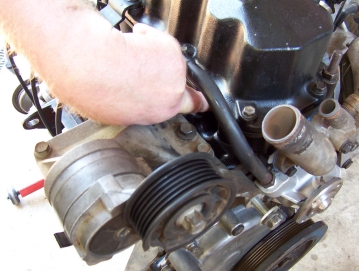
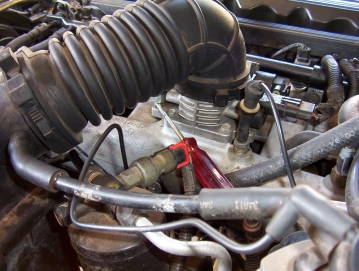
You now can insert the distributor after making sure the oil pump slot is between 10-11 o'clock. Push down on the distributor with the hold down fork at 1 o'clock. Push down as far as it will go and then it should start to rotate clockwise. If it does not want to rotate or go down far enough, you will have to tweak the oil pump position. If all drops in and rotates until all the way in with the fork over the hold down bolt hole, rotor pointing to 5 o'clock ( and the crank is still at TDC ), you have it perfectly set. Remove the Allen key and secure the distributor. Some after market cams I have been told will not allow the ears or the fork of the distributor to line up over the hole so they need to be filed or removed to fit. See the Hesco diagram provided by Kyung Kim for further detail.
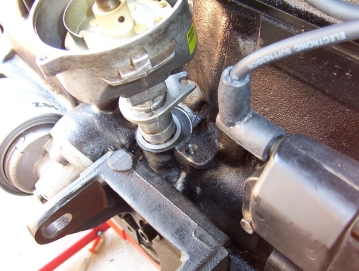
When lining the engine to bellhousing back up, make sure you have them as parallel as possible. It wont go together otherwise. Don't use the top two bolt to pull it together but rather the large lower ones instead doing a bit each side to pull up evenly. I also used a small jack under the lowest point of the transfercase so I could twist it to line up with the engine block. Once you have everything bolted back together and are about to start, leave the CPS/CKS ( Crank Position Sensor or CranK Sensor ) disconnected while you build up oil pressure again. Connect the sensor and let it fire up. Hold the revs at 2000 for 20 minutes to break in the cam. I placed a screw driver under the throttle stop as shown so I could continue to keep and eye on any coolant or oil leaks while the owner keep an eye on the temperature and oil pressure. It is a nervous time but all went perfectly even on the 100*F day. Allow to cool down and then take for a test drive. For a few miles accelerate and decelerate by going off and on the throttle to break in the rings. Make sure you monitor the temperature and oil pressure and don't allow prolonged pinging if you have any. Now it is important not to baby the engine or trash it either for the first 500 miles or 800 kilometres. The most important is to not hold constant revs at cruise or idling and not to labour it. If you have a power/comfort switch for the auto, leave it in power. Change your oil and filter first at 150 miles/250 kilometres and then again at 500 miles/800 kilometres. After that you can use normal oils but would not recommend full synthetics until 6000 miles or 10,000 kilometre to make sure it has broken in fully.
Now if you have pinging, which these can be prone to, run the highest octane available especially during break in. On this one I also needed to increase the MAP sensor voltage even with the 24 lb Ford injectors. See my write up and building your own adjustable MAP sensor. Also a 180*C Thermostat to control the pinging afterwards was also used which requires a resister to be added to the CTS so ECU does not stay in warm up or open loop mode all the time. Changing to colder plugs like the Champion RC10LYC and or opening the gap up from 0.035 to 0.045 inch or 0.9 to 1.143 mm will also help. The wider gap actually reduces the timing a fraction. Fitting a cold air intake like a snorkel will also help along with a shield under the intake and insulating the airbox. The one installed above improved a lot after the first 10,000 km and no longer require the extra voltage on the MAP sensor. It must also be noted that a significant difference was noticed after replacing the O2 sensor in reducing the pinging.
Also it is worth erasing the old ECU or PCM memory.
When you start the engine it will be running off a set of pre-programmed
tables that come with the PCM from the factory. When you get the engine up
to operating temperature, the PCM will start to collect data for the
“Adaptive Memory”. The PCM will collect data for Adaptive Memory for the
first 50 Warm-up Cycles.
[Index]