Installing 4.6 litre Stroker Engine
This write up is to give you an idea of what is involved in doing an engine change. In this case the stock 4.0 is being replaced by a 4.6 litre stroker. A manual is still a good idea to have on hand to cover anything not shown in this one including torque valves and also any differences that are between years and LHD and RHD's. This one is been carried out on a 1995 XJ RHD Sport with a HO engine and OBDI.
Some of the things to have on hand before you start apart from the obvious:
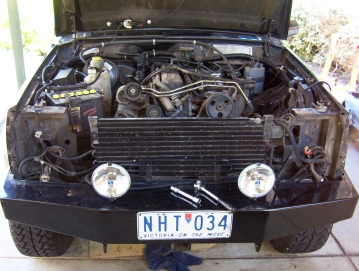
Start by removing the radiator like shown on my site. Once that is removed along with the fans, also unbolt the header panel. This will give you a lot more room to work with and is only held in by 4 nuts and one self tapper in the middle on the cross member. I even leave the headlights in place on the header panel and just unplug the loom. The A/C condenser is left in place in the photo but was just lifted up and placed on the left hand guard still connected so no gas is lost. Remove the airbox along with vacuum lines that don't stay on the engine.
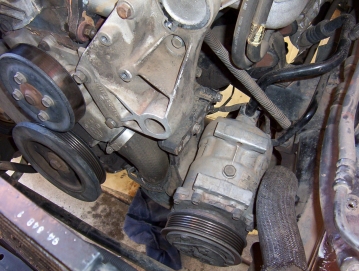
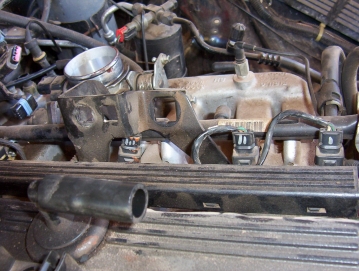
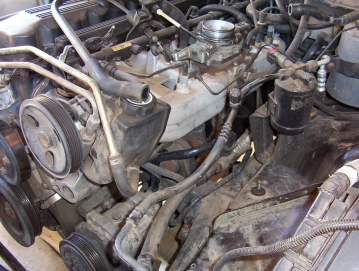
This being a RHD, the A/C pump sit right at the bottom of the block and was lifted out of the way where the airbox sat and left connected to the lines. The power steering pump was also taken off but left connected and swung out of the way. I did mark the fuel injection plugs as these are all the same and could easily be mixed in their pairs. No other wires were marked as they are all unique. Also remove throttle, auto kick down and cruise control cables. Also the fuel lines. Just push them in first before squeezing in the tabs and then pull back to release them. Be careful of any spray if you have not bleed the pressure by using the valve on the fuel rail.
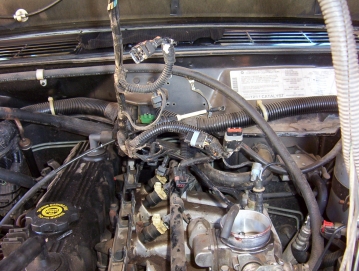
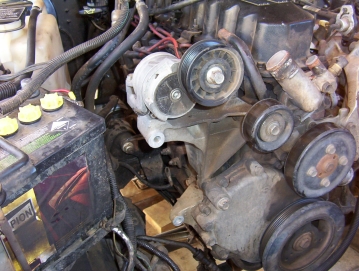
The plastic cover over the injection harness is clipped off and the harness lifted out. Earth wires from the engine are removed. They are located on the engine coil studs as well as the oil filler mount. One also from the last head stud to the firewall. The alternator was removed and sat on the bumper still connected. If you do remove it completely, you will have to mark the wire that is very similar to other earth wires from the same harness. Start underneath by just disconnecting the exhaust header at the flange. Leave both the intake and header in place on the engine for the pull.
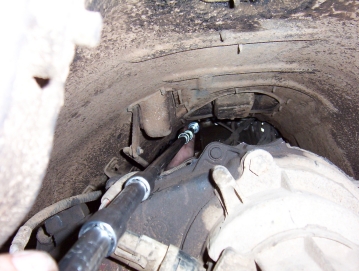

The starter motor to be taken off as well as things like the brackets supporting the auto cooler lines. Now the first bolts that should be taken off the bellhousing is the two top ones. These should be done while there is no strain on them at all as easily rounded otherwise. They have a male torx head with 6 points. I didn't have the bit needed which Hossman from NAXJA says is a E12 bit, so used a 3/8" 12 point standard socket. Done a few this way without problem but we don't have XJ's here older than 1994 and don't salt the roads here either. To access these bolts, remove the cross member and lower the transfercase until you can get about 4' of extensions and a universal piece over the top to them. Make sure you raise it back up after the top two bolts are out again and support the transmission pan on a stand with a wide piece of timber to spread the load or under the transmission mount.
[Index]