
Ford Taurus Fan Install
Considered to be the most powerful electric fan you
can use from either OEM or the aftermarket. It is a Ford 8C607 fan and is
advertised as having 2500 CFM on low speed and 4500 CFM on high by most sources. It comes in the 90 to 95
Ford Taurus and Lincoln Mark VIII with the 3.8 litre engine. Is very popular
with the Hot Rod and Muscle crowd as well as used in Offroad buggies etc. I
bought mine off
eBay using this search from
rde1409 which is a
good source for them and want to thank him for sending it all the way to me in
Australia and looking after me on postage cost. Don't buy the new copies as they
would not guarantee they would put out the same CFM, only that they would fit!
Very few have tried to fit these to XJ's so far and have had to butcher the shroud to fit them in unless used on their own without the A/C fan. They also used them, as fitted stock , horizontally. I went for a completely different approach and fitted it vertically so that a lot of the shroud hung below the radiator. This made for a easy fit and allowed me to fit a auto cooler in the lower section which answered a problem I have had for a long time, how to get a bigger cooler in without restricting and heating up the radiator behind it. Fitting it vertically also allowed the A/C fan to stay in its stock place and operate as normal as well as adding around 1800-2000 CFM extra as well. The old fan pulley, and part of its support, is removed to fit this fan in place as covered in this fan install.
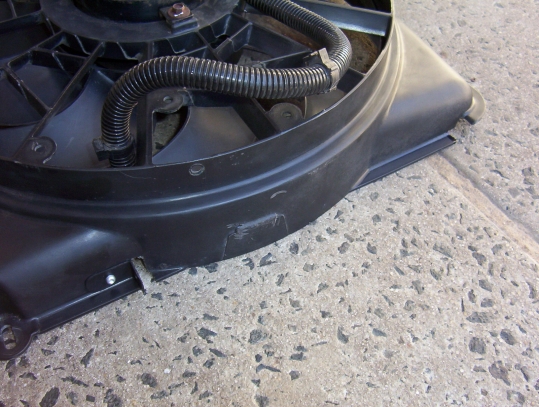
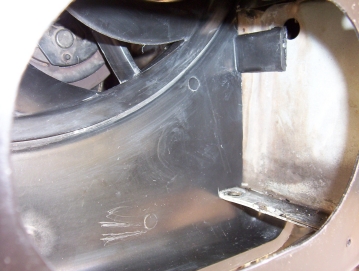
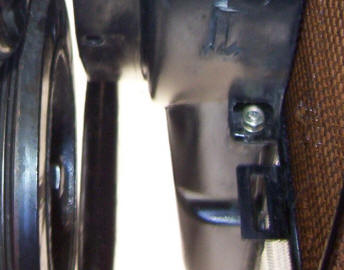
The fan was positioned so that exactly the height of the auto cooler I used ( 190 mm ) was hanging below the bottom of the radiator support panel. Slots were cut out of the shroud so that it would slide over the old tabs for the stock Jeep shroud. The left side ( left photo above which can be expanded ) also had a L bracket riveted in place below the slot to fix it to the old tab on that side. Notches were also cut at the top to clear the core support and top panel so that the shroud sit hard against the core. In the right photo above it shows how I have filled in a cut out in the shroud using a flower pot riveted into place. Also shows how I had to cut back the lower section so only that tab shown is left to clear the inside frame rail. A bracket was also fixed right at the bottom to support it.
You can see above how the side was cut out to clear the inside frame rail on a RHD. The right photo shows how it was cut around the top panel. I also changed the bolts that hold the motor to the shroud with counter sunk screws for more clearance. One of them needed in front of my A/C compressor on my RHD.

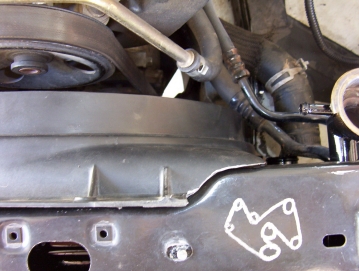
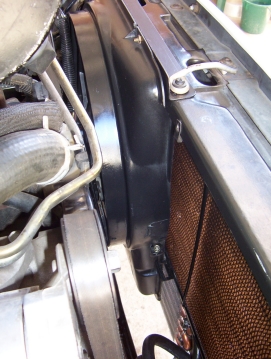
The photo above shows another view of the shroud trimmed to fit around the top support panel. A piece of thin angle was used to support upper part using the bonnet catch rod and another threaded hole that was already there. All excess plastic was cut away above this so it did not interfere with the bonnet closing. The right photo can be expanded for a better view.
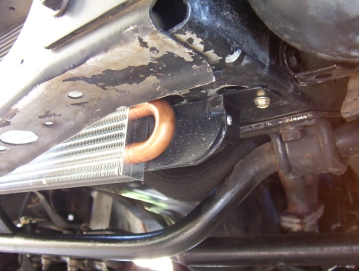
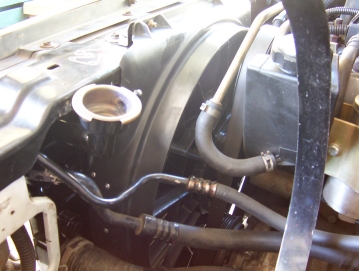
The photos show the lower brackets both on the left, using the old shroud tab, and the right screwed into the underside of the frame. Also shows the small part of the shroud blocked off that is not covered by the cooler which is covered in this write up. The cooler looks like it hangs a lot below but it is the angle of the photo and the little kick up at the end of the cross member.
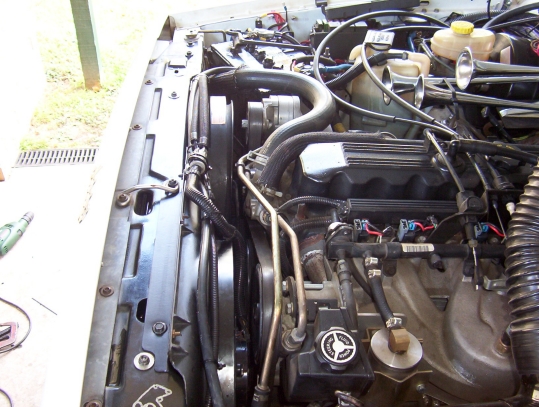
In the above photo you can see how it goes down past the radiator to cover the auto cooler underneath. Also the room with both fans in place. ( click to enlarge ).
[Pictures of LHD install NEXT]
[Index]