Airbag install for higher lifts
Just covering here things that I did differently
for my own install on my 4.5" lift rather than what was fully covered with a
lower lift on a customers XJ here.
Please refer to that write up on all other points not covered here including
bolt torque number etc and line routing etc. These are just hints of some you
might want to include over the standard install. After lot of research I
also found the longest bags made in this diameter that can be used instead of
the standard XJ kit. These have 9" of travel and the kit is sold to suit MJ
Comanche and other pickups using bag #W21 7607076 in the kit number
#59503. The brackets are a bit different but easily adapted to suit and
shown here. I would also like to thank John
Herrick of Seattle for sending me the kit from the USA.
![]()
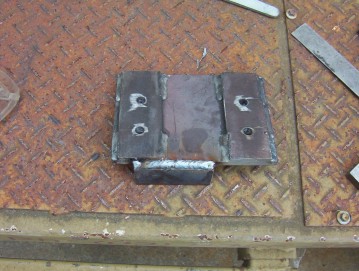
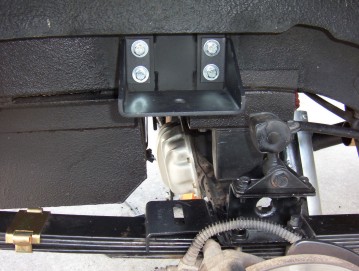
The first thing I did differently was cut the front off the bottom bracket mount that sits on the leaf spring so that I could move the bracket further forward. This places it closer to the leaf spring centre and also removes the need for the clamps around the leaf spring itself as I welded it directly to the leaf spring plate. This also allowed me to tilt the base so that it was square to he frame rail as the USA kit I used did not come with the extra channel bracket to level it like the Australian version does. Remember that you can gain more travel the more you move it forward of the spring centre ( it is not where the pin is ) but loose some load carrying ability if you move it.The next thing I wanted to improve upon was the way it attached to the frame rail. I wanted it spaced a over the centre line of the spring and also strengthen the mounting to the frame rail itself. I did this my using some 6 mm plate that I then welded two more strips where the upper bracket sits on. These were then drilled to 5/16" ready to be tapped to suit the 3/8" mounting bolts. A small plate was also added to the underside to disperse some of the load to the underside of the frame rail as well.
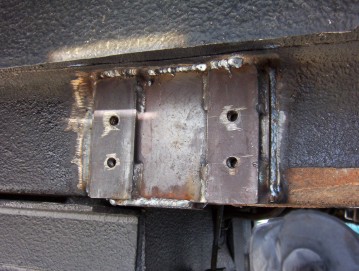
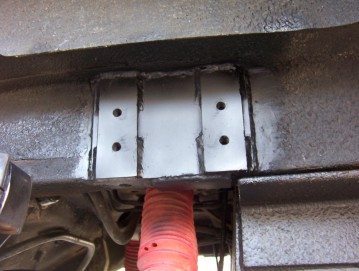
The plate was the welded to the side of the frame rail and along the bottom where the extra piece sat. The holes had a 5/16" drill passed through them into the frame rail so that the frame was tapped along with the 12 mm of total plate thickness as well to tie it all in together. The plate height was made to fully cover the frame. The bracket that holds the bumpstop was notched to fit around the new plate as well and bolted back into place.
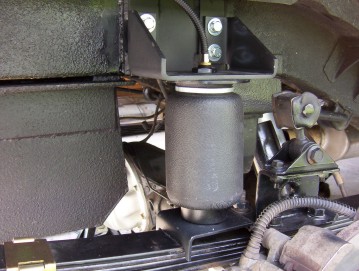
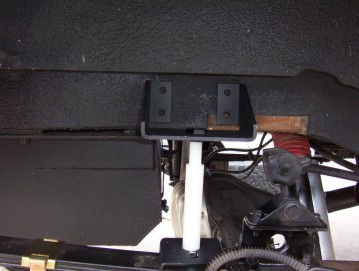
The top bracket was used upside down so that the fully extended bag matched my suspension droop. Turning the top airbag bracket over gives around 3" more down travel than the stock setup. The bumpstops were then dropped so that the bag would not over compress either. This was actually already done before hand so that my tyres would not foul the flares and also had to be done after lifting the rear axle shock mounts up for greater clearance and more down travel. You must take this into account however if you don't already have the same. I also changed the airline fitting from a elbow to a straight fitting so that the line could be run straight up to the underside of the body and not risk kinking against the side of the bracket. You may not need to take any of this on board and the stock fixing does work so long as the bag travel matches the suspension travel so I might be doing a few things over kill here. I have customer setups that have been running 3 or more years now in the stock setup without problem but I do push the boundaries a bit more than most when crossing deserts etc while towing my offroad camper so wanted to be completely at no risk.
[Index]