OTK Steering Conversion
This write up shows how to perform a 'Over The Knuckle' or OTK for the acronym, steering conversion. What this means is that the tie rods ends, or TRE's, rather than be inserted from the bottom of the knuckle and hanging the whole drag link and tie rod below it too, are made to fit in the from the top instead. This achieves a few great advantages. For one it lifts the steering around 2.5" higher out of the way of rocks etc, but in doing so reduces the angle that the TRE's have to run at. Once you have lifted 4" and higher, they can actually prevent the axle from dropping down to full travel. The drag links breaks the TRE just due to this fact of the TRE running out of travel. The TRE's will bind when 4" - 4.5" of extra down travel is used over the stock setup. So this conversion will allow 6.5" - 7" of extra down travel over stock before binding. What you will also find is the greater the angle of the drag link and tie rod, the more your steering force tries to push down on the knuckle rather than actually push it left or right. This difference in force direction was very noticeable at parking and offroading speeds where the whole steering effort was reduced once this OTK conversion was completed.
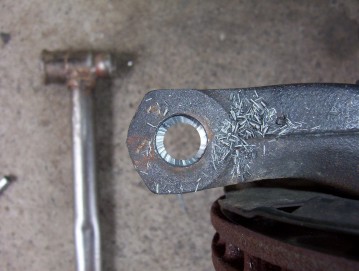
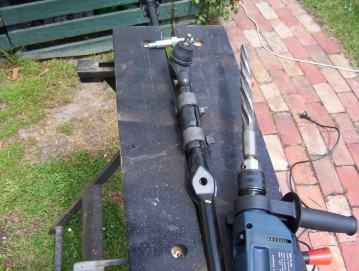
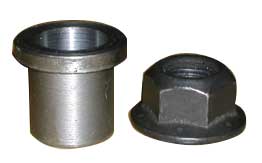
The parts required for the conversion are few but you need to raise the swaybar brackets as well as the trackbar axle bracket too. You need to buy 2 or 3 tapered inserts to allow you to reverse them and a LHD drag link for a RHD like mine or a RHD drag link if you have a LHD. I bought my tapered inserts from Goferit. These are put in by simply drilling out the old tapers with a 3/4" drill bit and then putting an tapered insert in it's place. Just make sure you keep it straight and can keep trace of that by removing the drill and checking to see that you have an even amount of material being removed from around the whole hole.
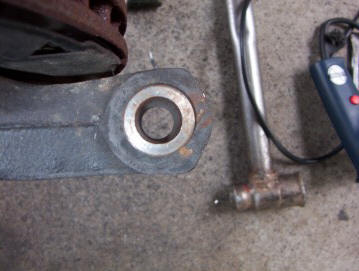
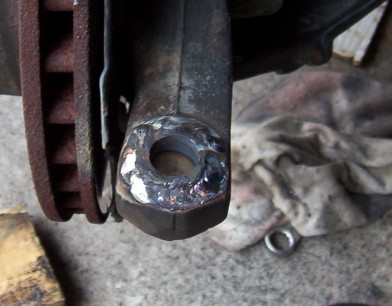
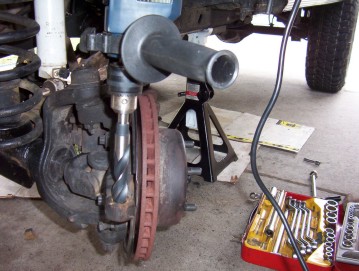
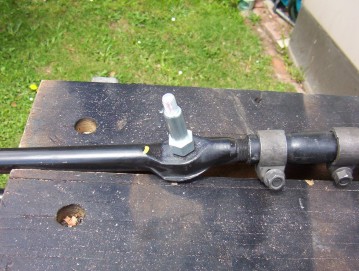
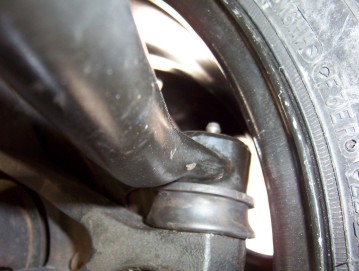
The insert just taps in from the top as shown so you now have the larger part of it at the top. You must prevent the insert from jamming on to the TRE by welding it to the knuckle. Do not try and bolt down the TRE without welding in the insert first as you will have a hell of a time removing it from the TRE later on. Really does not need as much welding as I have shown as it is only to hold it to the knuckle when you want to remove the TRE later on. As you are welding on cast steel I find using a stainless rod when using an arc welder the best. You will find a normal welding rod will not take well at all. I had some of the insert protruding from the bottom of the knuckle so cut that off to be flush.
Now at the time I didn't think of ordering three tapered inserts as didn't think of the stabilizer. Next time I will do it that way but to get around it this time I used a tapered reamer I had so that the stabilizer could be flipped as well. This way only gives you half the taper but for a stabilizer mount that is sufficient. You can find the new stabilizer bracket I made up here.

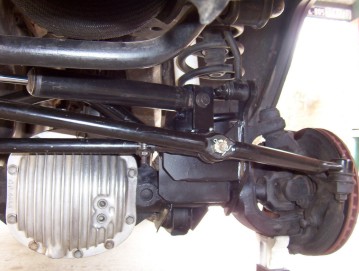
I have found there was not enough clearance on a TJ for the stabilizer bracket on top of the trackbar bracket as it will hit the underside of the frame under full compression. So what I did is fit one that bolts with a bracket to the tie rod instead and the other end to the underside of the drivers side coil bucket using the same bracket but welded in place. You can even have it fully bolt on in both ends using Rancho brackets as shown above. But better still you might be able to use you old drag link, which has a couple of holes in it to attach the stabilizer, as a tie rod instead.
As the drag link has a curve in it, when you flip it to sit on top of the knuckle, the curve is then in the wrong direction. For me having a RHD it meant I just ordered up a LHD drag link to solve the problem from Quadratec ( #52006592 the Jeep part number or #56118 12 for their part number ) from their OEM section. I also bought all the other links too but must say am disappointed in the quality of the Crown Auto branded parts as in less than 6 months, all the rubber boots have split and I have had to replace the boots with my 10 year old original ones which are still perfect. The travel in the ball joint I have now since measured and compared to Moog ones they have 10 degrees less! Better to go with Moog parts ( drag link Moog part # DS1238 ) as considered to be even stronger than stock also. The other links were replaced at the same time so have no old parts and not because they are needed for this conversion, as the only part different between a LHD and a RHD is the drag link. For LHD's you will need a RHD drag link which you can special order from your US Jeep dealer #52006582 for 91-01 XJ's. You will have to ask about the earlier models in the USA as they were never sold here before 94 but were in the US as postal Jeeps. Bigwhitey from NAXJA found a USA source for the RHD Drag Link and any others for that matter. You can also use your old drag link as a much stronger tie rod as shown here.
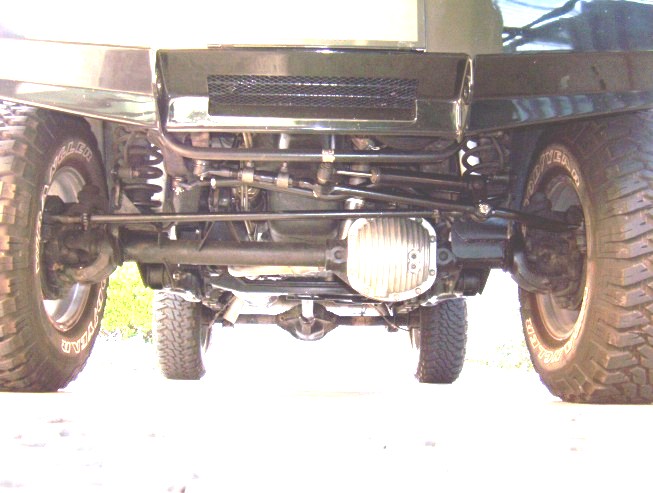
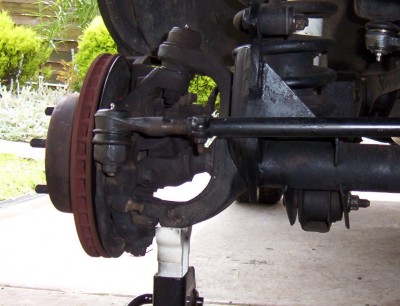
Left picture shows clearance with a 15" stock rim. Click on right picture for a larger image.
Before under taking this conversion, remember to check to see you have enough clearance inside your wheel to run the OTK setup. I had no problems at all as have 16" rims and my stock steel 15" rims also just clear ( shown above with just under 3 mm spare and they have 5.25 of BS or Back Spacing. So I am not sure if an alloy will clear without less than 4" of BS?
The drag link is a very strong part being solid cast steel and don't hear of anyone having trouble with them when not stretched beyond their design limit when not running a setup like above. Some do feel though that the tie rod link is too easily bent as is a only a hollow tube. Just having it higher up like this setup does will stop it coming into contact with things so left it stock. If however you more into boulder climbing you can beef up the tie rod by still using stock parts. What you need is the tie rod link setup from a V8 ZJ as it has a solid tie rod and the same adjustment setup as the drag link. This would give great strength through the entire setup. See a write up on doing it here. Just remember though that you will need that bit more clearance on the drivers side swaybar bracket which might be hard unless you have some spacers behind your steering stops.
Like to thank John in Seattle for on sending the
parts I ordered to keep the freighting costs down to me in Australia.
![]()
[Index]