OTK Raised Trackbar Mount
This is to be used in conjunction with the OTK ( over the knuckle ) tie rod flip. It must be done to make the drag link and the trackbar be parallel again which they must be to prevent bump steer or change of direction when braking.
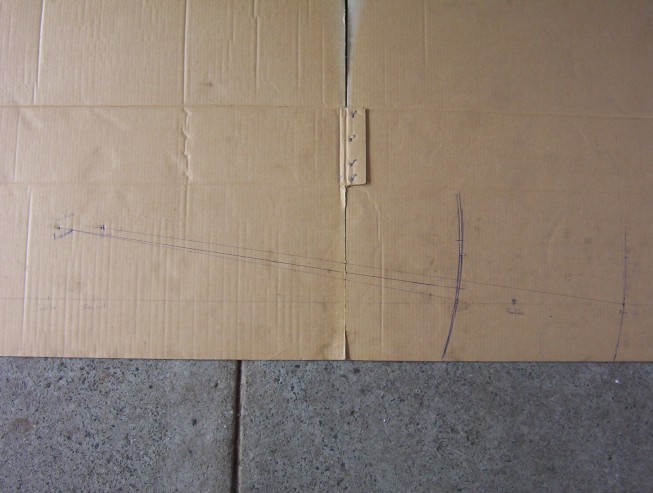
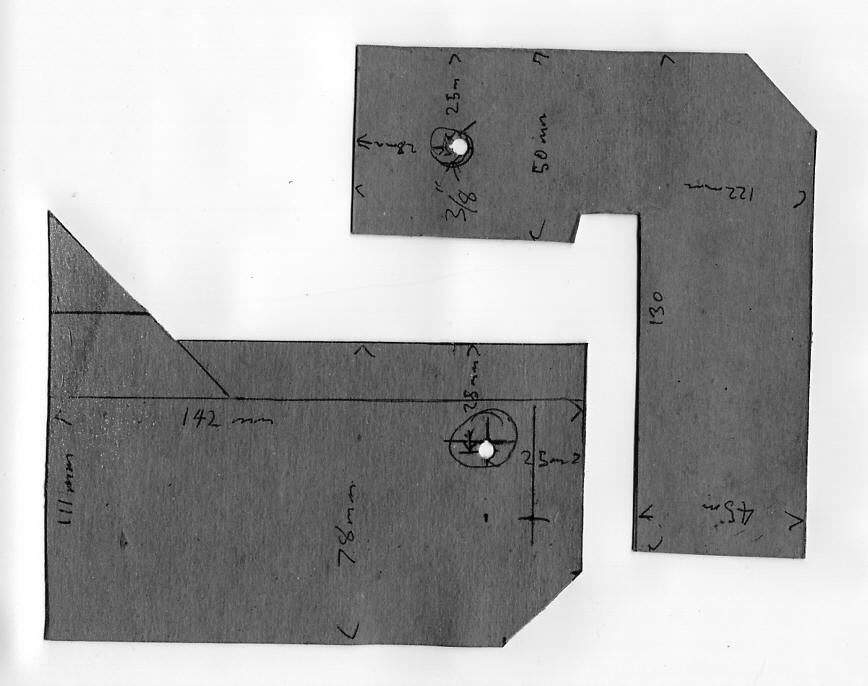
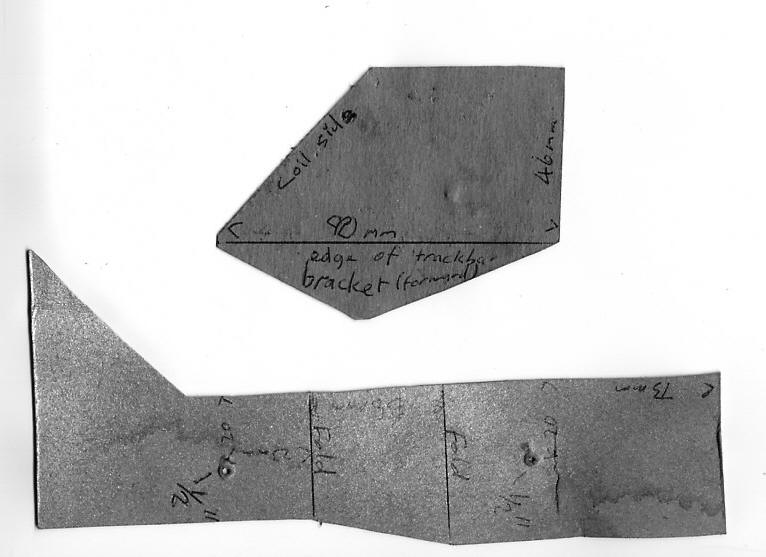
I plotted the heights and distances out in full scale first to make sure I got it right. I had see companies showing comparative arcs that the trackbar and drag link travel to prove their setup. They said the arcs should be exactly parallel. I tried that and it meant that the trackbar bracket needed to sit at the same level as the drag link at the axle end. But making the arcs parallel though meant that the trackbar and drag link were no longer parallel due to the drag link being shorter. Tried it first like that but under braking it would pull to one side. It shows that it would only work if both the trackbar and drag link are the exact same length. So re-did it so the trackbar and drag link exactly parallel and now pulls up much better. I have included the template I made which is clickable so hope with the measurement you can print it out at the right scale and use them. I would suggest to make a hole 15 mm higher and lower than shown or you think it should go to give some adjustment to get it perfect. To get the centre I would do the drag link first and then put a angle finder on it and then make the trackbar matched it. I fitted a ZJ pitman arm ( 20 mm lower ) along with it and got them exactly parallel and with the raised drag link due to the flip it gives me stock steering arm angles even at 4" lift. Use a string line on the trackbar around the centre of the tie rod end body and then mark where the bolt should go through the trackbar bracket on the axle.
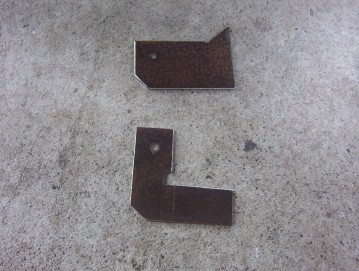
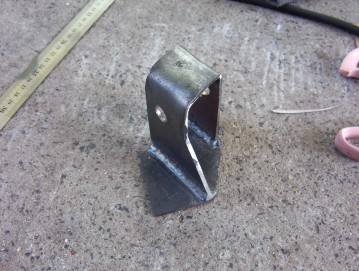
The steel was just cut from 3 mm steel the same as the original. This allows enough strength and allows the plate to firmly clamp the trackbar end after tightening. If you wanted to go thicker you need to pack out the front of the old mount to keep the spacing correct. I cut away the front of the old bracket using a 5" cut off wheel.
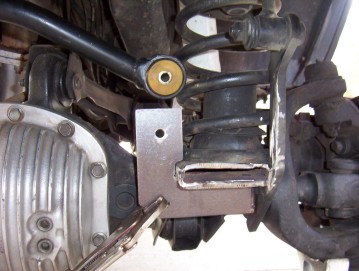
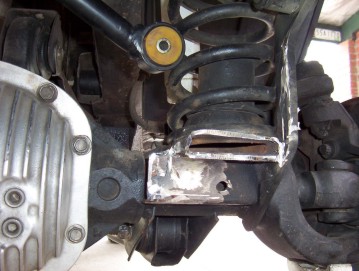
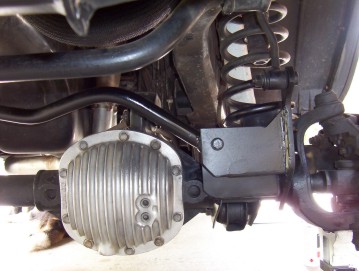
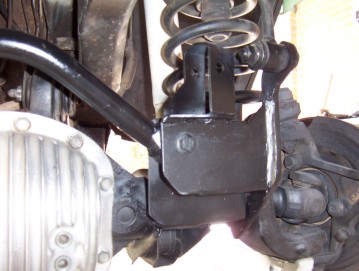
The rear bracket was welded in first and checked to be square to the underside of the coil mount. Then the front one is welded in against the new extended swaybar link and hard against the front of the coil mount. A weld was also placed on the back side on top of the coil mount. Make sure that the top of both bracket are flat. You will need to shorten the trackbar the amount is has moved across which is around 3". I recommend only to shorten a aftermarket trackbar rather than the cast steel stock one. I just pressed out the bushing and then cut the bush housing off. Cut the required amount off the end of the trackbar and then welded the bush housing back on again. In Australia I used an adjustable trackbar from Whiteline which can be used for any RHD XJ, TJ and ZJ. Can also buy from Repco this brand I have been told and can be cheaper than from their web site as saves you the freight.
Do a test drive before adding the steering stabilizer. If it pulls to the driver side, raise the trackbar axle end or fit a ZJ pitman arm to lower the frame end. If it pulls to the passenger side, lower the trackbars axle end.
I ran this without the stabilizer first and had no wheel wobble etc showing it was setup correctly. The above clickable templates are for the stabilizer mount. If you not running a Jeep original stabilizer you must check to make sure that clears the drag link as some like the Rancho have a thicker body. I have flipped all the templates so that the folds suit LHD's so fold the other side for any RHD applications.
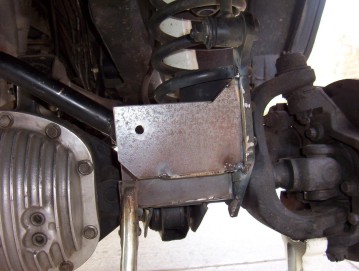
The stabilizer bracket was folded just in a vice but you could make it up out of three pieces too. Remember you are looking at a RHD version so you need the mirror image. The angle it set so it fits directly into the stabilizer fit when the wheels are pointing straight ahead. The longer braced part goes to the back and points toward the front as shown in the above shot.

I have found there was not enough clearance on a TJ for the stabilizer bracket on top of the trackbar bracket as it will hit the underside of the frame under full compression. So what I did is fit one that bolts with a bracket to the tie rod instead and the other end to the underside of the drivers side coil bucket using the same bracket but welded in place. You can even have it fully bolt on in both ends using Rancho brackets as shown above.
[Index]