

Stronger Tie Rod
The weakest part of the steering, and the most vulnerable to impact, is the tie rod which runs from the drag link across to the other wheel connecting the left and right sides. It is just a hollow thin tube with a 16 mm or 5/8" threaded tie rod end. So I came up with a way to use a stock drag link in its place which is made from solid cast steel and runs a 22 mm thread tie rod end ( or around 7/8" ). It also gives much needs clearance around the swaybar bracket if you are running a OTK setup like shown here.
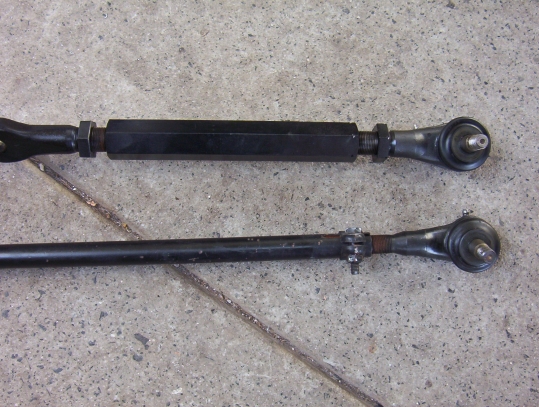
The picture clearly shows the increased beef between
the two tie rod ends. The left one is nearly 38% greater in size. The next photo
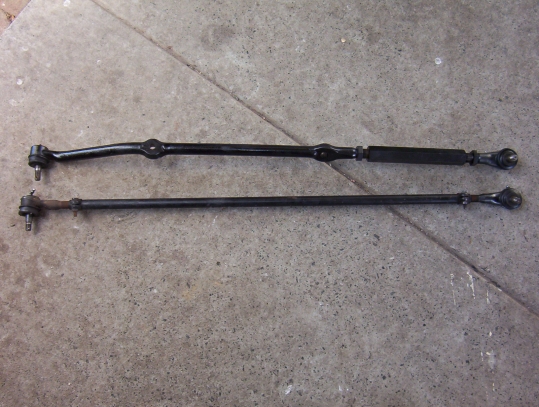
also shows the bend which gives the greater clearance of the swaybar bracket.
Now due to this bend it means that if you have done a OTK conversion, you can
use you old drag link that you have had to replace to do that setup. But if you
do not have a OTK, where you tie rod ends sits on top of the knuckle, it means
you must run a drag link from a RHD if in the USA or a LHD if in Australia.
Those without a OTK in the USA, or LHD countries, might be better off using a
ZJ V8 tie rod
( must be a V8 one as the 6 is the same weak hollow one ) which is a similar
setup. Could just flip the drivers side though with a tapered insert to get the
tie rod up out of the way and use two stock drag links in the conversion. This
would save making a new trackbar and swaybar brackets at the passengers side and
no need to source a opposite LHD or RHD drive drag link.
The drag link is shorter though than the tie rod it replaces. To get around this I had a longer adjustment collar made up out of CrMo hex bar by Cheezy Racing. They were threaded with a metric 22x1.5 mm RH thread for the drag link side, and a LH thread for the tie rod end side. Remember that for some reason these threads are metric on the drag link but imperial on the original tie rod? It works out that you need around twice the length of the 5" stock adjustment collar to around 10" long in total. I also had some jam nuts made to lock the collar in position. You could also get two stock adjustment collars and insert a solid bar partly into each living a gap between the collars so you can weld each all the way around to the bar connecting them. Also drill some holes in each collar end to plug weld to the bar inserted inside.


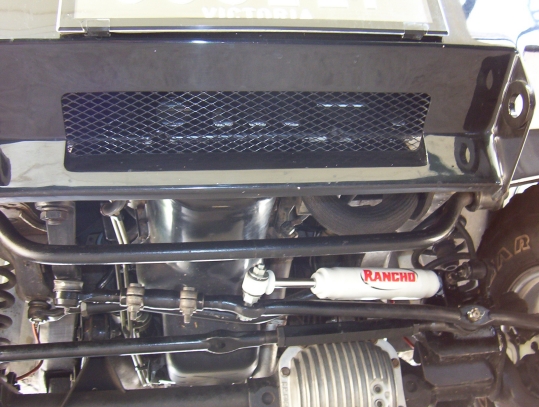
The first photo above shows how I had to cut away a lot of the swaybar bracket and then reinforce it again to clear the tie rod at full lock. Now with the drag link used instead, I have a heap of room and would not have needed to modify the swaybar bracket at all. At the other end where the tie rod end connects to the drag link, it was really tight for the grease nipple on the back of tie rod end with my OTK trackbar bracket which you may not have the same. So I simply drilled and tapped with a 1/4" UNF thread, a new position on top in the same exact place it was on the stock tie rod end. I know that with some TJ's the top nipple hits the bottom of some swaybar disconnects so it would be a good time to add it to the bottom of the tie rod end instead.
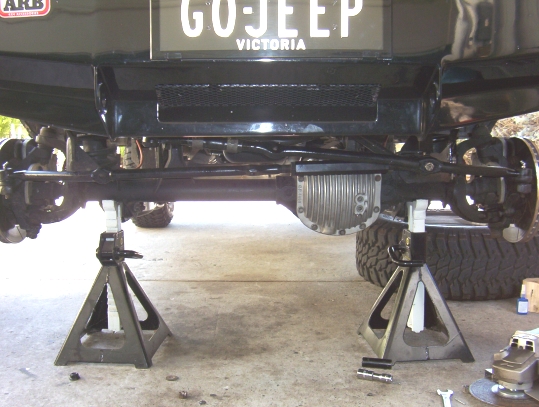
So you can see above how nice and high and out of the way the whole steering system sits. Even at 4" my whole steering sits protected by the stock bash plate when it is in place.
[Index]