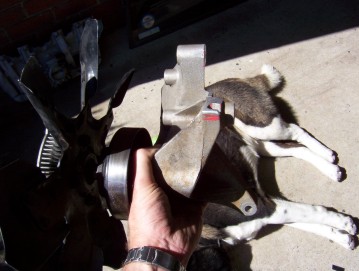
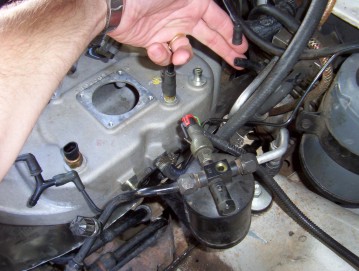
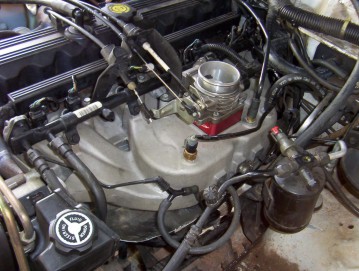
Shown above is the fan mount with the back of the upper boss or bolt mount removed to clear the intake for the RHD's. You can see in the right picture how it clears the pump mount on the intake. I found out later I might have been able to remove slightly less thickness from the upper bolt mount due to the pump spacing covered next. Even so there has been no flex at all in the fan mount the way I have done it. You will find it easier to swap the fuel rails ( and injectors if necessary, see below ) before hand as I could not use the new one that came with the intake as it did not have the return line fitting for the fuel. Make sure you jot down the wire colours for each injector first as it would be possible to swap a pair around and you don't want to do that! The new intake was put back in place using a light smearing on RTV making sure that would not ooze into the ports affecting the airflow when tensioned up. Start tighten the bolts in the centre and work yourself in a cross hatch pattern towards the outside. Then go back over them all again the same way to make sure it is evenly tensioned.
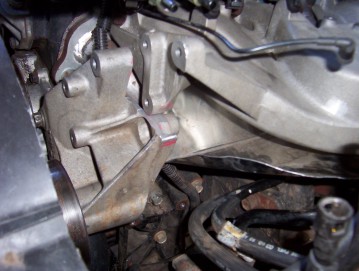
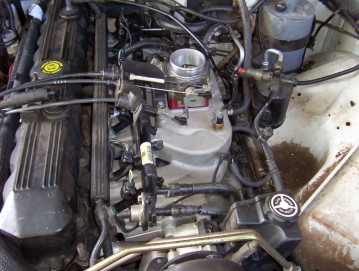
This is the front mount for the pump that was on the old one and it will still bolt back in place using the same two threaded bosses on the fan mount as well as the three bolts on the pump. This supports the front of the pump as well as becomes the upper mount for the fan mount as well. This same bracket was also used on the later model installs. What I did found after I started the engine for the first time was that the belt did not run exactly on the same part of the fan pulley below. To make it do so I had to space the pump forward 3 mm with spacers as shown in the right picture. It then ran perfectly in the same spot after that and everything lined up. I can only think the later models run a slightly wider pump at 60 mm thickness compared to my 57 mm one. I also noticed at this point that the threads in the intake for the pump bolts were different. The old bolts were 5/16" UNF but the new ones are 5/16"UNC and 3 1/2" long. Buy them first so you don't have to run out and buy them in the middle of putting it all back together.
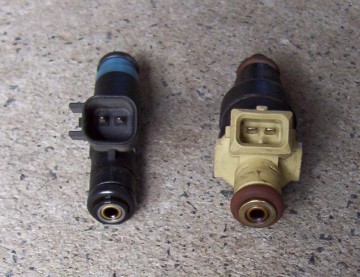
Now I scored with my intake that I bought a full set of
injectors that looked like they had only done a few kms before being written
off. It seemed a shame not to use them as mine had done over 110,000 kms and
even though I run premium now a days and fuel injector cleaner every 5,000, they
still showed a little build up. The newer ones also are completely different in construction
and weighing probably only a third of the old ones. This could also mean quicker
response to the electrical pulses as you always hope things get better with development!
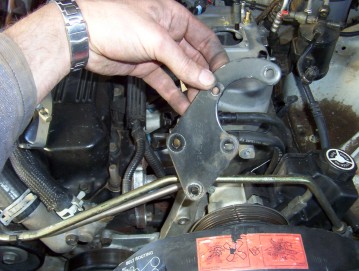
The only problem was that the old plugs do not fit onto the new injectors as the
mount differently. To get around this I ground down the two tags you can see on
the left new one in the picture until the overall width was the same as the old
one ( 17 mm ). This then allowed the old plug the slide over the new injector
but nothing to hold it there. So as you can see in the right picture I just used
a nylon tie to hold them in place. Make sure the plugs still face the same way
as before with the curved cut out section facing the fuel rail and that you push
them all the way down engaging the pins fully. I found that when I first started
that one had not seated completely so ran rough until I found which one it was
and pushed it home and tighten the tie and no problems since. Remember also that
if you have a pre 96 with the fuel regulator on the fuel rail, it will be only
running at 39 psi instead of the later pressure level that the injectors are
designed for at 49 psi. So you can add a adjustable regulator
like I show here or, Coas from Jeep Cherokee Forum
says, there are fuel regulators that fit Jeep fuel rail with no modifications.
Chrysler #4418850 or 5277829 or 5277864. These regulators will bump the pressure
up to 40 idle 48PSI at WOT.
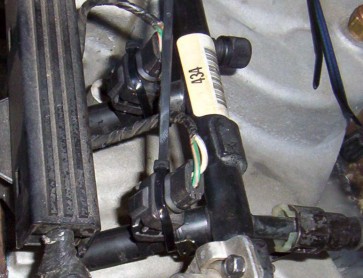
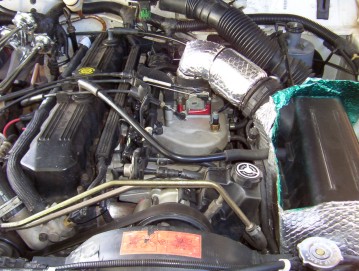
Time to hook up the vacuum hoses and sensor. The big hose to the brake booster fitted no problem as was the same size and in the same spot. The hose to the rocker cover ( pcv valve ) fitted straight in as I had earlier already changed it to the later model one which is bigger in diameter and better in controlling blow by. If you have not done this you will have to adapt the smaller hose. The two hoses in my fingers have to be extended and re-sized to fit the ports. One is from the map sensor and the other is from the cruise control and vacuum tank in the bumper. The hoses from the fuel regulator and the charcoal canister used to share a port but with the pressed in ones of the new intake you cannot swap it over. So I used a Y joiner as shown to connect them to the intake. Also had to extend the wires for the MAT sensor ( manifold intake temperature ) ( some call it a IAT intake air temperature ) as they did not reach. Some people fit this sensor into the intake hose from the airbox to make the engine run a bit richer giving you more power as written about by Dino Savva here. This would then free up a port saving you the Y joiner but with the intake shield that I have it would make little difference in my case so left it stock.
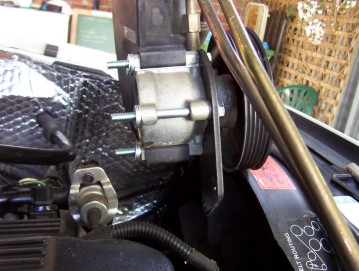
Then it was just a matter of clipping on the fuel lines and drilling a single hole for the fuel line support bracket instead of the previous two. Then bolting down the throttle body and even re-used the spacer again for that extra 76 cc's! The intake also came with a late model throttle body but the plugs do not match and I had already bored mine as well. Replace the cables and refit the airbox and you are done.
Now for the road test. I found the off idle response all the way to around the 2500 rpm mark to be the most different. If you just are travelling around town on flat roads there is not much of a change but as soon as I hit the hills I use every week it really showed. The steeper the hills for more it just pulled stronger than before and found I had to feed less throttle in than before to keep speed on the hill. This is was what I expected as longer runners perform much better at producing torque at low revs than short straight ones do which work better at high revs. You will even find some cars have two sets of runners with a solenoid switching to long runners for low revs and to the short ones for high revs. As I spend most of my time around the 2000 revs this intake is perfect for me and especially for all the towing I do in deep sand etc it will be even better. My trip computer is also showing around 7% better. You must reset the computer and to do this just disconnect the battery and then turn the key to start and hold for at least 30 seconds to remove any stored power in the computer. It is then important to do 'average' driving for the next day or so to get the right parameters set. If you just cruise or drive hard then the parameters will be set too low or high and might not be able to adjust enough for other conditions! Don't be surprised if the idle is a bit rough while the computer resets itself and sometimes even a day or two later depending on your mileage. I found also that by pulling the fuse marked for the engine control unit ( second from the right under the hood ) and leaving it out for a few hours cleared a code I had so might reset the ECU as well. You just cant drain the power stored in it unless left it out for a long time out like over night but at least saves you resetting all your radio programs etc.
I am happy with the result and it met my expectations. Don't do this it you are the type that revs it hard everywhere as you can lose response up high in the rev band or if you are expecting a large change. It is not that sort of change. A great by product that I did not expect was that my wife noticed straight away that the exhaust sounded deeper and more throaty! Just read since that it was a claim made by Jeep as well for the late models with a change in the intake and exhaust mentioned to give that sound! I have since also done 6000 kms trip in 100*F temps towing my trailer over beaches and one track alone had over 300 sand dunes and the new intake manifold made it that much easier than before.
[Index]