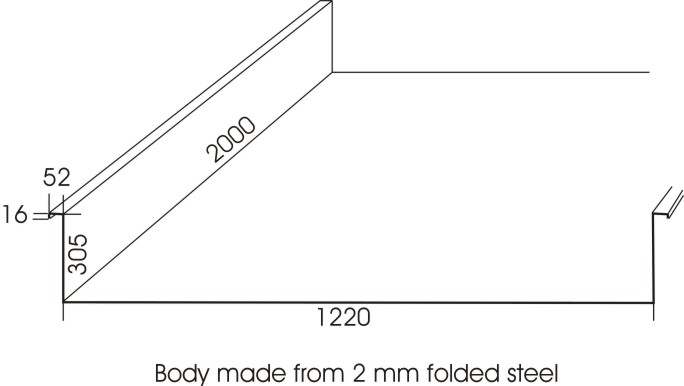
The body is made is made from 2 mm folded steel to the above dimensions.
I chose the height of 12" as it equaled the area of my first small trailer
that I was able to fit everything in. The low sides also stops it getting
filled with un-necessary stuff that's is just more weight and I can happily do
without!![]() Also found that with my mates
trailer that had 24" sides that their things just bounced around inside
everywhere breaking many things. With a single layer of well placed boxes and
then our pillows on top of them in canvas covers that I made for them, it
stops anything from moving even after I have had it air-born over sand dunes! The
low profile makes it possible to see over the trailer when backing or just using
the rear view mirror as well as giving it a lower centre of gravity. I have just
come across a web site where you can buy the panels etc pre-fabricated to put
together yourself.
http://www.marshall-eng.com.au/Panels%202.htm
Also found that with my mates
trailer that had 24" sides that their things just bounced around inside
everywhere breaking many things. With a single layer of well placed boxes and
then our pillows on top of them in canvas covers that I made for them, it
stops anything from moving even after I have had it air-born over sand dunes! The
low profile makes it possible to see over the trailer when backing or just using
the rear view mirror as well as giving it a lower centre of gravity. I have just
come across a web site where you can buy the panels etc pre-fabricated to put
together yourself.
http://www.marshall-eng.com.au/Panels%202.htm
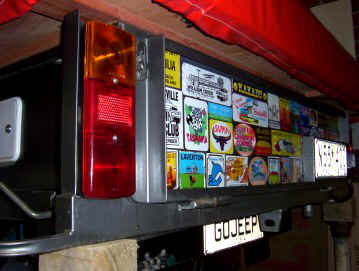
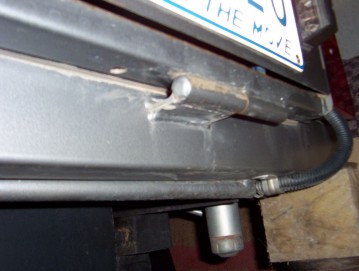
The tailgate is folded from 2 mm steel with an the top and bottom folds being 32 mm x 22 mm. It is retained by a catch that is also used on Land Rover tailgates and has never come loose. The chains can be un-hooked at the top end in case you should want to flip it right down. The vertical supports where the catch passes through as well is 50x50x3 mm angle line. You can also see how I have used self stick vinyl floor tiles so it can be used as a picnic table.
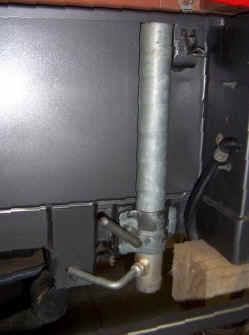
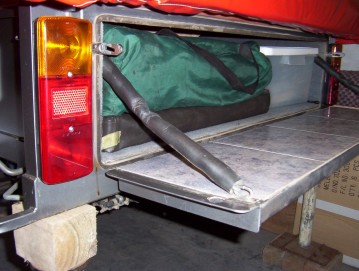
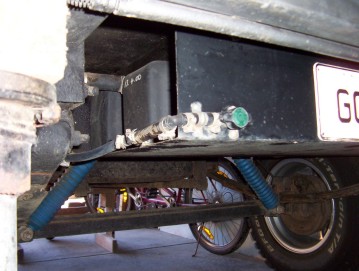
It is important if you are sealing it like mine that the hinges are spaced away from the body a couple of mm less than the thickness of the seal. If you make it sit hard against the body and then add the seal it will not close. The supports for the trailer used when it is not attached to the car are just pipe held by jockey wheel clamps which can be lowered. Then an inner pipe is also lowered to reach the ground that you can see held in by the outer pipe which has a nut welded to the outside and a bar with a threaded bolt welded to the end of it screwed in.
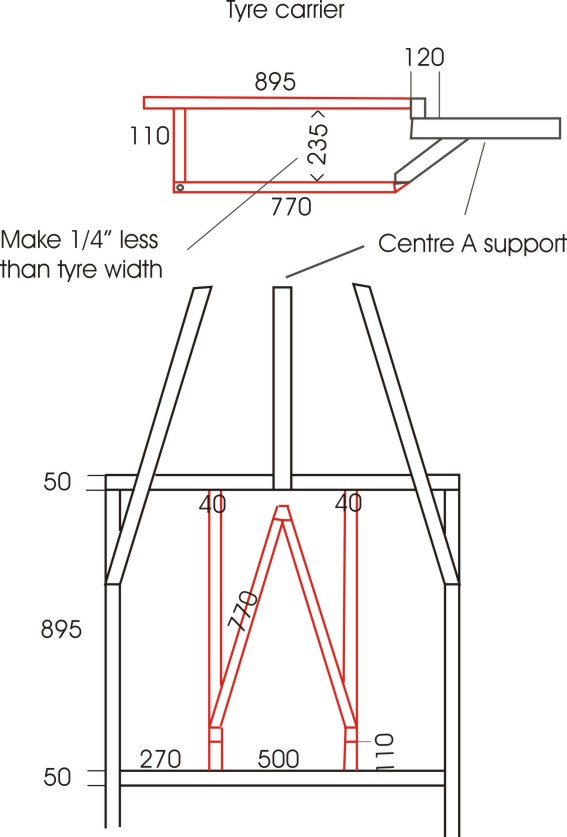
The spare wheel is mounted underneath as helps keep the centre of gravity low and found when on the outside of the trailer anywhere stones would bounce off it back into and breaking the rear window. It also balances out the weight of the water tank when full so the handle is always good with never a problem of sway. It is all made from 40x40x3 SHS tube and is hinged at the back where the end of the support A frame has flat welded to it and a bolt passing through the vertical supports. The front of the A frame had some angle iron welded across the front and gusseted and a tapered hole drilled in. The bottom of the front support has a wheel stud welded inside it to which the front of the A frame attaches using a wheel nut to hold it in place. It works really well as you have to have got out your wheel brace anyway to change the tyre and the whole A frame lowers down to the ground and become like a ramp when taking out and replace the wheel. The distance between the upper floor supports and the lower A frame is 1/4" less than the tyre width ( this a 30x9.5 tyre so the space was made at 9.25" ) so that it holds it tight and wont move at all.
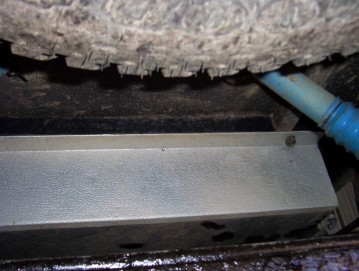
The water tank holds 60 litres had just has a 2 mm folded steel cradle bent in a U shape around it to support and protect it. It is secured through the upper flanges by 4 1/2" studs welded to the sides of the floor supports. The front face had some aluminium attached to it against all the stones thrown at it from the car. The rest is coats like the whole underside of the trailer which a product sold here in Australia called Grip 51 which is made from a rubber and bitumen mixture. I have run the drain hose to the rear like shown and used clear hose that also tee's into the vents hose at the top of the tank so I can see how much is in the tank.
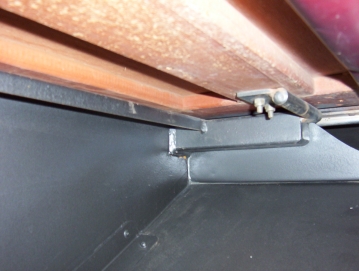
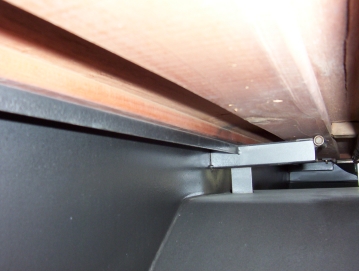
The trailer camper pack is hinged at three points. The supports are made from 40x40x3 SHS and extend out at each end of the trailer body and above the mud guard where it gains support from as well. The hinges are just the same used on steel gate frames. They are simply bolted through the wooden frame and floor using 1/4" mushroom head screws and nyloc nuts. Just remember to set them up high enough to take in the seal thickness minus a few mm for compression. The hinge centre point is 200 mm or 8" from the side of the trailer body. This was done as there was not a lot of clearance between the underside of pack to the top of guard. The more you move it out the less the camper pack overhang drops down when fully open. If you have plenty of clearance there is no reason why the hinges cannot be fixed closer to the trailer sides which would also reduce the lifting weight with any overhang working as a counter balance.
I also have a rough layout of the front boot in a Excel Sheet that is a bit taller then the one I have so it can accommodate a fridge if wanted or just more storage. It is the way I wanted mine to be in the first place but it didn't get folded up the way I had asked at the time. Download the file here.
[Index]