
Custom SYE Conversion
This write up shows a custom yoke style SYE on a NP242 pre 96 transfercase. It could also be used on later style NP242 or any NP231 on either a Cherokee or Wrangler and some ZJ Grand Cherokee's. On 96 and later transfercases, the yoke will be cut shorter and not go through to the bearing.
A Slip Yoke Eliminator, or SYE, eliminates the slip yoke, ( the part that allows the driveshaft to change length as it needs to when the axle goes up and down ), from the output shaft of the transfercase and then moves it to the driveshaft instead, just like the front driveshaft. The reason for moving it is that it gives the opportunity to shorten the output shaft which is turn means there is a greater distance between that and the pinion of the rear axle. The longer distance means less angle on the universals which allows it to run at higher speeds without vibration. Second thing is that the shortening of the output shaft brings the driveshaft closer to the output bearing which then allows the use of the heavier double cardon joint, or CV joint which it is most often wrongly referred to. The double cardon joint is two universals back to back which reduces the angle in both of them. It also reduces the axle pinion uni as this has to be rotated upwards to point almost directly at the transfercase raising the drive shaft up higher and reducing the upper uni's more so and also giving greater clearance under the driveshaft. Further more on pre 96's, it allows the removal of the driveshaft, should be bent offroad, without the oil escaping from the transfercase as the yoke stays in place.
Now for the 242 transfercase ( where you can select 4wd for road use ), there are few options about. Most popular is the Rubicon Express 'Hack & Tap", the RE1801 for pre 96 that includes the seal housing or RE1807 for the flange only. So called as you 'hack' off some of the output shaft and then 'tap' the end of it to get a thread in the end of it. The thing I don't like about these is that they run a flange rather than a yoke. They also have trouble with leaks as they have little support in their short length which gives them some play which leads to the fluid leaking out on pre 96. What I wanted to find is if there was a yoke that would fit the output splines. My searching found that the Slip Yoke has to have a 1.172 x 27-spline and use the 1310 series U-Joint. It must also have bolt through holes the same dimensions a the front driveshaft at the transfercase end. I bought mine from Tom Woods using part #2-3-27ZCV-131. He was not keen on selling it to me as my idea was not proven yet so I have waited a year to write this story to make sure their were no problems first.
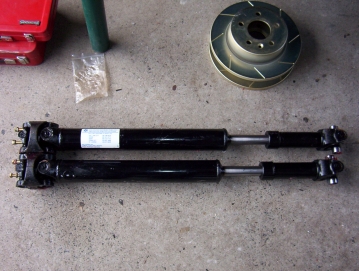
Pictured above is a yoke from a 63-64 Corvette that has a Muncie 4 speed gear box with U bolts. You will need a needle type grease fitting or a non greasable first of the two unis with this yoke though. Thanks to Secshunate from Duncan BC Canada for providing the picture and information. Other suitable yokes are also available from Powertrain Industries part # 3103-27CV and Driveline Service of Fresno which were the cheapest last time. The CV in the part number lets you know it is suited for the correct bolt spacing for the double cardon joint the same as a XJ front driveshaft. Inland Empire Driveline also sell the same yoke, # 3103-27CV, though not listed on their site as do Six States Driveshafts.

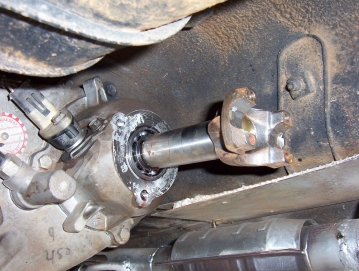
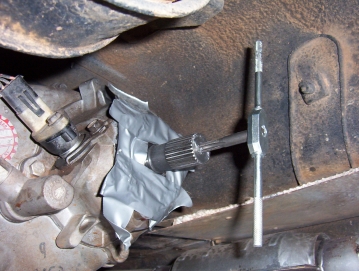
First remove the driveshaft by undoing the four bolts holding the two saddles on at the axle end. Pull free from there and then slide out the drive shaft from the tail cone. Only a small amount of oil will run out. My 95 was the last year for the tail cone that seals the fluid in and it removed by undoing the three bolts holding it on. The pictures show the tail cone removed and then a trail fit of the yoke. If it was not for the need to gain extra length and reduce the leverage, you could fit it now as is.

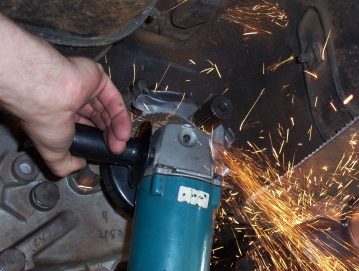
I have placed masking tape around the shaft at 1-1/4" or 32 mm from start on the splines. I then taped up the output bearing so no grit would enter the transfercase. Now I have had to repair shafts that were cut crooked by a well known Jeep shop here. Make sure it is in 2wd and the wheels well chocked. Then start the engine and engage reverse. This will have the shaft spinning while you cut it with a angle grinder with a cut off wheel. This will make sure you have a perfectly square cut as you have effectively made your own lathe. Sounds scary but it is not and the shaft is not spinning quickly at idle.
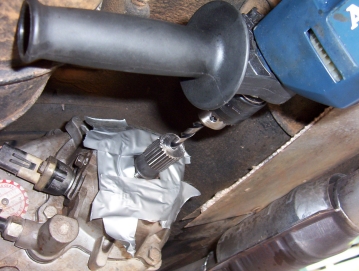
While spinning also grind the sharp outer edge off and I even ground a little extra in the centre of the shaft to make sure the outer edge would be pressing on the yoke keeping it stable. The pattern made also showed where the exact centre was clearly so it could be centre punched. Neck drill a 3/16" pilot hole with the shaft spinning once more. This will keep the drill going in exactly straight. Drill in 1-1/4" and then switch to a 21/64" drill bit to drill out to final size leaving the shaft spinning still.
Tap out hole with a 3/8"-24 ( UNF ) tap using a cutting oil. Make small 1/4 turns and backing out the same amount each time to slowly advance the thread. Do it slowly and never force the tap. You don't want it breaking in there. If resistance builds, screw the tap right out and clean filings out and reinsert the tap after adding more oil. Never advance until the tap is turning freely. Just rotate it back and forth until smooth to turn and then go forward again.
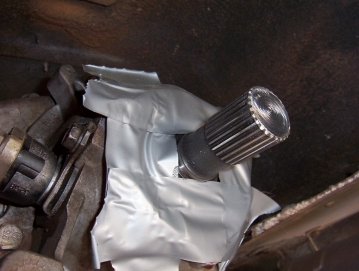
Slide on the yoke to see where it stops on the shaft. I chamfered out a little from the inside of the yoke so it rested against the bearing cir-clip to support the bearing as well but it is up to you. Then measure from where it had stopped to the end of the shaft after removing the yoke. Next measure from the end of the yoke down inside to the back of the brass end plate. Subtract the two measurements so you know how much to cut off the end of the yoke. I left an extra 1mm so that there was tension on the yoke against the bearing. This makes it very stable as does not move around like the flange does in the RE kit. Also drill a 3/8" hole in the middle of brass end plate in the yoke for the 3/8"-24 x1" long retaining bolt.
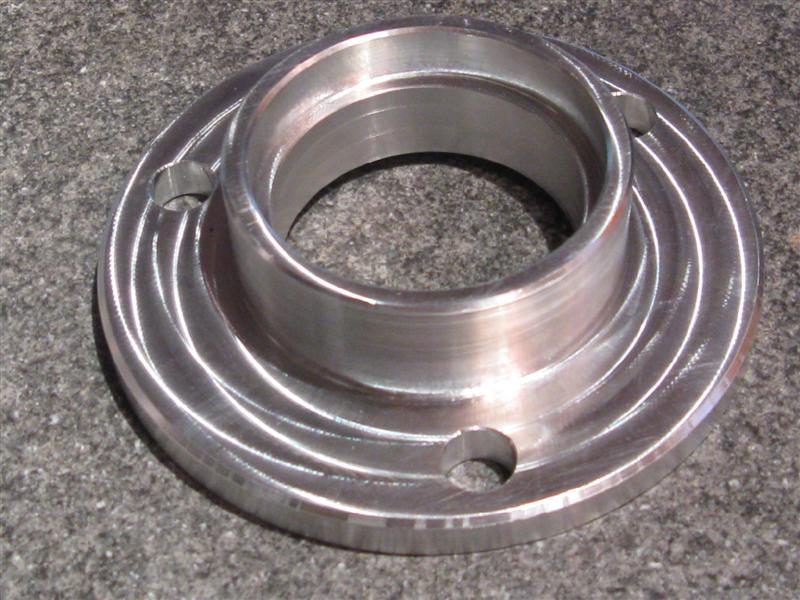

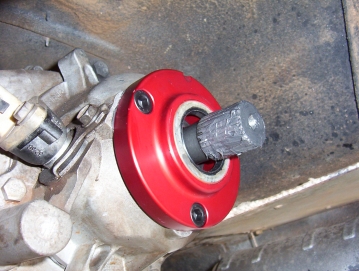
To seal the end of the housing, ( for pre 96 models ) I bought the RE1801 kit which gave me the seal housing, drill bits and tap. I then sold it all off minus the seal housing as a 1807 kit to someone with a 96+ Jeep. I have since found out you can buy just the seal housing from Rubicon Express but even better is that Eric Salsman made his own shown above after following this write up to do the conversion. The benefit with his is he made it to take the standard output seal so no problems finding a replacement. He can be contacted for the seal housing as is making some more to sell for others. Will post world wide and be cheaper than buying the RE housing.
Now it is very important to use the right sealant on the housing as well coating the splines as shown. You should only use Loctite Black as it does not dissolve over time in transmission oil like the other coloured sealants in their range. If using another brand, make sure it states for transmission oil and not just engine oil.
Now the seal supplied with the housing will not be able to use with the yoke I had. The yoke seal surface was smaller so make sure you buy a seal to match the diameter of the yoke and the seal recess of the housing. The seal I used was bought at Bearing Wholesalers here in Australia. Their product number is #402896N with a description of SEAL 150.232.37 TB. It measures a outer dimension of 59.30 mm ( 2.332" ) and a 38.1 mm ( 1.5" ) shaft size. The data on the seal lip itself are: TB2 232 150 37, TTO, E962 3. These specifications should allow you to find a seal to match like this SKF #14977 that Chris Lawson found for me. You can this page here to learn about the different tyres of lip designs and materials you can have. Can then select search for inch oils seal and feed in 1.5" for the shaft diameter and 2.332" for the bore size. The best I could find was there was #NOK AD2284-E0. Slightly under sized in the bore is fine as have used them before and you just use some black RTV in the bore of the seal housing.
Make sure that thread locker is used on all bolts. I had new driveshafts made for both the front and rear and as you can see, there is little difference between them in length. They are identical in every other way and the front shaft can even be used in the rear to get out of trouble. But this is with my combination that gives you the shortest rear shaft. That is a auto with a D44 ( or 8.25 ) rear axle. Having a manual transmission and or a D35 will leave a front shaft too short. The front driveshaft must also come from a automatic as they are the longest. It does not matter what transfercase as the 231 and 242 are the same length.

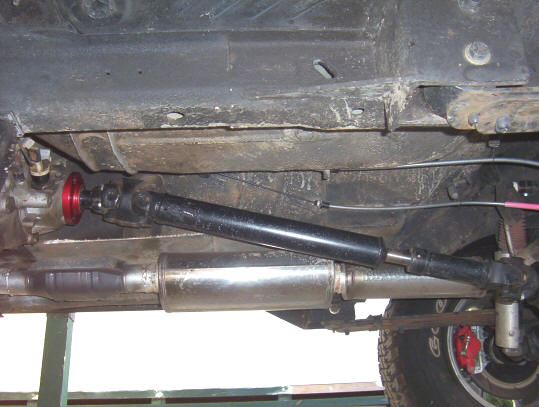
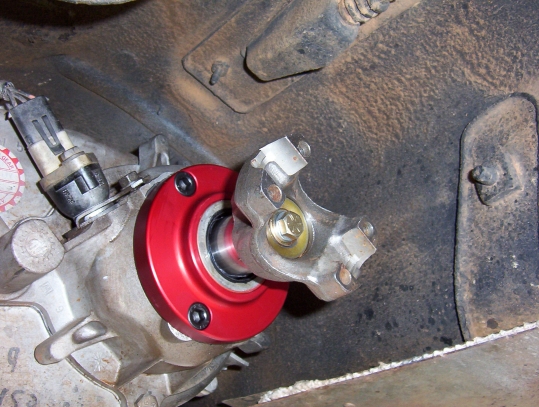
The yoke was bolted up and the rear pinion was correctly aligned to suit the double cardon joint. Make sure any previous transfercase drop has been removed first. The axle must be rotated so the pinion is raised, with either shims or in my case as the axle was new, welding on the leaf perches at the right angle. The pinion should be pointing up towards the centre of the top yoke. But importantly, there should be a 2-3 degrees difference between the driveshaft and the pinion angle. That is the pinion is pointing down slightly below the yoke centre. I have a clear write up on it aligning the pinion for a SYE here. This is so the universals are correctly aligned under load as the pinion lifts then.
[Index]