
Rear Disc Brake Conversion
My rear brakes were due for a re-build so before throwing any money at it I decided to see if I could convert to disc brakes for about the same money instead. I have always wanted rear discs as they perform better wet or dry and never have to be adjusted. Don't need cleaning out after a mud run and with this conversion I ended up with a better handbrake as well. Knowing that Fords cars have the same wheel bolt pattern ( 5 on 4 1/2" ) I looked at them and the local Aussie Ford Falcon was my best choice as they are a bit heavier and larger than the XJ and easy to get cheap parts for. It also turned out that some models had a bolt on caliper bracket as the model was designed to have them easily fitted instead of standard drums if the disc brake option was taken and just bolted on instead of the drum backing plate with no other changes in the whole braking system needed including master cylinder and proportioning valve on these Fords. I narrowed it down to the XE-XF ( vented ) or EA Falcon ( solid like the ZJ ) as they were the only ones with the bolt on bracket and settled for the EA. It has the more modern caliper design similar to the front of the XJ and the EA housing flange bolt pattern would interfere less with the XJ one leaving it stronger. The XF needs more looking after according to different brake specialist as the they are prone to seizing where that same part is enclosed in a rubber boot on the EA. The EA also includes the handbrake retainer which the XF doesn't so you would have to make a bracket and weld it to the axle housing with the XE-XF. My conversion required no welding at all and it everything bolted on!
I have also looked into those with older Jeeps using the AMC 20 rear in Australia and from the measurements and research I have done into it, it looks as if you could use the Falcon EA-ED brackets and calipers. They will bolt on instead of the drum backing plate and bearing spacer with no need to make any other space like I had to. As the wheel stud PCD and hole centre is much larger you have to use a different disc. The front ones off a Suzuki Vitara Estate LWB has the right offset and stud pattern and hole centre to use and are ventilated. They are however 2 mm thicker than a EA solid disc but I think you should still be able to use them. DBA sell the discs with a part number DB514. These I have been told are a little expensive but you might also be able to use the ones from the Standard Suzuki Vitara fronts ( DB513 ) which are solid but these are 2 mm thinner than an ED solid ones which I think should be alright too. They are however 3 mm taller than the Ford so you need to see if you have the clearance for the extra 1.5 mm radius that you need to clear inside the caliper which I don't see as a problem. Food for thought anyway and if you do do this conversion I would be most interested in how it turns out and would like pictures if possible to do a write up.
I get asked a lot if there is a car in the USA that has the same setup up and the closest I have found is the Ford Crown Victoria like shown here by Cherokeekid which is a bolt on for a Dana 44 and maybe modified for a Dana 35 or Chrysler 8 1/4" axle. Also recently another conversion is using 95+ Ford Explorer rear disc brakes with ZJ rotors to save on machining and better alignment. You can bolt on however the rear caliper brackets like mine onto a Dana 35 and 8 1/4" rear axles using the Grand Cherokee ZJ parts. To connect the handbrake lines you can loop the XJ cable around the handbrake lever like this that wcarpent on the JU forum has done or use a Lokar Parking Brake Cable Clevis kit. You can just cut a slot to drop the cable through and then close it up again so the end does not have to be replaced. Here are more pictures of a bolt on ZJ conversion here and here that are for the Dana 35c and 8.25 and do not require any spacers or fabricated parts with the only modification needed is on the 8.25 that needs the caliper bracket centre hole made slightly larger for their bigger axle tubes.
Here is a list if you want to use all new ZJ parts ( provided by Scott Backer ):
Backing Plate (Left) - Part# 4762129
Backing Plate (Right) - Part# 4762128
Brake Rotor (2) - Part# 52008184
Parking Brake Lever Boot (2) Part# 4762124
Banjo Bolt (2) - Part# J4006700
Brake Caliper (Left) - Part# 4762103
Brake Caliper (Right) - Part# 4762102
Caliper Bushing (4) - Part# 4762106
Caliper Sleeve (4) - Part# 4762105
Brake Caliper Bolts (4) - Part# 5253000
Brake Hose Washer (4) - Part# J3237672
Caliper Mounting Bracket (Left) - Part# 4796343
Caliper Mounting Bracket (Right) - Part# 4796342
Flex Line (Left) - Part# 52008663
Flex Line (Right) - Part# 52008662
Proportioning Valve - Part# 52009061AB
Parking Brake Lever (2) (Slide) - Part# 4762132
Parking Brake Lever (Left) - Part# 4762130
Parking Brake Lever (Right) - Part# 4762131
Parking Brake Adjusting Nut (2) - Part# 4762118
Parking Brake Adjusting Screw (2) - Part# 4762120
Parking Brake Adjusting Socket (2) - Part# 4762115
Parking Brake Hold Down Clip (4) - Part# 4762125
Parking Brake Hold Down Pin (4) - Part# 4762126
Parking Brake Spring 2 (Lower) - Part# 4762116
Parking Brake Spring 2 (Upper) - Part# 4762127
Rear Disc Brake Pads - Part# 4883717AA
Parking Brake Shoes - Part# 4796337
If you have a Dana 44 then you can adapt the ZJ parts with some extra work
like
shown
here and here.
You can also now use a TJ (Rubicon) retainer plate in place of the custom ones
shown on madxj's site. The bolt holes on this needs to be re-drilled also, but
other than that it worked great. part # is 1-05083678AA, and they are around $3.00
each.
I picked up all my parts from the local self service car wreckers and was lucky that a EA wagon had just been dropped off with near new discs and pads. The discs when new are 15 mm thick and should not be used below 14 mm. Check the prices because if you buy the parts separately maybe cheaper to buy a whole axle disc to disc and that will give you the brake lines as well which you can used with some changes shown later.
So what you need all together is:
EA calipers, caliper brackets, stone guards, hoses, pads. Also the EA axle brake lines with 2x 3/8” flare nipples fitted instead of the 10 mm metric ones at the T piece end, 2x passenger side handbrake cables, 8x 1½” long x 3/8” cap screws and nyloc nuts, 2x 125 x 125 mm x 10 mm thick aluminium. I also grabbed the front wheel studs off the same EA as they stock rear XJ ones will be too short.
The only other things if you don’t have them already is brake fluid and diff oil.
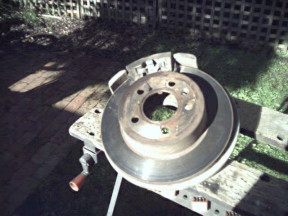
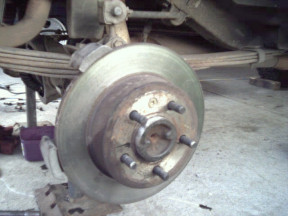
The solid rotors are 287 mm in diameter and 15 mm thick ( XJ fronts are 280 mm ) which compare well to the ZJ rear discs at 285 mm and 11 mm thick. The only other difference is the centre hole is 70.7 mm ( same as the XJ front ) to the ZJ 71.8 mm. You have to choose here if to reduce the size of the centre flange so the EA disc can slide over or take out the rotor centre to fit the flange. I chose to grind down the centre, after knocking out the wheel studs, by jacking up the car at the rear and starting the car and letting it run in drive and then running the angle grinder against the centre flange until it was the right size where the rotor would fit nicely. You have to start and stop the car a bit to make sure you don't take too much off but it worked out perfectly and took about 5 minutes a side. Don't forget that it is only the last 1/4" that has to be exact and the rest can step down like it was before. The next one I did I was able to file out the centre of the rotor by using a large half moon file following a line made by sanding the slight taper that was on the outside of the hole to highlight it and then filing until it disappeared. It worked out exactly after checking it on the axle where it was easy to see where any extra filling was needed to make it fit on. It may be possible to use a ZJ rotor with a 12 mm spacer and the thinner disc ( 11 mm verses 15 mm ) shouldn't cause the piston to come out too far as there is plenty of piston travel and then no machining would be necessary.
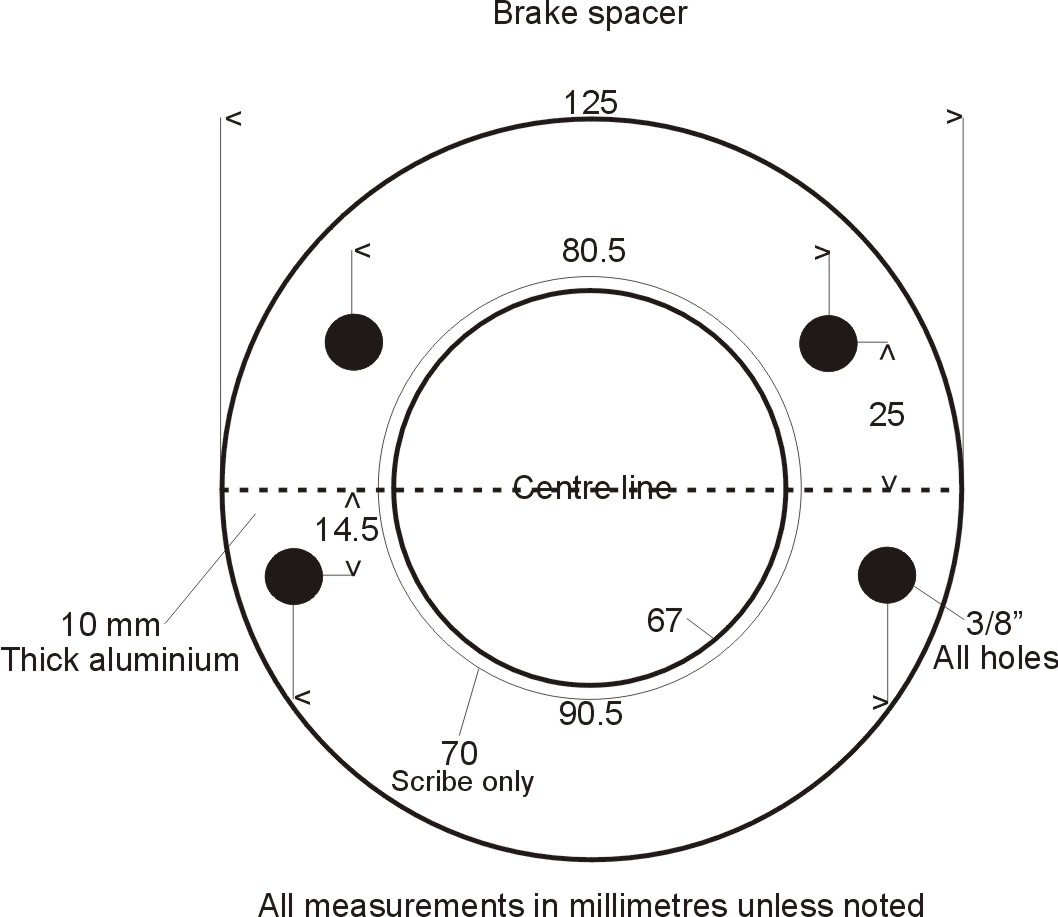
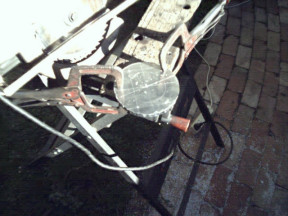
The only thing you have to fabricate is a spacer as the Jeep axle is 10 mm further out than the Ford EA. ( XF is 15 mm different ). I bought the alloy already cut to 125 mm square 10 mm thick and then scribed the three circles on it ( the 72 mm circle is to match the centre of the caliper bracket and to help line it up later ). I cut the outside using a standard circular saw with a fine tungsten or carbide teeth used for timber, ( picked this trick up at a alloy truck bullbar place ). Just kept cutting across the edge of the line and then ground smooth. Also take note that the top bolt holes are closer together than the bottom ones ( still centered left to right ) but off centre in the height compared to the horizontal centre line!
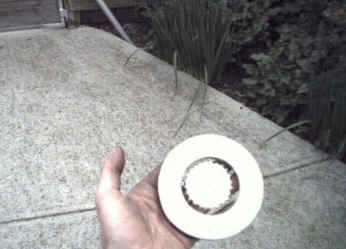
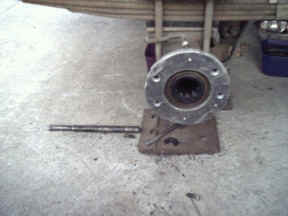
The centre hole was cut out using a series of holes inside the centre mark and then filed smooth. It was a nice and snug fit but it is not critical as it is fixed the axle housing flange and all forces are rotational not any other way. Remove the axles which will require taking off the diff cover to remove the C clips before pulling the axles out and then the old drum brakes like shown here. Clamp some vice grips or similar to the flex line to stop all the fluid running out when you remove the lines from the wheel cylinders. Place the spacer on making sure the bolt holes line up ( the old studs can just be knocked out with a hammer ) or mark them while the spacer is on by scribing through the housing flange holes and then drilling. You can see how it fits over the axle housing end against the flange. There is no need for a bearing retainer as there was not one before and the spacer bolts on the exact same way as the old drum backing plate used to.
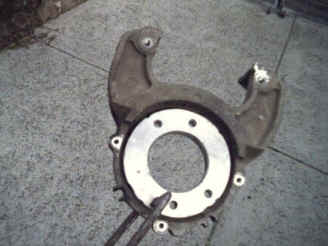
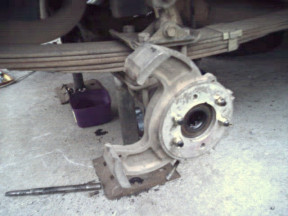
The EA caliper sat centered on the horizontal but I decided to get as close as possible to the front which is tilted up about 16 degrees off the horizontal as the EA bracket holes do not line up with the Jeep axle pattern anyway. I placed the caliper bracket on the spacer using the scribed line to centre it and rotated it upwards until it lined up with one of the old holes ( the bottom right hand hole looking at a LH bracket from the housing side in the left picture above ) and it now matches the front when viewing through the wheels. Also it gets the bottom of the caliper further behind the axle out of the way of flying rocks and such as well as the handbrake lever. Now just drill through the spacer holes into the caliper bracket and it is ready to bolt on using the cap screw bolts ( Allen key bolts 1 3/4"x 3/8" ) and nyloc nuts. To combat any extra leverage from the thick spacer you want grade 8 or higher so you can use cap screws which are marked 12.9 ( same as grade 9 ) and they also help with there head size as there is very little room on the housing flange for bolt heads. If you are using the ZJ rotors ( ZG here in Oz ) then offset the bracket by 1 mm closer to the centre to over come the slightly smaller rotor.
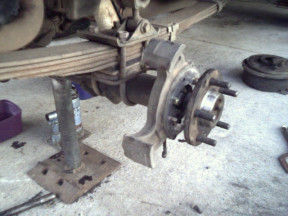
Before replacing the axles and the C clips I also added longer wheel studs off the front discs of the EA as the disc is 1/4" thick compared to the 1/8" brake drum and if you run alloy wheels the rears were too short for my liking anyway ( you can see them on the next page ). I also drilled and tapped the axle flange for the hold down screw ( not really necessary as the front does not have them ) and then slide on the discs.

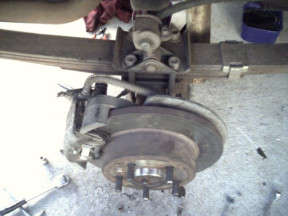
It was then a simple matter of bolting the caliper back on after I had made sure that the metal sleeve inside the rubber boots moved freely by pulling them out and cleaning them and coating them with rubber grease. This makes a big difference to the performance of them and also stops them dragging on the disc. The stone shield was bolted back on and now was ready for the lines and handbrake hook up. Go to the next page for that on the link below.
Handbrake and brake line hook up next.
[Index]