Fitting Exhaust Headers
I have covered about headers and different designs etc in my Exhaust for Torque write up so wont go into it again here. This write up covers the fitting to a RHD 95 Cherokee of a locally produced Australian header by Hi-Tech. It is a different design to the ones I have from the same company which are no longer available. The basics will still be the same even on a LHD.
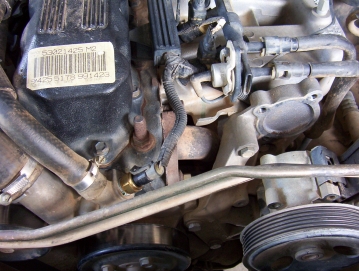
Start by removing the fan belt and then the bolts holding on the power steering pump which is attached to the front of the intake manifold. On RHD's there is also the mechanical fan to remove which attaches between the water pump mount and the intake as well as the side of the block. The last is a pain to remove as its bolt is tucked away behind the A/C pump which needs to be removed and pushed aside while still left connected. Also disconnect cables from throttle body and sensors etc. Remove vacuum lines as well as the bracket holding up the fuel lines to the intake.
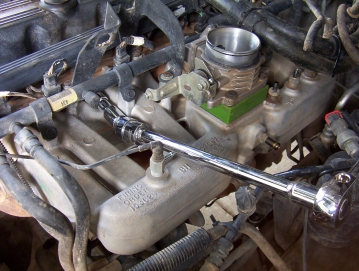
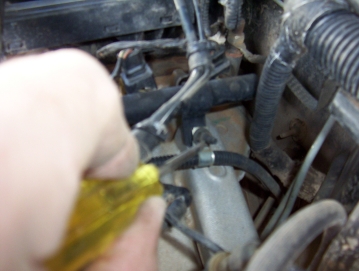
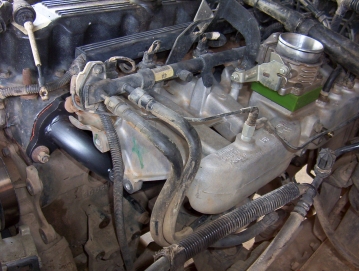
Some tell you to remove the fuel rail to get to the bolts but this is not the case at all. You can see here that using an extension with a universal at the end allowed me to get to most of the bolts. Was able to do some of the bottom row as well from above running the extension and universal underneath the intake. You will have more room if the airbox is removed. The left picture also has a screw driver pointed at a clamp holding the loom from the CPS to the fuel rail which must be removed. I have been able to get all but the last near the firewall this way which was undone from underneath using a ratchet ring spanner which makes the job much easier. There are three bolts that only hold the header in place which are the first middle and last bolts. You can see these a few pictures down holding on the new header. Leave though until you lift the intake out of the way. Also try to keep all the fuel lines connected by putting the intake across the top of the rocker cover as they are prone to leaking otherwise. If you want to remove them, push the hose in hard and then press in the tabs with some long nose plies, then pull the hose free.

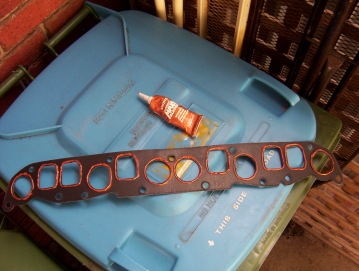
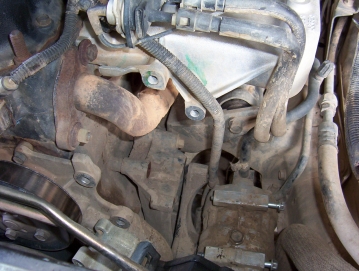
With the intake out of the way you can remove the two bolts holding the header to the down pipe as well as the three holding it to the head. Good time to unplug or remove the O2 sensor. You can clearly see the benefits of the header above with the longer tubes smoothly intersecting without abrupt ones the stock header has. The next step is the exhaust gasket should be coated with a bead of copper silicon ( used the Loctite brand ) on both sides around each port. Leave for 20 - 30 minutes to skin before fitting everything up is the inside the trade hint I learnt. Done many this way and never had a leak even without re-tensioning. I apply this and then set to work cleaning the old gasket off the head with a scraper and then sanding smooth.

Now is also a good time to check the condition of the engine mount as this side is prone to breaking up from the heat of the exhaust. Fit the gasket after the 20-30 minutes are up and then the headers with the three bolts. Make sure that none of the other bolt holes are obscured in anyway by checking you can thread a bolt into each of them before proceeding any further. Even pays to run a tap through them if not in good condition. I found also that the bottom row of bolts in the middle can be very hard to get started as you cannot see the hole or the angle you have the bolts at. So the trick here is to thread them in so they are only just hanging in there with the washes sitting against the bolt heads. You can then just drop the intake in so it slides behind the very loose bolts. Thread in all the bolts loosely and then start tightening them from the centre outwards moving from one side to the other. With these headers I had to do more of them from underneath which made it more awkward. Go over them several times and torque up to 33 Nm or 24 ft. lbs.
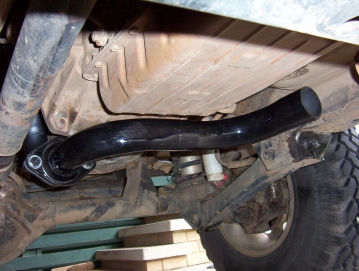
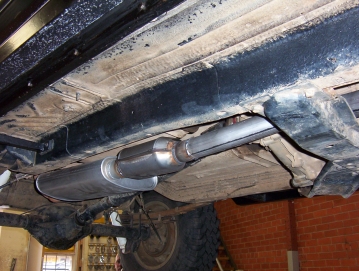
Reconnect all lines and cables etc and the pump and belt and so on. Also re-adjust the kick down or TV cable as covered here. I had cut away the exhaust system until the front of the muffler so I could fit the supplied S tube. I then drove to the local exhaust place here ( Exhaust Fix ) and had then fit a fully stainless steel cat ( not ceramic brick inside to crumble ) with a new muffler. Magnaflow make a really nice at stainless cat and muffler now a days. The original tail pipe was reused as was stainless steel and in good condition apart from some baked on mud which can be wire brushed off. The engine gives much better response down low and all through the rev band with a now lower tone without any drone.
Also it is worth erasing the old ECU or PCM memory.
When you start the engine it will be running off a set of pre-programmed tables that come with the PCM from the factory. When you get the engine up to operating temperature, the PCM will start to collect data for the “Adaptive Memory”. The PCM will collect data for Adaptive Memory for the first 50 Warm-up Cycles.
[Index]