EA Falcon Disc Brakes on a D44
This is just a quick write up to show mainly the differences to fitting the EA rear disc brakes to a D44 instead of a D35 which I covered in depth here.
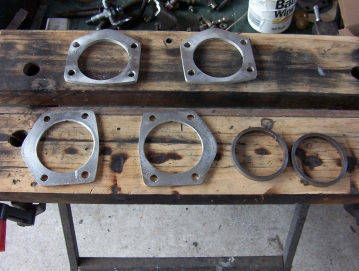
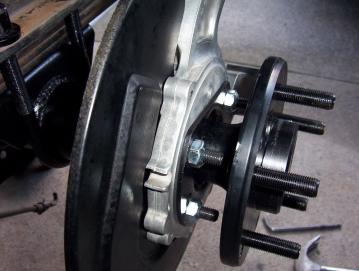
The Jeep axles sit out 11 mm further than the Falcon ones so the caliper mount must be spaced out around the same amount to keep the caliper centred over the rotor. I made mine from cutting out the centre of some caliper brackets I had lying around with one set machined down to get the correct overall thickness. Those with TJ's would be better of making a spacer like I shown in my D35 write up as have the same hole pattern as that and not the Ford like mine was. The centre hole was opened up to match the outside diameter of the axles seals. The other thing that has to be made is a spacer ring to keep the correct tension on the bearings. These are made to be the total thickness of the caliper spacers and brackets minus the thickness of the original drum backing plate. I just used some pipe that was machined down to the same outside diameter as the axle seals.
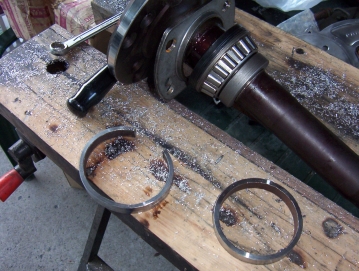
My bearing retainers will look different to most as they are from a Jeep Rubicon which uses the ZJ rear discs. When I ordered my new MJ D44 from Ryan in the USA, I got him to slip on some of these before pressing on the bearings as was thinking of running the ZJ brakes at the time. Now rather than pressing off the brand new bearings again to fit the bearing spacer rings, I came up with the idea of simply cutting them through with a hacksaw and pulling them open to slip over the axle shaft. They were then clamped closed again with a pipe wrench. They will be kept closed by the caliper bracket and spacers.
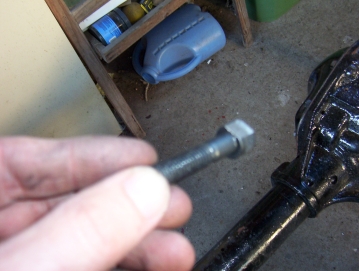
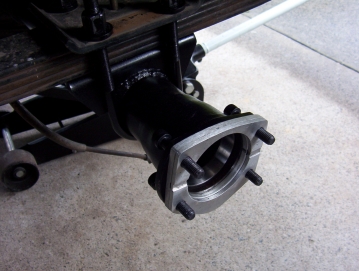
I used 12.9 grade cap screws and had to grind part of the head down to clear the axle tube. These were then put in place along with the spacers ready to accept the caliper bracket.
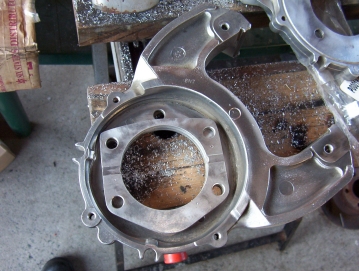
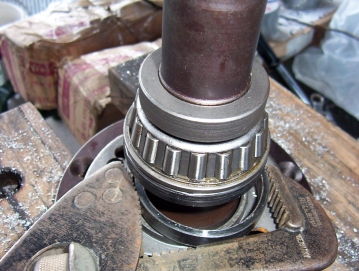
As my XJ D44 had the same axle flange hole pattern as the Ford but 90* off, I could re-use two of the old Ford holes and re-drilled the other two like shown. Once the caliper bracket was fitted along with the spacer plates behind it, the axles could be fitted. So the order is first the spacers, then the caliper bracket. For the axle you have bearing retainer, bearing, axle seal, bearing spacer rings and then bearing retainer plates.
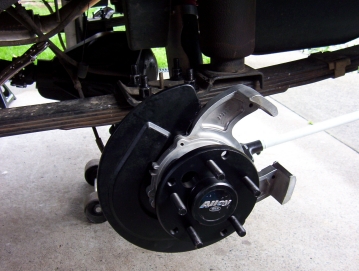
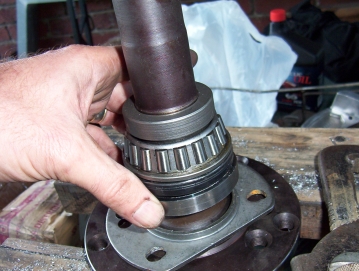
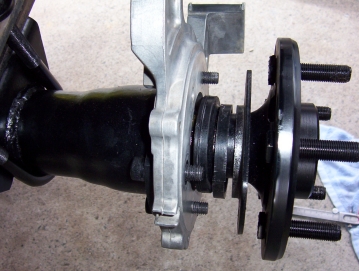
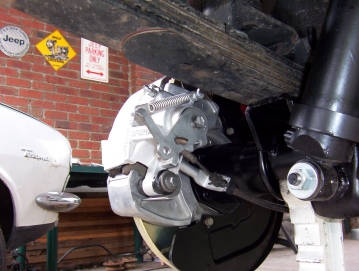
The whole lot is bolted down and then the dust shield can be added. I had the axle centre spigot turned down to suit the Ford rotor hole size which is 70.7 mm instead of the Jeeps 71.6 mm. Also as I have new CrMo Alloy USA axles which have a dual stud pattern, I had to remove a slight amount from the outside of the axle flange as well for the rotor to sit over.
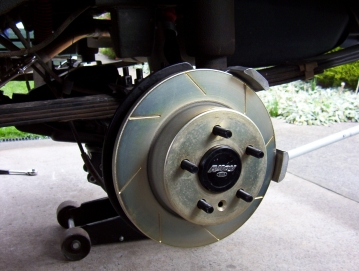
Also as I have new CrMo Alloy USA axles which have a dual stud pattern, I had to remove a slight amount from the outside of the axle flange as well for the rotor to sit over. I had the calipers fully overhauled starting with having the housing sandblasted and all new seals and boots etc fitted so they are as good and new.
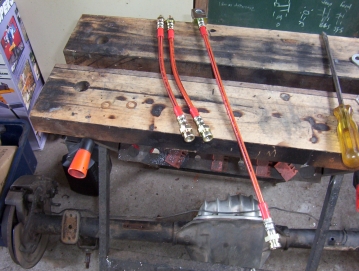
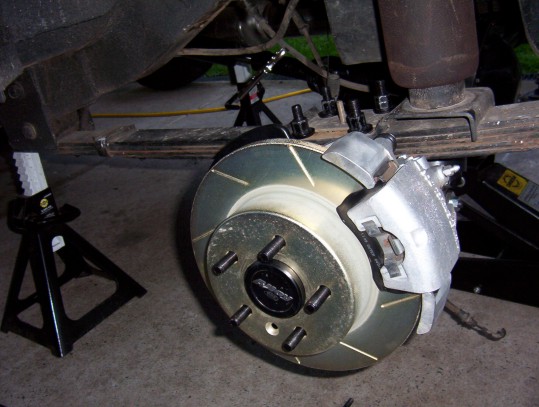
I used the hard lines off the same EA axle without alteration. The way I got around the Ford metric to Jeep imperial problem was to have a braided stainless steel flex line made with the metric tee piece on the axle terminate with a imperial end at the chassis. I also replace the hard lines to caliper with braided hoses too which just run standard Ford metric ends. The handbrakes cables were setup the same as the D35 write up using shortened EA Ford items. I had the new end stops fitted at a gym supply place as they use them at the end of the cables in home gyms.

This whole brake setup I will be selling soon too as I am developing a new brake kit for a company and need my axle to do the testing on. The wheels and near new MTR tyres are also up for sale. $100 a wheel and $200 a tyre.
[Index]