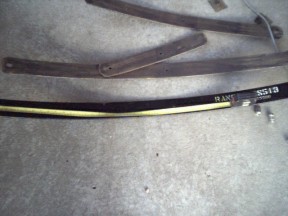
Rancho Add-a leaf
As some would already know, I built my trailer using upcountry springs and shocks but found after some long Outback touring and offroading that they started to sag as I carry the same weight as the rear axle of the XJ. I fitted a Rancho Add-a-leaf ( www.gorancho.com ) to raise the trailer to gain some more up-travel and increase the spring rate a bit. These instructions are the same as for your XJ and any differences are mentioned so they can be used. You can also look at the adding a rear spacer page that was fitted to my XJ as a lot of it the same and a alternative if you need a small lift without a spring rate change. Add-a-leaves are a good idea if your springs aren't past their use by date and also if you live in an area where road salting is done as many bolts get broken as the nut inside the frame is seized and often break the welds holding it and a large hole must be drilled under the seat on top of the frame to access it. The main leaf is left in place doing it the way shown.
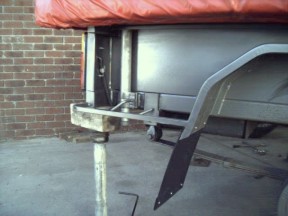
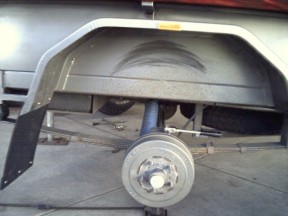
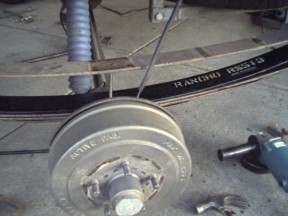
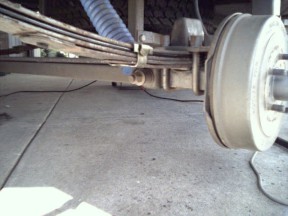
Measure the left and right side and write them down so you can compare after it is finished. Start by jacking up the car once you have chocked the front wheels and place stands under the towbar if fitted or under the frame as shown. Next place a couple of bottle jacks under the axle without using blocks if possible so you can then lower the axle as low as possible when the wheels are removed. Remove the wheels and then the 'U' bolts and lower the axle making sure that all the tension is out of the springs and you have enough room to put vice-grips on the centre bolt head under the spring. You may have to remove the shocks from the axle stud if they prevent you from doing this.
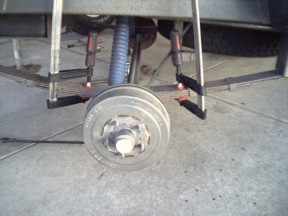
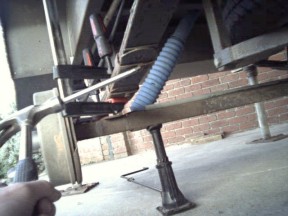
Make sure that you place clamps over the springs as shown before removing the centre bolt otherwise they could suddenly fly apart when the bolt is removed. It is a good idea to let the bolt rotate a few times while un-doing the nut to free it up before using vice grips on the bottom bolt to stop it from turning while removing the nut. Keep the clamps on while taking off the leaf clamps using a cold chisel and hammer as shown.
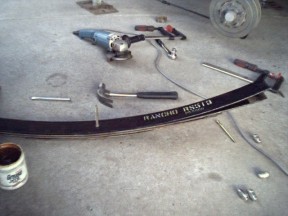
You can now remove all but the main leaf and give them a good clean and a light smear of grease to keep them quiet and they will slide better. Measure the leaves putting the longer end to the rear and replace if worn the friction pads at the end of the leaves. Check the new centre bolt head that it is not too thick and bottoms on the axle in the middle of the spring perch with some of the head still exposed. I cut the head to half it's thickness otherwise when you replace the springs you wont be able to sit the leaves on the spring perch because it will be resting on the bolt head. Then by starting with the shortest, put in the centre bolt and add the next longest until you add the new add-a leaf last of all. Make sure that the hole in this leaf is the same size and if it is bigger, add a sleeve which can be cut from some tube. There is usually a bit more curve in one more than the other so add the one with more curve to the side that was lower when you measured earlier.
Lift the assembly onto the spring perch lining up the bolt with the main leaf and then jack the axle up until the springs start to compress. Then spin the nut down and hold the top of the bolt with vice-grips and then tighten the nut. Cut off the excess and then tighten to 20 ft-lbs for the 5/16" or 32 ft-lbs for the 3/8" bolt if you have a torque wrench.

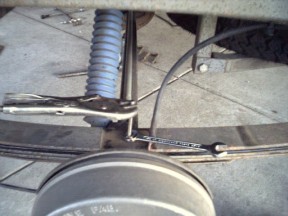
Replace the 'U' bolts making sure you have enough thread ( torque to: 28-32 ft-lbs for 3/8", 30-35 ft-lbs for 7/16" ) and then the spring clamps can be added. I chisel off a bit from the bottom of the friction pad so the clamp has a good place to locate. Place the bottom half of the clamp on and slide the top over which might need the use of a clamp to bring the ends close enough before you can do this and then use a clamp to hold it place. Using vice-grips on the end, bend them down as far as you can so that you get a nice round bend and not a sharp one . Then tap the end home using a hammer making sure that the bend is left rounded as shown.
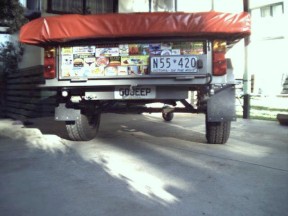
I normally do both at once but thought I would show the difference with one side done as on the left above. The right shows it finished and I gained 1 1/2" of height and is the same as other XJ's I have used this kit on. After 100 miles make sure you re-torque the 'U' bolts because they will settle and loosen.
If you measure from the wheel centre to the bottom of the flare on your XJ you will see how much you gained. Stock is 17 1/2" inches at the front and 17" at the rear. If you have removed your flares you can then measure from the flat round bumpstop area inside at the bottom of the coil spring up to the top of the spring isolator, where it meets the bottom of spring tower at the front. Front stock is 11 1/4" this way. For the rear you can measure from the top of the axle to the bottom of the frame rail, right above the bump stop. Stock is 6 1/4" for the D35 and 6" for the 8.25 and D44.
[Index]