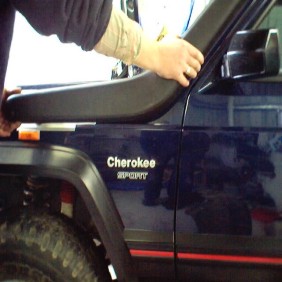
Airflow Snorkel Install
This shows what is involved in fitting a Airflow snorkel that are made here in Australia. This is the only one made in competition to the Safari/ARB snorkel for petrol XJ's, ( see diesel here ). The big difference with this one is that is has far fewer bends than the Safari which looses all its ram effect due to them and the distance from the head. The Safari has two 45 and seven 90 degree bends and about 6 feet of flex hose before reaching the airbox. By contrast the Airflow has two 45 and three 90 degree bends and just one foot of flex hose! Another advantage is the fact it sits higher up on the front guard above the crease line which means those fitting or have fitted Bushwacker cut out flares will not have to cut a huge part of it away to clear the snorkel. Those with the small indicator light or the guard will not have move it and have one further forward than the other side. I think they are a better design as tests on airflow on both have shown. They even found that the stock front intake hole only utilized half of the filter as a vortex was created directly above the hole. By running it in from the rear tests showed that the whole of the filter was used and increased flow and gave a longer service life to the filter as well.
Now these are sold through Opposite
Lock stores and 4WD
Systems here in Australia amongst others though not mentioned on either on their sites. The part number is
S34. You can also deal directly with
the factory or ring them on ( 613 ) 5987 3733 as are available for
$349 AUD or $255 USD as of February 2006. This is the only way at the moment
those overseas but if in Canada and USA you can buy them through
www.dpgoffroad.com now. Freight to countries
vary according to where you are from $100 USD to $180 USD they have told me and
take 4-5 days. In New Zealand this is the place that distributes them throughout
so contacting them will get you a shop close by. Bill Ross at B.C Direct, Work:
6433418107, 2/ 60 Hayton rd Sockburn Christchurch New Zealand. They have other
distributors in Taiwan, France etc now so will add that list as I get the
information but otherwise contact them for the details.
THIS SNORKEL WILL FIT NON ABS CHEROKEE'S ONLY
These are new instructions in case you have seen this write up before. The reason is that I worked along with Airflow to have the designed changed so that the outlet into the engine bay is now earlier so will clear the water bottle inside the guard without the need to relocated it. Those now however with Cherokee's older than 1995 will have to install the large inner guard washer bottle from 95 on or re-fit their old one some where else. Using a universal one mounted against the master cylinder will also work. You will find also the instructions supplied with the kit are similar to these written here as I wrote those as well.
|
XREF S34 |
Skl – Chrysler Jeep Cherokee |
|
|
A SP081 |
Jeep Snorkel |
1 |
|
B SK64 |
Air Ram 76 mm |
1 |
|
C SP015 |
76 mm Hose TPR |
550 mm |
|
D SP019 |
Hose Clamp 60/80 mm |
2 |
|
E SK134 |
Jeep Template & Instruction |
1 |
|
F SP002 |
Welded Jeep U/B |
1 |
|
G SK07 |
Bolt Kit ( 4 bolt ) |
1 |
|
H SP034 |
A pillar Bkt Stainless Steel |
1 |
|
I SP023 |
Spring Washer 6 mm Z/P |
1 |
|
J SP026 |
Screw Plug Nylon |
2 |
|
K SP025 |
Panel Washer 6 mm x 70 mm xl 6g |
3 |
|
L SP024 |
Guard Bolt M6 x 12 mm Hex |
4 |
|
M SP029 |
Self Tap Screw 12g x 25 mm Z/P |
2 |
|
N SP170 |
Plastic Bag 73 x 115 mm |
1 |
Above is what is included in the kit. A elbow is often included as well and was only used when the outlet used to be further forward before I got them to shift it back to clear the inner guard washer bottle. I had told them to leave it out but they have continued to add it so it is just a bonus The only thing not supplied in the kit is the Polyurethane sealant like Sikaflex-227 which will be required.
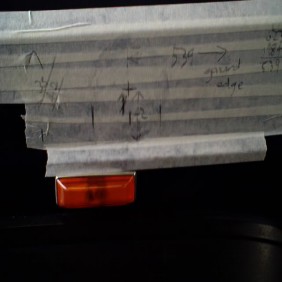
First check off all items against snorkel check list. Then remove guard liner and front rubber. Remove washer bottle to give more access room if you fill you need it. It will be refitted later on. Tape the template supplied together accurately on gridline 17. Then cut down gridline 28 to the mark shown on the template. Place the Airflow template supplied on the guard, ensuring the guard crease lines are followed exactly. Top guard edge line is a guide only as it will vary slightly between pre and post 1997 Cherokee’s. The whole area is then masked before drilling to help prevent paint burn.
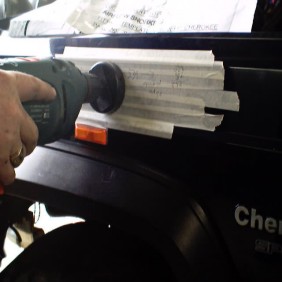
Pilot drill locating holes as indicated. Then drill the 8mm holes being careful of any wires or other obstructions under the inner guard. Cut harness ties and lift out of the way on inner guard. Drill the 76mm hole using a hole cutter on a slight downward angle. You will be going through three sections: the outer guard, inner cowl drain channel and the inner guard.
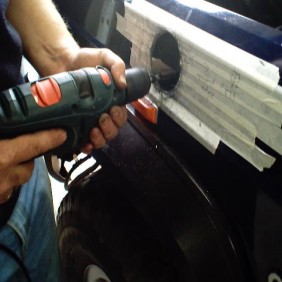
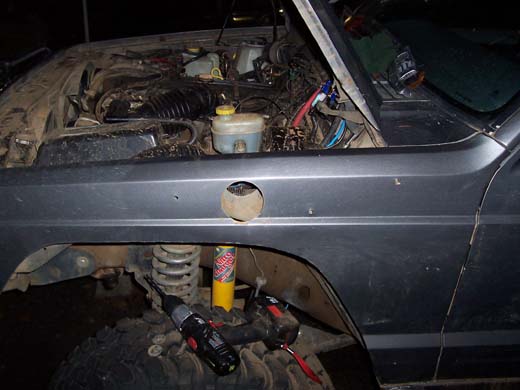
A small grindstone in the drill can be used to clean up the hole. So this above is what you have with all the guard holes drilled as shown on Tim Boone's XJ from the PNW Jeep Club.
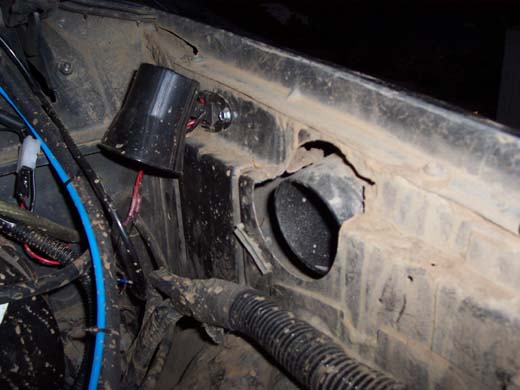
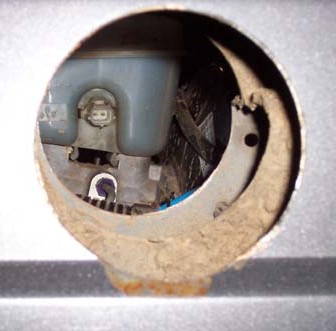
This shot shows the completed hole all the way through the guard with the snorkel temporarily in place. Remove the airbox so the modifications can begin on that.
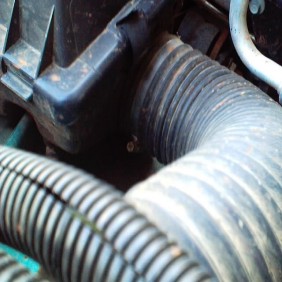
It is a tight fit but you can just fit the hose into the back of the airbox as shown. The adaptor provided needs to be fitted to the top right just below the filter which is where it steps out as you can see above. Rivet it in place through the ears along with the polyurethane to seal it. They may have to be trimmed slightly to fit correctly. The original hole in the front needs to be sealed up but nothing is provided so a scrap piece of sheet steel was cut and glued in from the inside with polyurethane. Also it can be sealed with the a piece of the plastic cut from the old snout off the airbox it you have the one with the longer section on it. Next is to file down all exposed burrs and paint all exposed metal surfaces.
The next page deals with the airbox modifications and the A pillar bracket that supports the top.
[Index]