
Drum brake overhaul
The rear drum brakes are pretty easy to overhaul yourself and I used no special tools at all. It is always a good idea to do one side at a time if possible so you can reference the other side if needed. The only thing you will have to check is if your drums need machining which you will know by a lip on the edge or any heat spots or scoring.
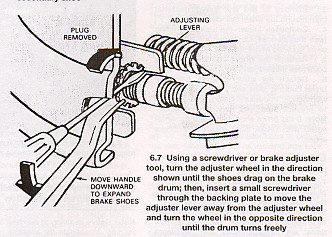
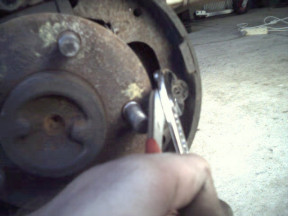
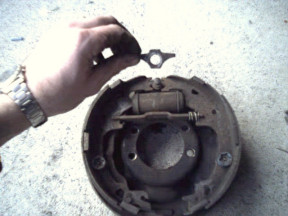
The diagram is the opposite side to the photos shown so keep that in mind when referring to it. It might be necessary to back off the adjusters like shown above to get the drums off if they are stuck but try hitting around the centre of the drum first with a hammer to loosen the drum in case it has rusted to the centre of the axle. Also back off the handbrake cable to make it easier.
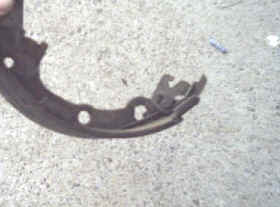
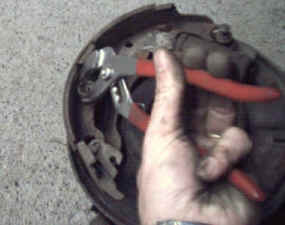
This is the time to check the shoe thickness and if there is less than 1/16" of the lining left ( above the rivets if there or the shoe if not ) then they should be replaced. Start by removing the spring that holds the shoes against the adjuster at the bottom first using channel locks as shown. Screwing the adjuster right in first will make this easier.
Remove the two upper retracting springs next along with the self-adjusting cable. Some will have a stud on the upper part of the shoe with a clip and spring washer under it and that can be levered off with a screw driver. The shoe hold down springs can be removed by gripping the top cup with channel locks and fully compressing the spring and then turning the centre pin with your other hand from behind the backing plate 90* to release it.
After removing the parking brake link you can replace the wheel cylinder if it shows to be leaking after pulling back the rubber boots. The areas arrowed are where the shoes rest on the backing plate and you can put a little high temperature grease to give a smoother operation. Assembly can now start with adding the adjusting lever and spring and lever as above. Remember that the primary shoe ( the one with less friction material ) is mounted toward the front of the car.
Add the shoe to the backing plate using the hold down spring. Before adding the second thicker rear shoe, hook in the handbrake cable and make sure that you have the parking brake link ready along with it's spring which fits on the opposite side to the shoe with the adjusting lever. Make sure that this link along with wheel cylinder push rods are in there slots. Once in place the anchor plate fits over the anchor pin as shown.
[Index]