EXTERIOR IDEAS
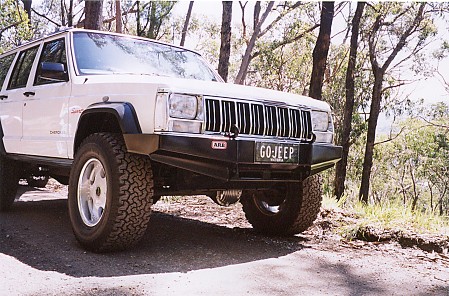
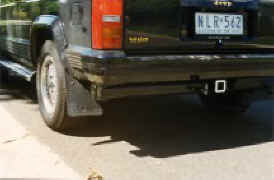
ARB Custom Bumper
The bumper was made from an ARB 80 series Landcruiser bullbar that had the top cut off and cut and shortened to fit. I have done one containing a type 3 class hitch built in as well from an XJ bullbar. To see the full story then go to here.
Custom ARB rear bumper
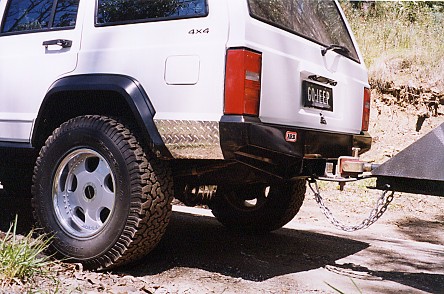
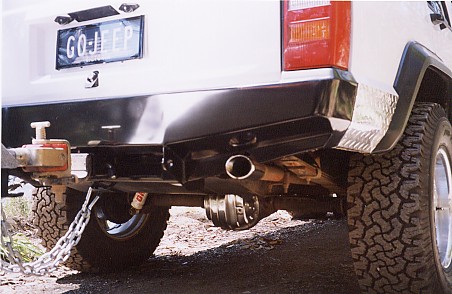
To match the front ARB bumper I decided to make a matching one for the rear as well. I started with the same bullbar but this one required a lot more work to follow the body line. It also contains a class 3 hitch to which it was attached. To see the full story go to here.
Cowl Bonnet
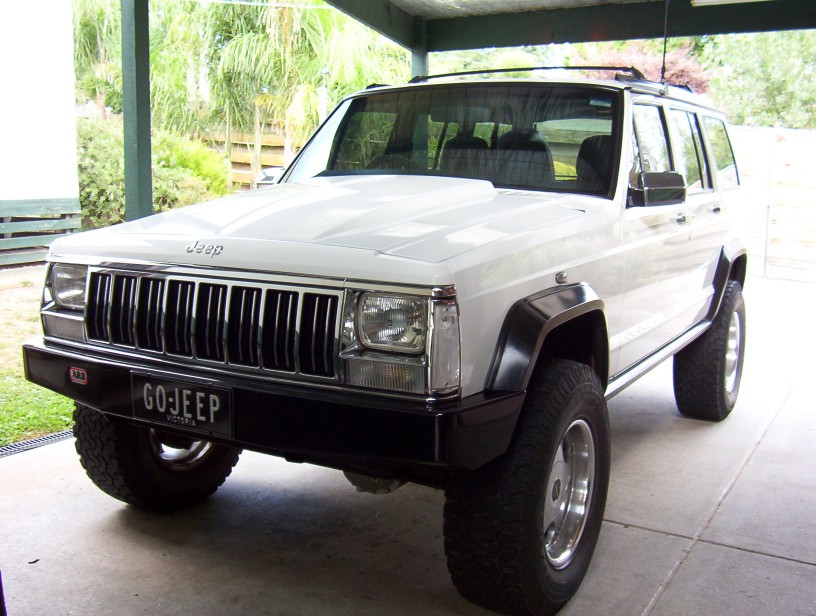

To further improve engine cooling a all steel replacement bonnet was fitted. It vents at the back of it letting hot air out when four wheel driving but draws cold air in at road speeds. For all the details on it see my write up here on it.
Number plate trim & LED's
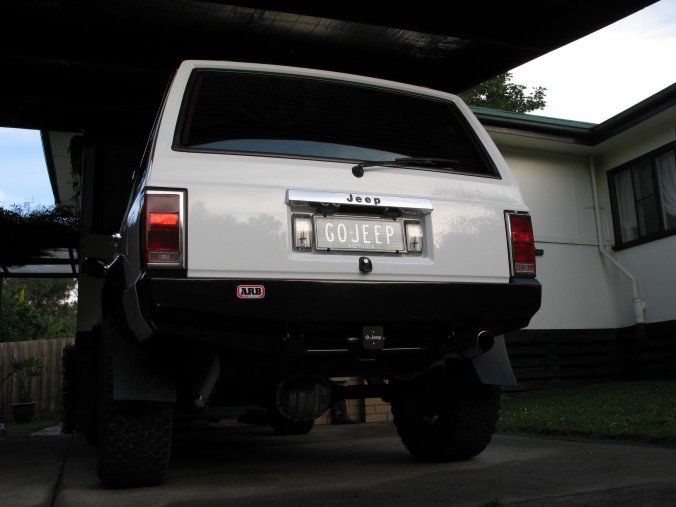

Just another little effort to make
it a bit different. I have added a chrome license plate trim that came off a XJ
Wagoneer. A big thanks must go out to John Herrick in Seattle for that present.
![]() I then lit up the
number plate with a couple of LED's from Hella ( #95951040 ).
I then lit up the
number plate with a couple of LED's from Hella ( #95951040 ).
Clear Lenses
![]()
![]()
Most new cars and 4wd's in Australia have clear lenses and liked the look of them. The clear indicators come from USA XJ's and the corner ones are available from Procarparts on the web and when I bought them you could get them at this link, ( http://store.yahoo.com/procarparts/87jeepchercl.html ) which was much cheaper than other links on the same site, ( $29.95 )! Many thanks to Bill from Kansas City for sending them over to me.
Bulb holder painted white Halfway there!
![]()
In Australia the corner ones are not wired and we have indicators only below the headlights and our parkers in the headlights. I decided to wire the corner ones as parkers and painted whiteout on the top half of the globe holder so it blended in when looking through the lens. The indicators were fitted with amber bulbs ( Part No. 1157NA ) and if you use the corner ones as indicators as well then use amber bulbs there to, ( Part No.194NA ).
I have changed the side markers to clear as well and have used ones from a 2001 Holden ( Opel ) Astra as they looked even better than what was in there. They proved very easy to fit requiring only a bit of filing using a square file.
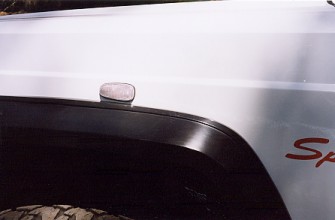
The large square ( 28 x 23 mm ) and the two small holes are what you find after you simply grab the old side marker and pull it free from the outside with no need at all to access the back. The left small square was filed to 7 mm square and the right rectangle ends up 9.5 mm long and 8 mm high. The old globe holder was cut off and wires soldered to the new holders pins directly. The wedge globes of 5 watt are needed if not originally in the old ones which mine weren't. Twist the new holder into the back of the lens and hinge the left side in first and then push in the right side until it clicks into place. They will flash orange as there is a amber disc inside the lens.
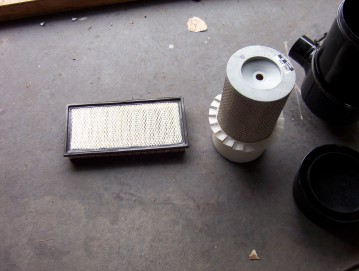
Canister Air filter
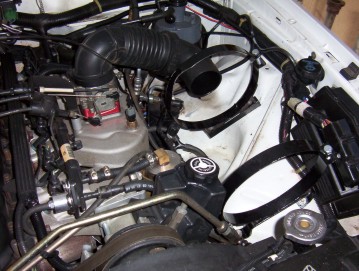
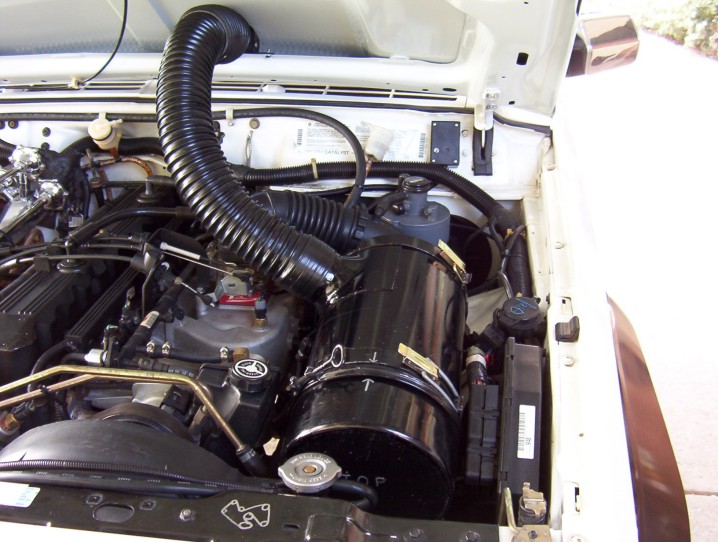
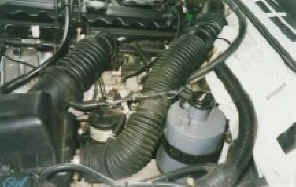
I have been wanting to change my air filter for many years as it is a limiting factor in performance once you have opened up the intake and exhaust. I looked into a K&N filter but they have a 1/3 less filter area but still claim more flow which means it has bigger pores which lets small dust particles through as laboratory tests shown on the web have proven. Any filter you have to oil you run a risk of too much oil will hurt performance and to little will cost your engine. So a bigger paper filter is the way to go Well the one I have chosen is way bigger in size as this photo clearly shows at 3.66 times bigger than stock. See the whole write up here on it. I have fitted the intake to my bonnet cowl where it can draw fresh air.
Shock absorber mounts
Stock 2" Shorter
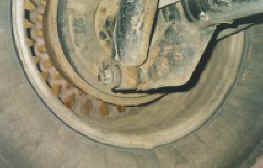
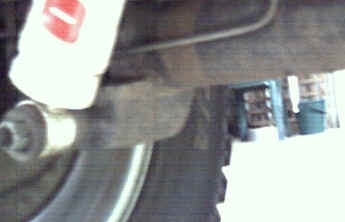
2" Lower 3/4" Lower
Raising the rear shock mounts for greater clearance and more down travel is possible if you have lowered the bump-stops to clear the body work after fitting larger tyres. I raised the mounts 2", the same amount I dropped the bump-stops by inserting 2" square tubing in between them and the frame, ( you will need to bend the front of the tube slightly with a large hammer so it will sit flat ). I also lowered the top mount a further 3/4" because the replacement shocks had that amount of extra compression than stock. This netted me 2 3/4" of extra down travel.
3"higher
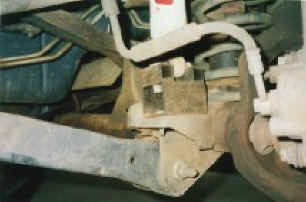
The fronts were also raised for the same reasons plus in the interests of safety where too much up travel can make the car unstable in a sudden swerve. The bump-stops were raised 2 1/2" in this instance because the front shocks had 1/2" more compression than stock. This was simply done by welding on some tube with a 1/4" plate on top. You can also use hockey pucks just glued into place with good success.
A sketch to make the alterations to the shock mounts can be seen here and a write up on it and all the spacers is in the how to section.
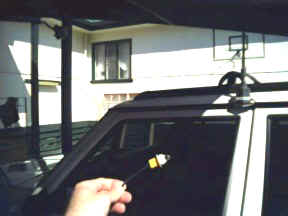
Air intake diversion hose
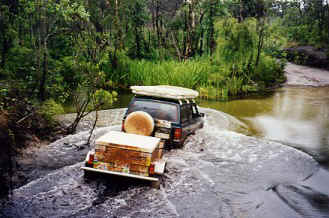
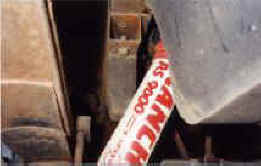
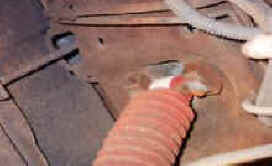
I have a diversion hose for the intake which I use during deep river crossings. This is blocked with a tennis ball the rest of the time so I don't suck hot under bonnet air. When I am about to cross a deep river I put a blind (small tarp) over the front of the car and then block the front of the air box and pull the tennis ball out so that all the air is drawn through the hose at the highest point under the bonnet. The blind on the front creates an air pocket while you keep a steady pace though the river. If the water ever gets this high then your motor will most likely have stopped anyway with the electric's underwater first. I have used this technique with water up to the windscreen ( as in the photo above ) without any problems.
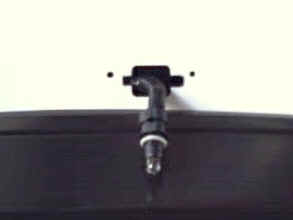
Bonnet gas strut
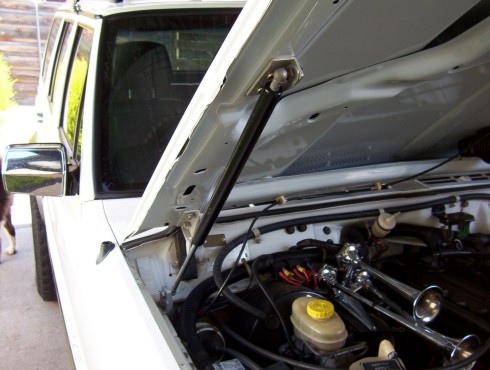
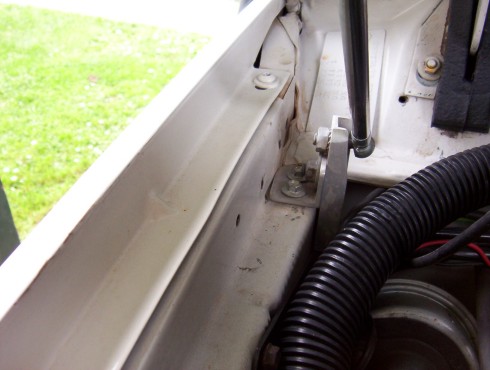
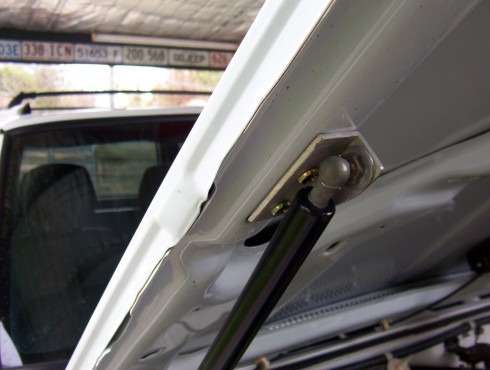
The gas strut is one off the rear hatch and does a great job of lifting the bonnet hands free, which is great when the bonnet is too hot to touch. The spring that lifts the bonnet a couple of inches after release, is held down with a nylon tie on the same side as the gas strut to reduce the pressure on the release cable. The bottom mount is 1 1/4" from the edge of firewall seam and 1 1/4" above. The upper mount on the bonnet is over the top of the second oval hole or 1' 10" from the bottom of the bonnet. In LHD's it is usually mounted on the left side of the engine bay.
Swing-away carriers
Tyre only Tyre and Jerry can
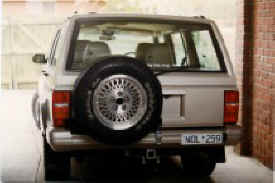
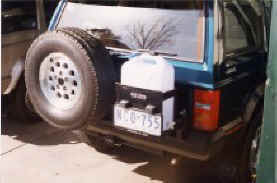
This was constructed using the hitch only for support by extending the hitch out to the side and then a bearing housing was placed above this inside the bumper. The hinge was a stub axle for a trailer and its bearings which makes for a very strong and rattle free pivot. It then comes through the bumper end cap so no departure angle is lost. The arm is made from 75x50x3 RHS and an over-centre catch to close it. They have proven to be very reliable over thousands of corrugations and desert crossings. One even survived a roll over and still worked perfectly, the same could not be said for the rest of the car however which was written off.
Swing-away bike rack
Open Closed
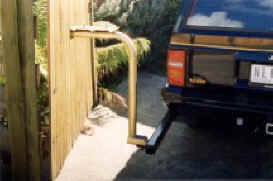
This was made so a bike rack could be swung out of the way without unloading the bikes to gain access to the hatch. The extension which was welded to the side of the hitch was made from 65x65x6 RHS as was the arm. The hinge is simply two pieces of 8 mm flat welded to the extension and the arm had a thick walled pipe inserted and welded in place. A 1/2" grade 8 bolt passed through upper plate then the pipe inside the end of the arm before exiting out the lower plate where a nyloc nut kept tension.
Diff and ratio change
3.55 and open out 4.11 and True-Trac in
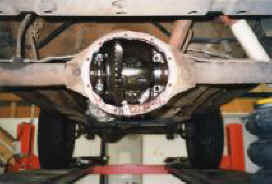

I have just installed a set of 4.11 gears with Detroit True-trac differentials front and rear. I bought all these parts and more when I was in the U.S. I am very happy with the performance the ratio change has given which resulted in a gain of 14 kph. on a hill I had been testing on before and after the swap. I had also done a test on the diff change with a grassy bank that I could not get up on a angle in 2wd. without speed, but after the change I got up in 2wd. slowly even though it was raining heavily at the time. In some steep sand dunes recently it was great to see 4 roaster tails coming up from the wheels. It has not effected my on road driving at all without the under steer out of sharp corners that other lockers give. I have notice a great increase in taking off from the lights or around corners from a stand still.
Alloy Differential covers
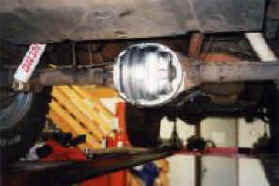
These covers are forged which are stronger than steel and much stronger than cast. They reduce the temperature of the oil due to the fins which increases the surface area that the air can cool. Aluminium is also a better conductor of heat which effects the amount of heat transferred and I have noticed a great deal of difference. On a recent trip with my mates XJ along as well, I could hold my hand on his cover but it was not possible on mine as it radiated more heat outwards than the stock steel ones. There was a test comparison done in a 4wd magazine and there was a 60*F difference in temperature between aluminium covers and steel ones. They also found that chrome covers retained more heat than even stock covers. Stainless steel covers are not recommended either as they are a poor conductor of heat and that's why you will often find aluminium or copper bottoms on sauce pans that are made from it. The rear cover holds about 50% more oil as well which well help with the life a the diff when towing and 4 wheel driving in the heat. The rear normally runs hotter than the front in 4wd's because it does the bulk of the work as well as getting the heated air from the motor and exhaust etc. There is also a the bonus of a drain plug and a screw in plug for the filler as well. I have also glued on a magnet to the drain plug and collected a metallic sludge 1/8" thick in the first 600 miles of breaking in the new gears and diffs. I think it is better than it circulating around and causing more wear. The front cover has been redesigned at my request to have a drain plug added as well as adding a raised fill plug so the right oil level can be reached for the hi-pinion or reverse cut Dana 30's found on our XJ's and Wrangler's. You can contact the manufacturer direct toll free on 800-MR-CONCEPT or at http://mrconcept.com/ . The front is part number C.P. 5058 for the Dana 30 and the rear for a Dana 35 is C.P. 5062. I also ordered them bright burnished for the polished look instead of natural cast. Fitting and changing the diff oil see here for the write up.
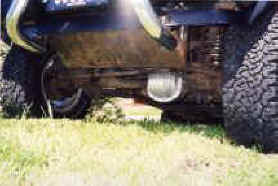
Heat Shields
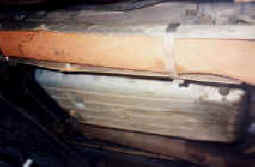

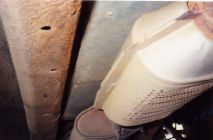
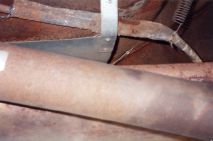
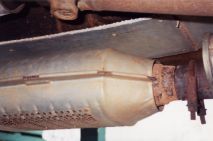
The floor tends to get very hot on long trips so I have added a strip of galvanised sheet above the cat and muffler which is riveted in place to the ribs and a nuts used as spacers else where that the rivet passes through. It is important to have the gap in between the shield and the floor to let the air pass through. You can see where the rear of the shield the support straps hold the handbrake cable out of the way as well. Above the cat I also sandwiched some asbestos matting in between two layers. I also have some aluminium that I rolled over some pipe first then put over the exhaust pipe to keep the heat from the floor as well as the side and front of the auto. I used a circle of rivets to make the gap for these and then put a hose clamp over the top to hold the shield in place.
[Index]