Raised Swaybar brackets for OTK Steering
The write up shows how to make extended axle swaybar brackets to clear the tie rod and drag link for when a OTK ( Over The Knuckle ) steering is used.
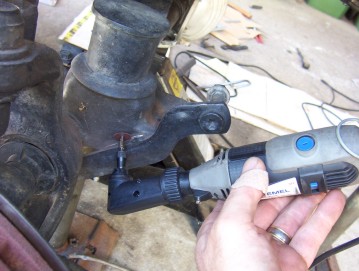
Start by removing the old brackets. I cut what welds I could with a 5" grinder with a cut off wheel but to do the weld shown, I use a Dremel with a right angle adaptor.
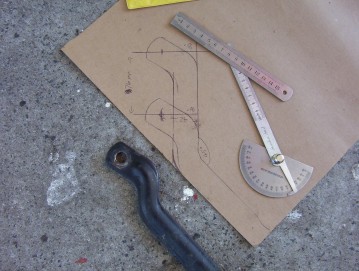
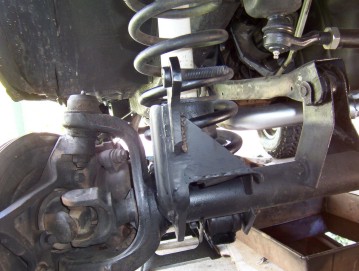
Using the old bracket as a template, I extended it to give a 3" rise over stock. Then checked it against one not removed yet so I could work out what angle it needed to sit at.
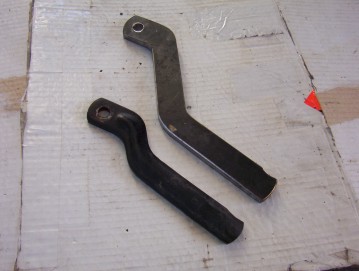
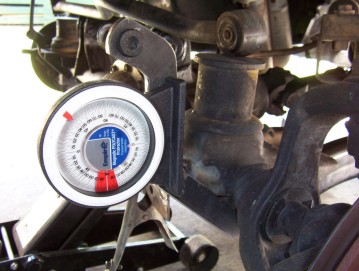
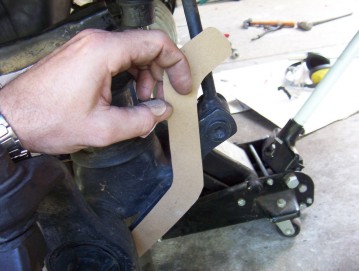
The new bracket was cut from 10 mm flat to give the required strength. This was completely cut out using a 9" cut off grinder and the inside corners with the Dremel so that they could be made rounded. Using a angle finder to set the bracket up correctly. I found that running it at the same angle as the coil springs gave the best alignment for my control arm and swaybar setup.
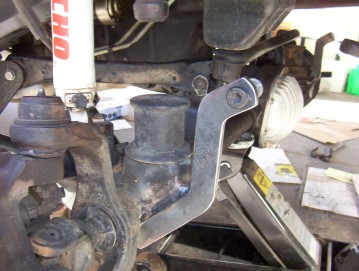
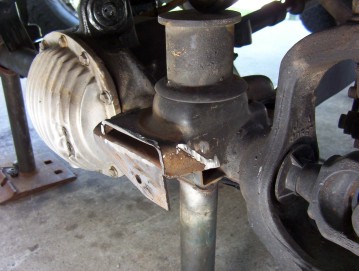
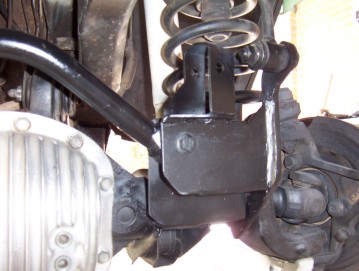
The bracket was welded into place in the same spots as before after hammering in the link stud again. Remember that it does not screw in or out even though it has a Torx head. It is the same as a wheel stud with a knurled shoulder the grips inside the 1/2" hole to stop it from spinning. What is not shown here was a triangle gusset that went the full width of the coil mount an up as high to give sideways stability on the drivers side and a gusset come trackbar mount that secured the passenger side. Also the drivers side needed some clearance and then re-enforcement once the OTK steering was in place to get full wheel turning.

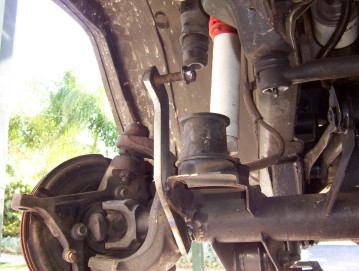
The clickable thumbnail above is the template I used to make the extended swaybar bracket. It has a reference measurement on it to make sure it scales up correctly once printed out. The other photo shows the gusset come trackbar mount covered on that link that secures the passenger side.
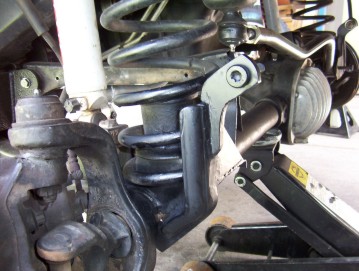
Shown here was a triangle gusset that went the full width of the coil mount an up as high to give sideways stability on the drivers side. Also the drivers side ( don't forget you are looking at a RHD ) needed some clearance and then re-enforcement once the OTK steering was in place to get full wheel turning. What I used was the old swaybar bracket which I bent so it could sit at the angle shown by cutting in some slots in the back of the bracket just enough to allow me to bend it and then weld over them again. It will be a bit of trail and error working out exactly how much clearance you need and can only be done once you have the OTK steering links all in place. You may not even need to do this if you have washes behind the steering stops to stop your tyres rubbing on the lower control arms. I have since found a much better way of getting all the clearance I need and a 38% bigger tie rod at the same time by using my old drag link as shown here.
[Index]