Diesel Snorkel Install
This install came about after spending a day at the Airflow factory working on the petrol Cherokee snorkel so you would no longer need to move the washer bottle from inside the guard to the engine bay after fitting a snorkel. Once I had worked that out with them I asked if we could try some of their other snorkels to see if there was one that could be used on the right hand side of the Jeep as well for all the diesel Cherokee owners. Using my Jeep we then went through them until we found one that would do the job nicely. So then set about making a guard template for it and working out how best it could be run to the airbox. As I didn't have a diesel I put the call out to diesel owners on the Ausjeep forum and Roger ( Kyro ) and Ian ( Mountainman ) came to the party with photos and ideas and together with Airflow we came up with a workable solution. Then it had to be tried out and Roger was game enough to be the guinea pig. So here is his story on how it all went. ( Gojeep )
Roger's diesel xj snorkel story.
First I'd like to thanks the guys involved in
getting this off the ground....THANK YOU!
Where do I start? From the sleepless night before as I was a bit scared to drill
holes in my Baby ( the jeep ).
After dropping the wife at work and tell her that it would be done by the time I
had to pick her up and the look on her face said it all ( no faith at all ).
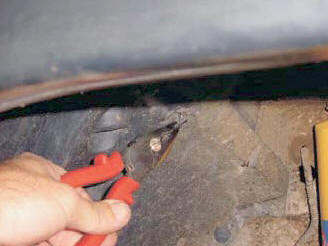
So after backing the jeep into the shed, it was time to start pulling it down ready for the template to go on. The first was to get those cheeky little push in clips out (a pare of pliers did the job) There is also 1 or 2 clips over the bolts that hold the flares on. ( You will find it easy to work in there with the wheel off. Gojeep )
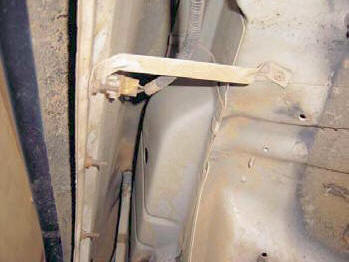
Once the splash guard is off you can get a better
look at what is needed to be cut away for the snorkel.
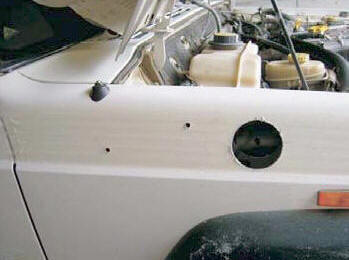
Now it time to tape the side of the outer panel so not to damage the paint when
drilling the 76mm hole. Then once the tape is on the panel take out your
template and tape it to the panel following the guide lines on the template.
Then it’s time to drill! This took a lot of stop and starting to get the first
hole done and then I still used the smallest drill bit I could find just in case
I had to fill them back up again. But all was good and the template was easy to
follow, so then it was time to use the right size drill bits for the 8mm holes.
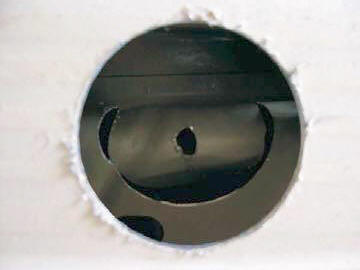
Now for the 76mm hole saw, this is scary stuff and takes some doing but once I
started there was no going back but I must say that noise of it cutting into my
jeep I will never forget. Hahaha.
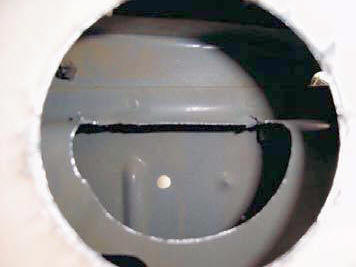
Once you are through the outer skin I followed it into the cowling drain channel as you will need to remove a lot of it for the snorkel to work.
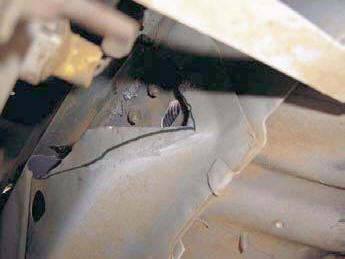
You can see the line in the picture below that I ended up cutting that out
to. I used an angle grinder to remove the extra from the drainage channel but it
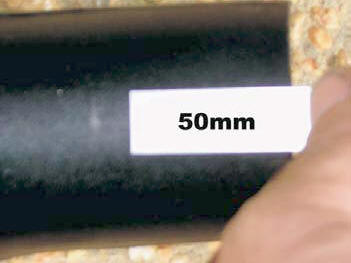
is very tight so please be careful. Next step after
this was to cut 50mm off the end of the snorkel so the snorkel can turn inside
the guard. Then I used a Dremel to make the 76mm hole to the right size by just
doing a bit then checking it with the snorkel that you just cut the end off .
[Index]