Transfercase Chain replacement
This write up shows an over view of replacing a chain in a 242 New Venture transfercase. The system is the same for doing a 231 NV case as well. The symptoms given by most chains that need replacing is that a rattling noise is heard when in low range 4wd. The chain can droop far enough with the stretching over years that it will contact the bottom of the case and is what you hear.
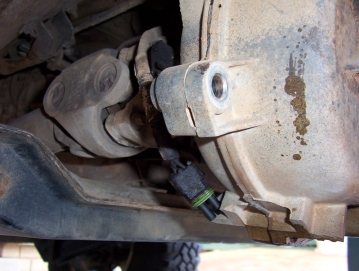
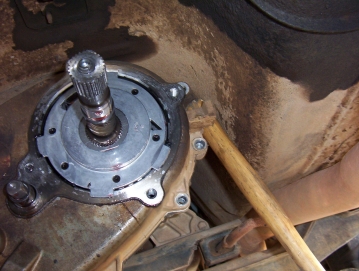
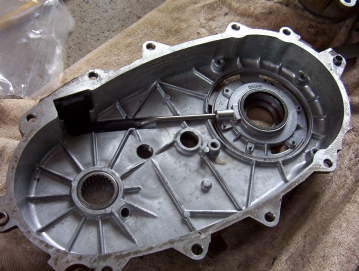
First thing to do after driveshaft removal is remove the tail cone, or in this case, seal housing that was part of a SYE conversion. Unplug the speedo drive as well and remove it. You will have to remove the C clip holding the bearing housing in place. Do yourself a favour and make sure you have the proper flat nosed C clip pliers as the pointy nosed cur clip pliers are just too hard to use. Next is too remove the bolts and the housing by using a large flat screw driver under the protrusions like shown. You do not want to drive it in other areas as will damaged the sealing surface.
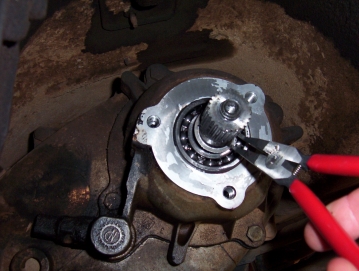
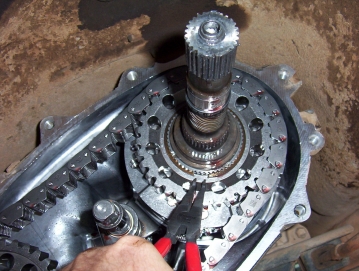
This is what you will be faced with showing the oil pump. Leave it in place. You can now remove all the bolts holding the split case together. One of the bolts near the middle of the top has a 12 point head that a 10 mm 12 point socket will fit. To split the case drive a screwdriver into the slot shown above.
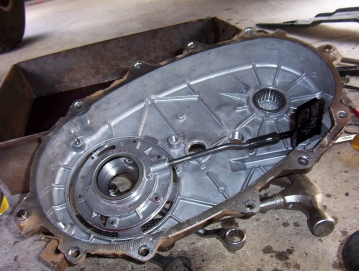
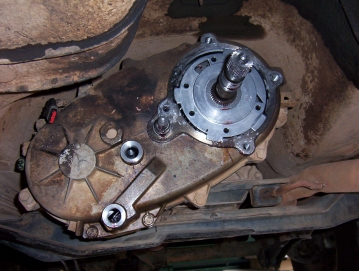
There is another slot to drive a screw driver at the other end as well but you cannot use it while the transfercase is in place, so I levered with a hammer handle as shown at this end. Once the case has loosened, you pull it back evenly letting the oil pump slide off its spline. Keep a hold of it so it does not fall to the ground. The oil pickup will also come off with it on the inside.
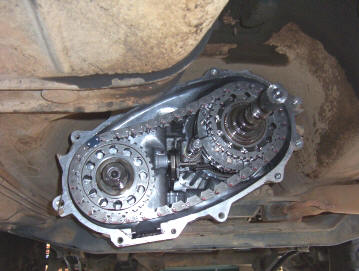
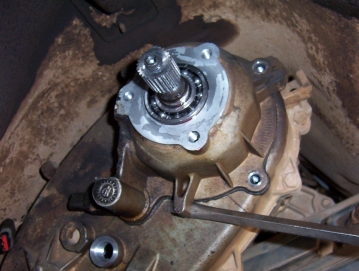
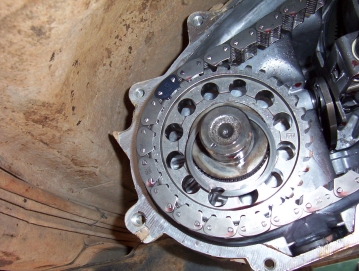
This is what you will be viewed with after the case is split. Where the oil pickup sat at the bottom of the case, you will also find a washer shaped magnet. Make sure you clean this well and replace straight away so you don't forget to do it later. Seen it happen too many times when everything is back together and someone is left wondering what this left over washer is for.
Most people now remove the C clip from the upper rear output shaft which is what you would also do on a heavy duty SYE conversion on a 231 transfercase. But I find it easier to remove the C clip from the lower front output shaft instead as this shaft will stay in place.
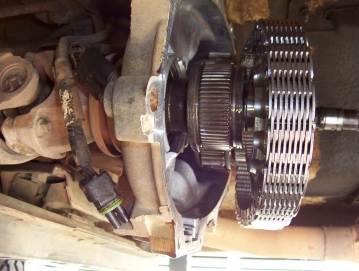
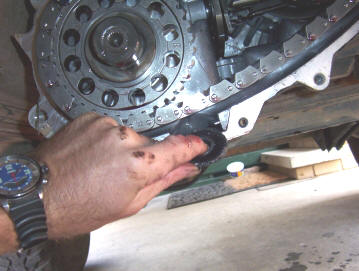
The bottom pulley will just slide off and the chain can be removed and replaced with the new one. Clean all the surfaces and make sure no oil runs over the sealing surface or the sealant, ( RTV black which is for auto transmission use as others will dissolve over time ).
When reassembling, make sure you have the oil pump and pickup as shown. It is quite fiddling to keep it exactly in the position while you put it back. Also you will find that the shafts will have tilted slightly so you will have to push on the main shaft so that the bottom one will fall into its indentation while putting the back half back on again. This will also put the tension back into the new chain so don't worry when it still looks slack after first fitting it back on. Also do the bolts up lightly and let sit for an hour before doing the final tightening. This will prevent too much RTV being squeezed out and then not sealing correctly.
[Index]