White Background Install.
Here are the install instructions to make it easy to install any of the white back ground files I sell as shown here. They are also shown in French by Jerome Andre on his site.
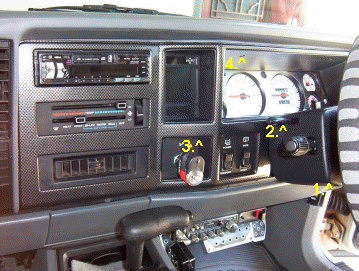
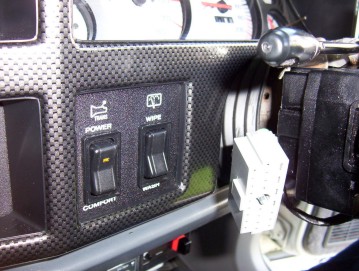
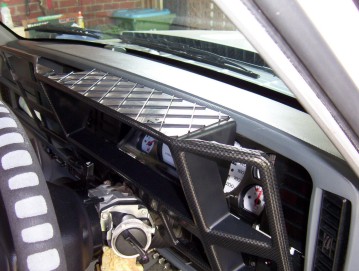
Remove the column surround first if you have a 95 or later ( non airbags models don't need to do this step ) by undoing the three torx head screws underneath ( 1. ) and unscrewing the tilt adjustment lever ( 2. ). Then unplug the column wires as shown above on the right photo by undoing the screw which holds it in place. The plastic dash face is held in with four screws, ( No.3 & 4. both sides ) two above the instruments and one each above the cigarette lighter and headlight switch.
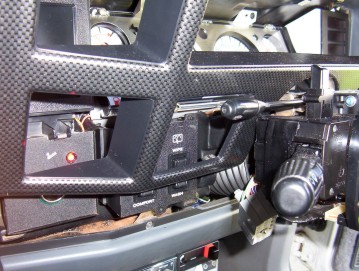
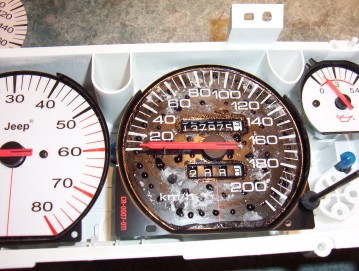
It will now unclip by pulling on it in different places until it is free. You will have to flex it over the back of the column while pushing down while pulling forward on the top to get the top deep section out. To get the clear gauge cover off you first remove the trip reset button by just pulling on it while holding onto the shaft. Then four gold coloured screws are all that remain to get the clear plastic and the surround off. You can remove that cluster if you like with another four screws and un-plugging it but I have done them both in and out before.
Do a test print ( it will look pixelated on screen until printed ) on some standard paper first before you do the one on glossy photographic paper or plain paper if laminating it to make sure everything is ok. Make sure the 'Shrink to fit page' IS NOT selected in the print information. The small gauges should measure close to 2" and the large 4". Don't forget to change the printer properties for the photo paper if using it and put it on highest quality print. The first set I did was on photo paper and worked really well and had them in for 5 years without any fading. But that was with Epsom ink which many say is the best for that. This time I made a new one off design for myself and did it on plain paper and laminated it. This means it will not fade no matter want ink you use and looks very good too.
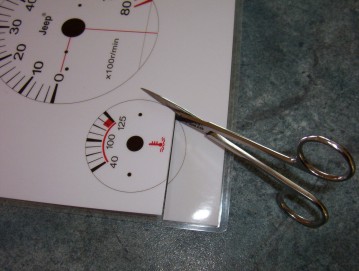
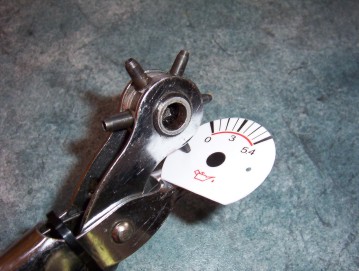
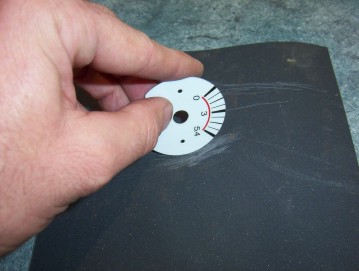
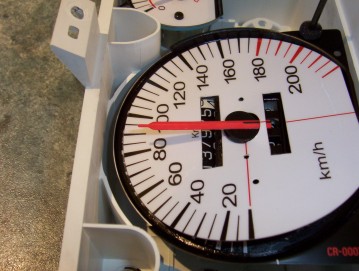
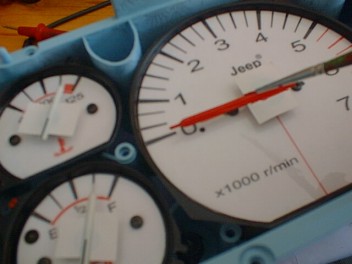
I just cut the gauges out using small scissors as shown above. The black dots are what you have to cut out for the screw, light and needle rests. I just used a hole punch that is used for putting holes in leather belts and such.
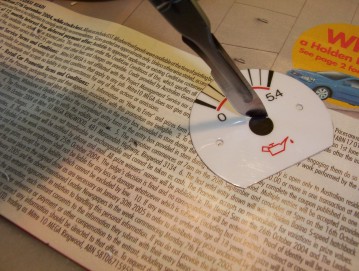
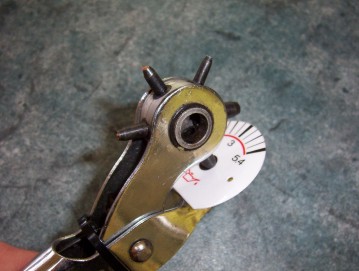
For the bigger holes I nibbled around the edge with the punch or used a scalpel. I used a utility knife to cut out the slots for the counters. You must make sure that the small gauge centre hole end up at least 9 mm big and the large gauge 14.5 mm. Failure to do this can result in needle breakage. Do not force it over!
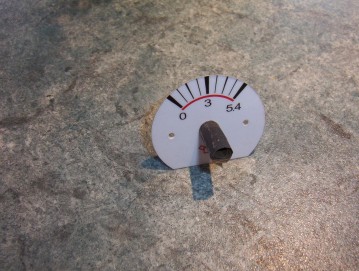
If fussy like me you can place some emery paper on the desk and roll the edge of the backgrounds on it to make it nice and rounded. I even rolled up a little paper the clean up the centre holes as well. Make sure they are big enough to fit over the round piece supporting the needle. I would recommend you trial fit them as shown below to make sure and before using any glue for practice.
To get the needles to slide over the smaller gauges you will have to trim the short end of the needle with some toenail clippers until they are 1/4" long from the pivot point (the black stripe on top of the needle will end up 1/4" long). They are then in the same proportion as the larger gauges and look better anyway. Remove the screws that hold the back plates in place before sliding the backgrounds over, as this will look better as well as extra holding strength. I used a glue stick that would glue both to metal and paper and was called UHU power stic when I used the photo paper but if laminating, it is easier just to put on drops of super glue on the face like shown above. Any glue or even silicon that will stick to these surfaces should be alright.

Now remember that YOU WILL NOT NEED TO REMOVE THE NEEDLES to put on the new backgrounds ( removing them can damage the gauge and you have no way of knowing what position to put them back on as they are not indexed ). To put them on you slide it with the trailing edge under the needle like shown above left. Once you get that far you tuck the trailing end of the hole underneath as shown above right.
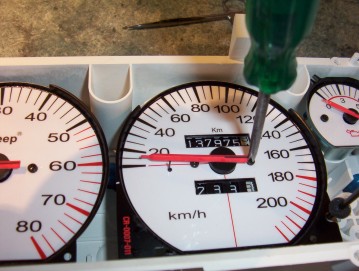
Now pull on the background until you can tuck it under all the way to the needle pivot underneath like shown above left. This gives you just enough room to then get it over the end of the needle.
Place the background so that is sits over the needle stop and that the holes line up with it nice and square. Then replace the gauge screws after lining the face up with their mounting holes ( some large gauges may require you to pierce the screw hole first ). Make sure you clean the needle rests after the backgrounds are stuck on as it is easy to stick the needle to it.
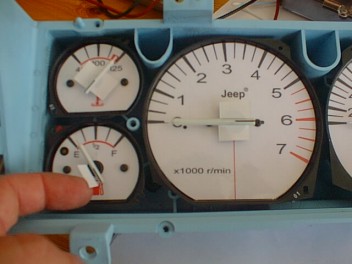
To colour the needles red I used a paint pen or you could use some model paint as shown above. I masked off the black part of the needle base to get a nice straight line.
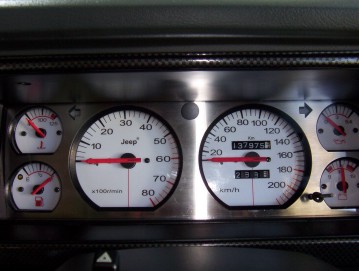
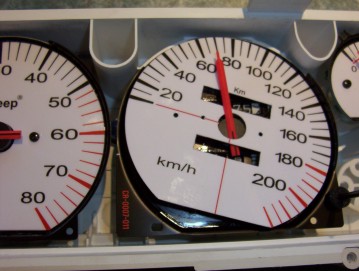
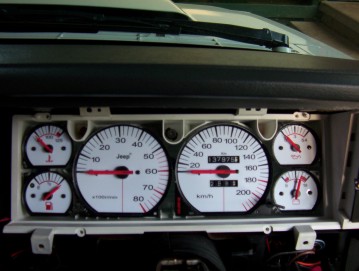
You can paint the surround a different colour or even fit a stainless steel cover like I have done. You end up with a nice new look and everyone that has seen mine thought they were factory so doesn't get much better then that.
[Index]