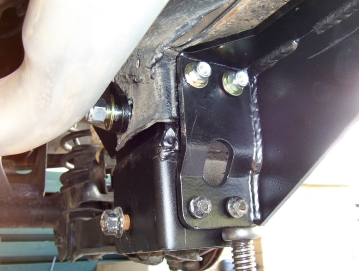
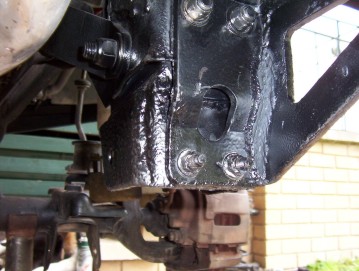
Place the inner C into the new lower bracket as it will hold the brace in place as well. Lining the brace up with the top two holes I found hard. To get the brace to sit hard against the bottom of the frame in the corner I had to grind a little off the bracket. I then even jacked the bottom of the brace up to force it flat against the frame as you can see in the picture above. It is also very import that you still leave all the bolts loose so you can line up the cross member bolts that pass through the rear of the brace bracket. If you do up the bolt on the back of the bracket first, it pulls the brace across as RE says the brace is designed to be under tension to work at its best? This is why I have added the extra bolt to hold the brace in place if the cross member is ever lowered as it would require all the 4 bolts to be loosened again to align it. The two upper bolts should also be the first to do up tightly before you put the arms in as too hard to get to otherwise. They will require a lot of doing up one and then the other and swapping back and forth until pulled up hard until you cannot not turn either of them any more.
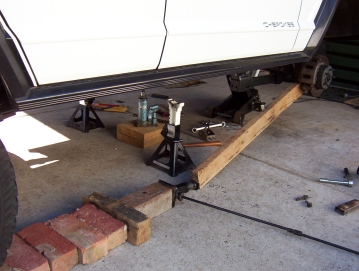
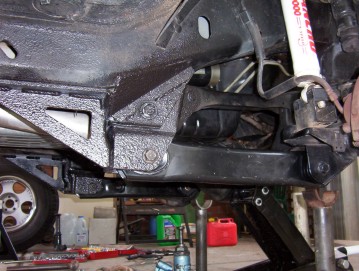
You will find most likely that the axle has moved backwards making it hard to refit the control arms. I rigged up the contraption above using the stock bottle jack to push the axle exactly forward. Once you have one of the arms in place, push the bolt home and then you can still use the jack to help align the other bolt. Still leave the bolt loose until both arms are in position. You can then do up the arm bolts and then the remaining bolts. There will be some pulling on the outer brace to get it to sit flat so keep going over the other bolts that pass through it until you can go over all without moving one of them. This is very important and have heard of them becoming loose if this step was not taken or all of the bolts weren't gone over again after a weeks worth of driving and after the first 4wd trip.
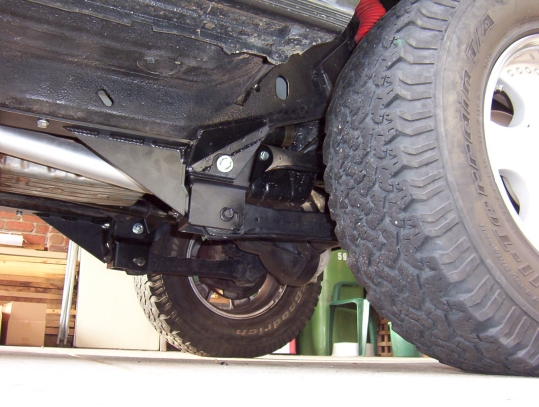
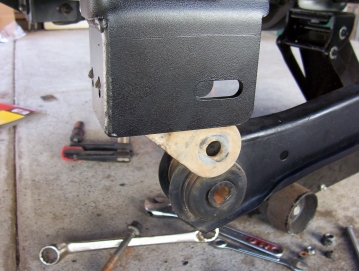
The instructions say that alignment shims are not needed as maybe the caster is worked out for a lifted vehicle? It is worth checking it though as I show here. The brackets also move the whole axle 10 mm ( 3/8" ) forward which gives greater firewall clearance for big tyres. Be careful to check that it has not forced the coil against the swaybar link though. You can clearly see how the arms actually go up to the axle a few degrees even with my 4" lift as the lower control mount is really 4-1/2" lower than stock but the top mount drops only 4"?
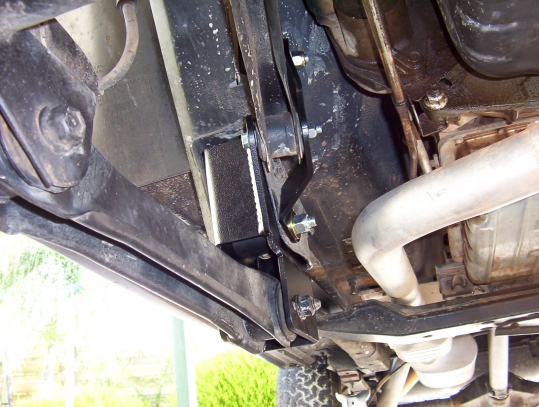
Due to this fact, ( and everything I do tends to be custom! ), I later raised the lower hole up when I fitted the WJ arms for a little extra clearance and trimmed the bottom off the bracket level with the bottom of the brace. This restored the arms geometry back to stock and felt it gave a little more anti dive under braking too. I also removed a triangle out of the brace by drilling a hole in each corner and then cutting with a angle grinder between them to remove some of the metal. Found it looks much better and more professional and saves a fraction of weight too.
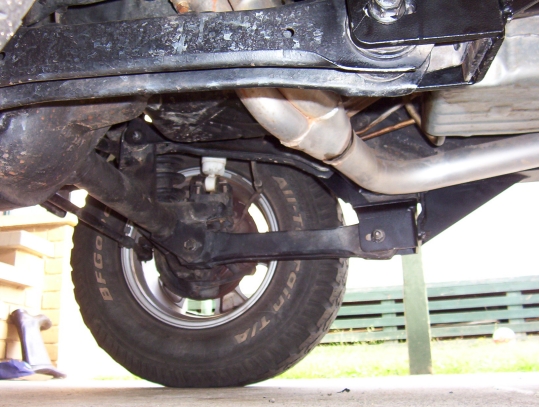
The ride has improved with the drop brackets and will also extend the life of the body itself due to the much reduced amount of force being directly absorbed by it rather than the springs which are designed to do that job. I have never been hung up on them even though this was a worry for me in the beginning. My friend John Herrick even has been over the Rubicon Trail with them and has not suffered being stuck because of them. You can slide along your arms and off down the braces without harm.

Just want to add another brand ( Rough Country ) that has just been released ( February of 2008 ) that is cheaper than RE and easier to install the braces. I came across these on this NAXJA posting and bought them directly from them via eBay for JDU's XJ. The install is exactly the same as RE above but the braces are bolted in the underside of the frame using the two for each side supplied self tapping bolts.
The only thing I would recommend differently to the instructions is using a 5/16" drill for the bolts and start the threading by tapping the end of the socket extension while turning it by hand until you feel it bite. Then use you ratchet to drive it in the rest of the way. The smaller drill size give a much stronger bite into the frame. Another advantage of the shorter braces is that they don't spring out of alignment if you drop your cross member and haven't fitted the extra bolt like I show in the write up above.
[Index]

