Exhaust for Torque
I have always found that the peak torque on 4.0 litre six was too high in the rev range ( 290 Nm at 3950 rpm ) for the low speed work and towing of the off-road trailer through the deserts in Outback Australia to the mountain tracks in the Victorian high country. Now headers has a lot to do with where the peak torque band will be and how flat and long it is. Basically, small diameter ( only just big enough to flow the CC's of the cylinder at the rev limit to keep the exhaust velocity as high as possible which works out at around 1.5" diameter tube size for the primaries ) with long header tubes will lower the peak torque in the rev range. Just remember that the lower the rev limit the longer the primaries you should have. The optimum length with a 5,500 rpm redline is 33" before the collector or merger if a 6 into 1 so just choosing the longest you can find will get you closer to that. There are also two main header designs with the Tri Y spreading the torque peak over a wider area than a 6 into 1 design. Running bigger shorter tubes and 6 into 1 in the header will only make it more efficient above 5000 rpm but dragging a short torque peak up high with it.
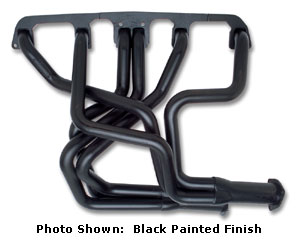
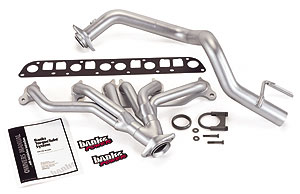
Also, pairing the cylinders that are 180* out in crank shaft rotation in the firing order is the best possible way of getting cylinder scavenging where the firing of one cylinder assists another. So the best set would pair 1 & 6, 5 & 2, 3 & 4. Never seen a set like that though but the Hedman headers shown above goes some way to do this on their AMC 72-86 CJ model with dual outlets but not the 4.0 later models? But make sure that at least the next cylinder to fire is never paired with the one that just has in the firing order of 1 5 3 6 2 4.
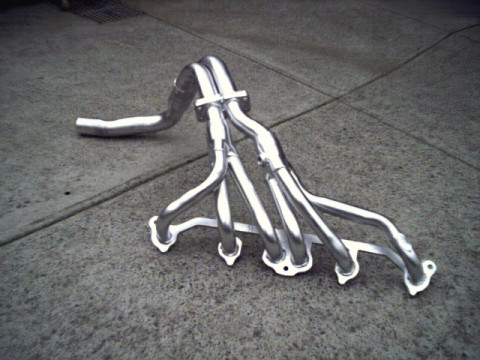
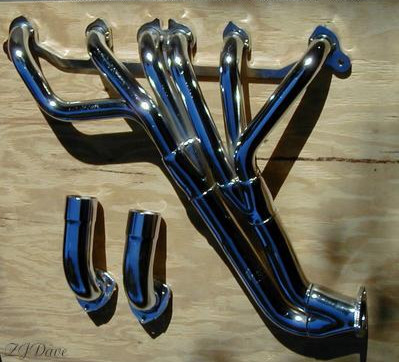
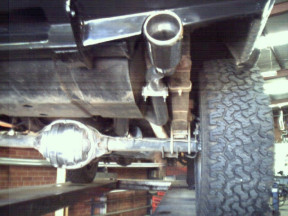
The picture above is the ones that I fitted which were the best I could find to fit the requirements of above with it's Tri-Y design with long small tubes. These are made here in Australia in stainless steel by Hi-Tech Headers and give you an idea to compare with other brands that are available in your country as these are not sold else where. These have since been changed and are no longer available either but I have fitted the new style ones from them to several XJ's since for others. The new ones look more like the Thorley ones further down on this page and have a 2 1/4" end now instead of the 2.5" but don't have the droning problems mine had without a resonator. Just showing again that too big a pipe is a bad thing as these new ones pull better down low than my 2.5" one and sound even better. A 2 1/4" system will actually give you your torque peak at lower engine revs due to the higher exhaust gas velocity in the smaller pipe which also helps with the scavenging of the cylinders on a largely stock engine.
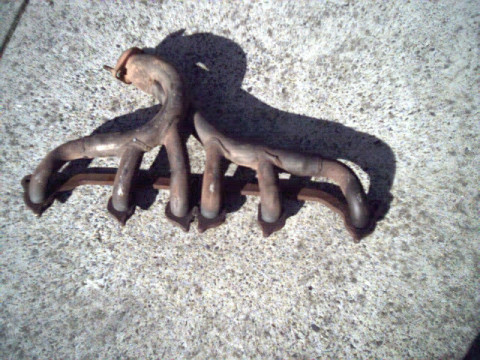
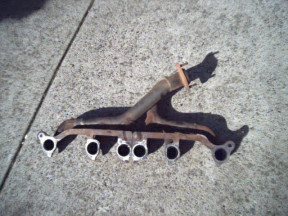
These above are the stock headers and even though they have the right tube diameter, they are far too short and are of poor design in the flow area as well! These have a habit of cracking and cars that do a lot of short trips will crack sooner as it has a lot to do with how often they are heated and cooled. As I use a bike for all the short trips I can and the car gets to do more than half it's total mileage every year touring around Australia even these had just started to show signs of cracking at 110,000 kms on the clock.
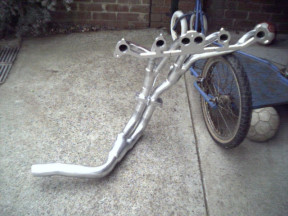
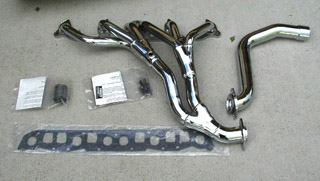
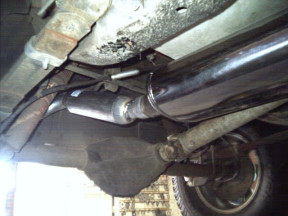
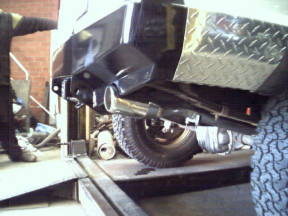
This view from the backside of the both headers shows just how much longer the new headers are before ending in a 2 1/2" pipe compared to the 2" stock one. They curve down under the bell housing before coming one rather than the side of the block on the stock header. The Pacesetter header on the far right above but are made from steel and quite a good design. Try also Headman headers and Clifford headers and look at theirs.
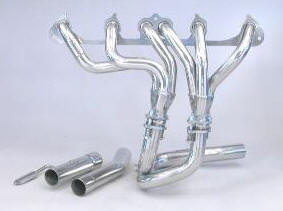
Here are some headers available to those in the USA including the headers sold by Mopar which are made by Mike Leach ( above left ) which are the best design out there as rather than 6 into 2 they go 6 into 3 and then into 2. This is the best design even if a bit shorter than mine but have just heard that they may no longer be available. Thorley ( middle ) ( middle picture provided by 'Satan' from JU ) and the new ones from Banks ( above right ) are another option but not a very good one due to the 6 into 1 design and that a few people have started getting cracking with one guy has reported 4 doing that on him so far. A cheaper copy is available instead that is still better than a stock replacement header from iNeedParts.com. The Mopar ones are not cheap but often come up cheaper on JeepsUnlimited on the Group Buy forum. I think the Pacesetter would be my next choice. There is a write up on Cherokee America on fitting Borla Headers which in my opinion are a little short but still better than the stock header and many have been happy with them.

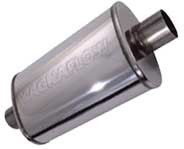
While the exhaust is hot it is of greater volume so a 2 1/2" Car Sound catalytic ( part number 94006 ) converter was used ( Magnaflow make a better all stainless steel one now ) along with a stainless steel Magnaflow muffler which is un-baffled ( check out the stock one at the bottom of this page ) meaning you can look straight through it. Looking at their site I have the 5"x8" oval body 18" long ( with the tape it was 16"? ) 2 1/2" offset muffler ( part number 14256 ). These give a nice deep mellow sound outside and very quite inside the car. A bigger one would be even better and would remove the need for a resonator to be fitted as well.
I had all this fitted up by Ross ( now run by Ron ) at Exhaust Fix in Croydon Victoria ( Ph. 03 9722 9766 ) who had done my fathers XJ earlier and tried four different tail pipe set ups before getting one without any droning that we were after ( my dad tows a caravan around Australia that weighs almost as must as the XJ ). He had started by trying a 2 1/4" tail pipe, then 2 1/4" with resonator, 2" tail pipe and finally settling on a 2" with a resonator ( also know as a Glass pack or Hotdog ). I tried mine without the resonator too but it droned a little on long hills under load. I could run the 2.5" with a resonator ( took out the harshness at full throttle too ) all the way though as the Magnaflow was a much better muffler than what my Dad had fitted. I also picked up the hint that the exhaust gasket should be coated with copper silicon ( he used the Loctite brand ) and has never had one leak when using it. Put a bead on both sides of the gasket and leave for 20 - 30 minutes to skin before fitting everything up. Done several this way since and never had a leak even without re-tensioning. Also try to keep all the fuel lines connected by putting the intake on top of the rocker cover as they are prone to leaking otherwise.
If you have droning and gone to a smaller tail pipe you might think that it seems a waste of time having 2 1/2" at the start only to restrict it down to 2 1/4" - 2" at the tail pipe. But the further the exhaust travels along the pipe the more it cools down which also means it shrinks in volume. Remember that the further you are from the engine the less influence, good or bad, the exhaust has on performance. Part of the droning is caused by this slowing of the air velocity due to the cooling so running it into a smaller pipe keeps the air velocity speed up. Also the greater the distance from the muffler to the tail pipe, the greater the risk of droning. See this write up where they used 6" coffee cans just to see what would happen on a dyno if going bigger than the 21/4" - 2.5" system recommended for a XJ. If you are using a 3 chamber muffler like the 50 series Flowmaster one then a 2 1/4" tail pipe could be used as backpressure has been increased inside the muffler.
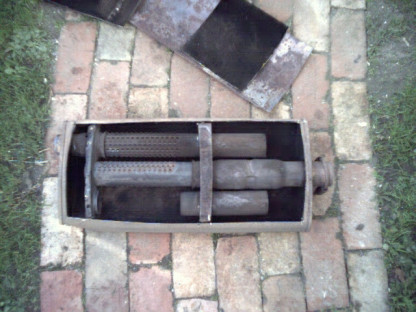
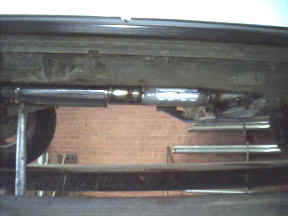
Above is the stock muffler that I cut open for you to show just how restrictive it is. It enters in the middle right of the photo it hits the far side of the muffler before traveling all the way back to the front of the muffler and squeezing past the in-coming pipe and then traveling all the way to the back again. Each turn is flat against a wall with no help in directing it in any direction before traveling through open chambers with pipes sticking out into them. Compare that to the muffler and resonator I used which do not step down at all and only have perforations in the side of them with no raised sections to hinder air flow. Here are some sound clips from exhaustsoundclips.com of a flow master 50 series and 40 series mufflers etc in case you want to go that route. Also remember that you will find that after about 12 months it will be quieter still and smoother in sound as the small build up of carbon etc inside the pipe helps smooth the flow and acts as an insulator.
On the road it has great pulling power that does not let up at all and it is very linear from idle to full throttle without the slightest lag or stumbling along the way. Along with my bored throttle body and other intake improvements it feels very balanced without any bottle necks. The engine is just a pump and any modification to the intake should be matched with the exhaust to keep it all in balance and get the most from the changes. A customer that came into the shop when we were testing it asked what sort of V8 it had and that is the first time anyone has ever confused it with one and am very happy about that. Inside the car the idle has a nice deep mellow sound and at cruise it is quieter than stock and only the tyres are heard ( with the radio off ) and only under load can it be heard a bit louder than stock but with a lower note.
Also it is worth erasing the old ECU or PCM memory.
When you start the engine it will be running off a set of pre-programmed tables that come with the PCM from the factory. When you get the engine up to operating temperature, the PCM will start to collect data for the “Adaptive Memory”. The PCM will collect data for Adaptive Memory for the first 50 Warm-up Cycles.
[Index]