Adding a Jeep Clock
I wanted to use the dead space next to the radio. This space was used on some models with a factory clock. I got mine from Scott Backer ( SandS143@adelphia.net ) who was kind enough to send it all the way to Australia for me and often sells these and other XJ parts on eBay at very good prices so email him and ask.
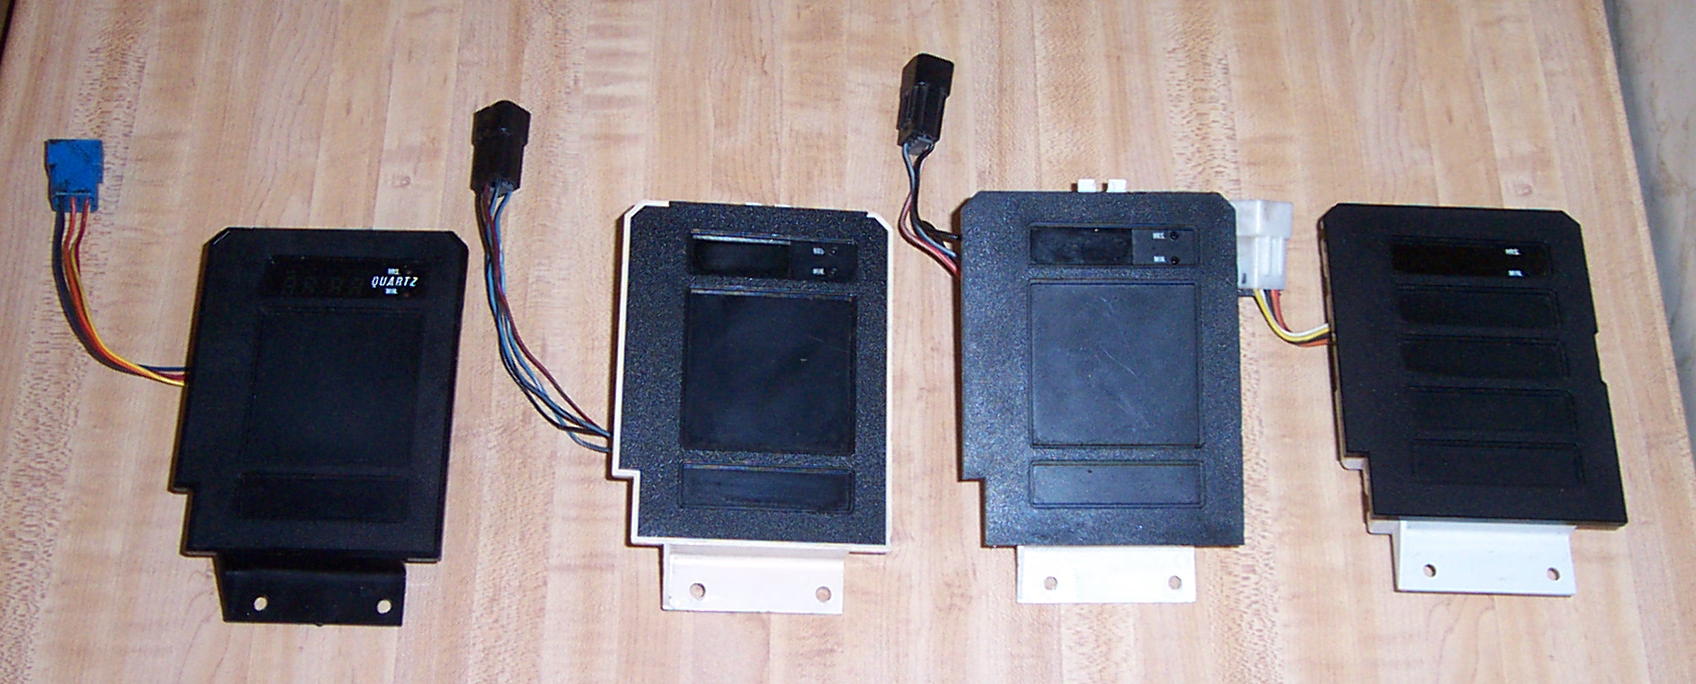
Now there are four main types of Jeeps clocks out there and with the plugs being different you need the right one if you have the wiring present. These pictures were provided by Scott to show the differences front and rear.

The are the Chrysler part numbers and the dealer list prices for the Cherokee clocks below in case you want a new one:
1984-1986 56000061 (blue plug) $61.30
1987 82200639 $50.00
1988-1990 82200908 (black plug) $40.00
1991-1993 56004588 (white plug) $74.00
1994-1996 56006862
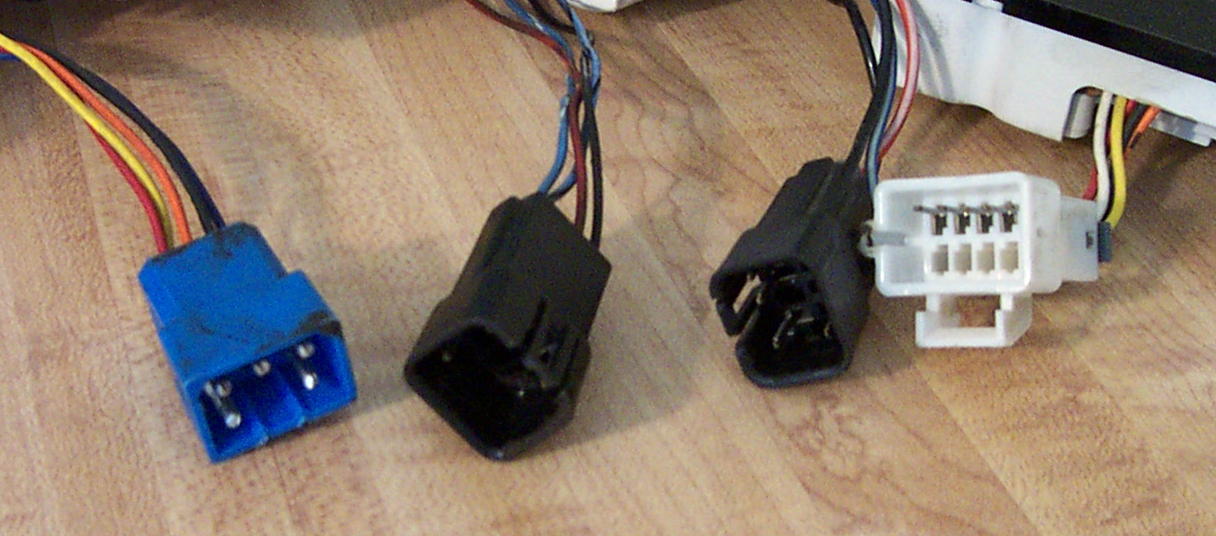
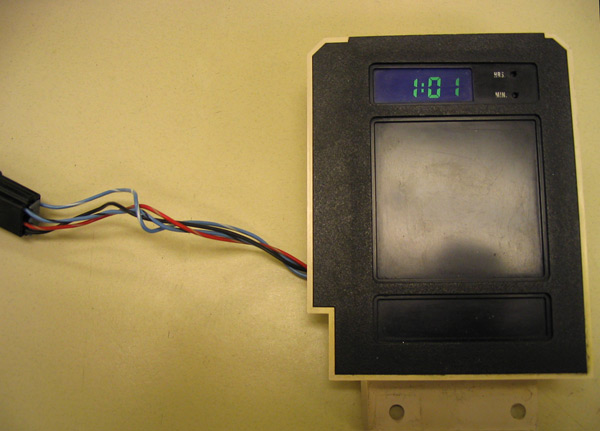
There are at least three different plugs on the clocks. The 1987 uses either the blue plug of the 1984-86 clocks or the black plug of the 1988-90 clocks. I have used the 1988-90 clock with the black plug as it made no difference to me which I used as no RHD's have the wiring in place anyway.
Scott gave me the wiring details from a '85 below from which I could work out what mine needed so you should be able to do the same.
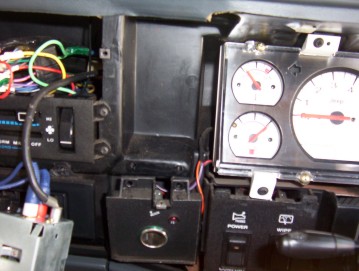
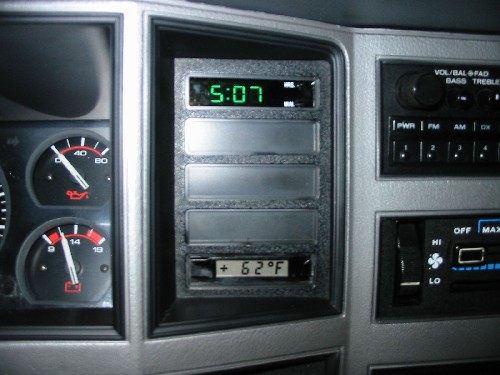
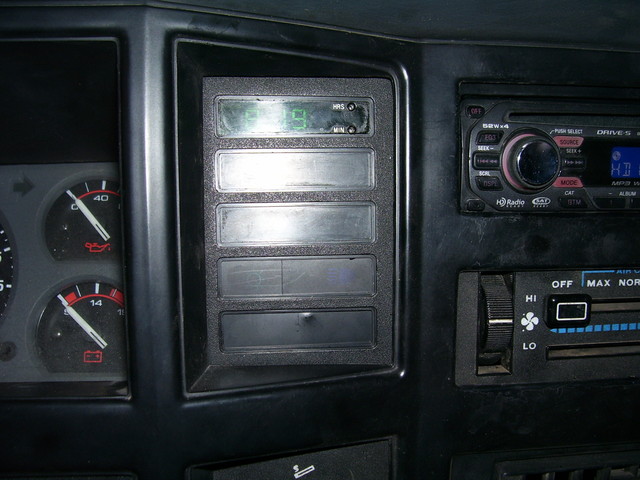
For those with LHD's you can just remove the dash panel as shown here and fit it straight into the spot using the same screws as the blank panel that was in it's place. But for those with RHD's you will run into want I did and probably why it was never offered for them. As the back of it is offset to clear the support for the heater controls etc, it means that support is right in the way for ours. I had to cut the side of the clock casing away and replace the moulded support with some angle iron as shown to get in to fit.
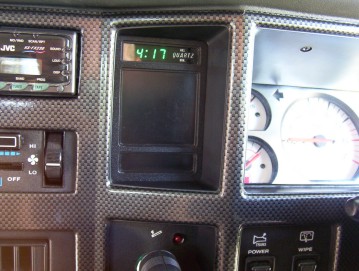
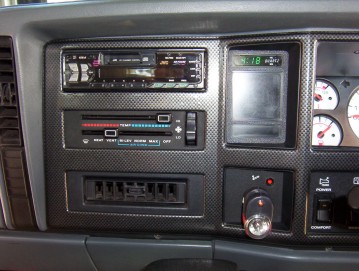
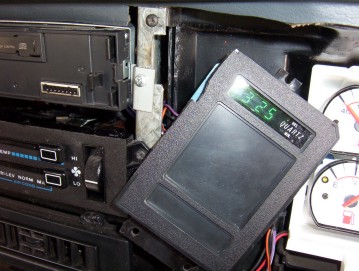
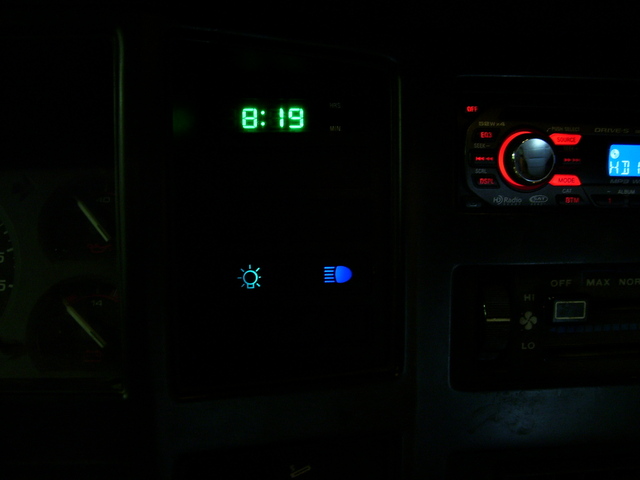
So there you have it . Finally that blank spot put to some use.
The following write up was kindly been given to me by Padraic from Canada
88 Wiring
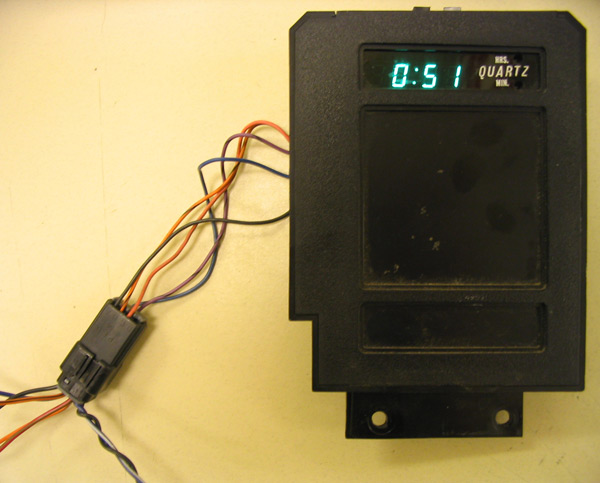
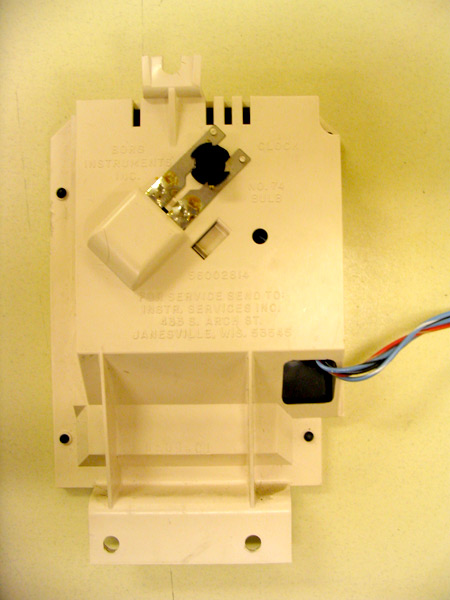
Seems all the '88 XJ's I've seen have the 'total black clock' as I call it. It's easily recognized by two facts: Factoid #1: it's all black! Factoid #2: it has 'QUARTZ' written between the hrs and min button holes. I've found in my research that the dash side connectors are very similar to the '90 dash side version. A wiring, and the '88, '89, and '90 use the same Molex connectors.
clock side dash side
black A black ................. ground
orange/black B orange/black ...... panel dimmer (?)*
red C red/tan ............... 12v power
<empty> D black .................. not used
<empty> E <empty> ............. not used
purple/black F orange/white ....... switched 12v power
dark blue G dark blue ............ lights on input (?)*
<empty> H dark blue/white ..... not used
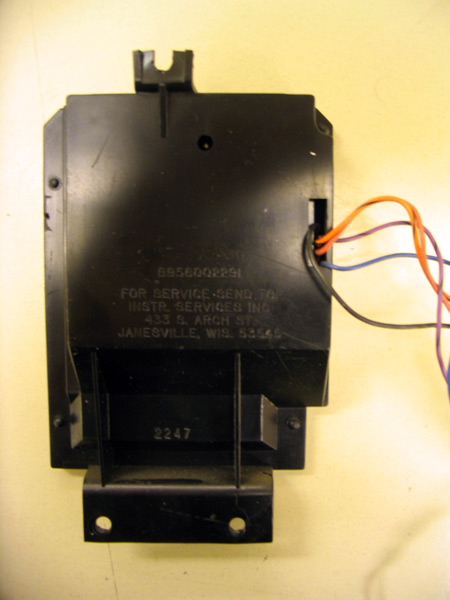
Written on the back you'll find: prt# 8956002291
FOR SERVICE SENT TO:
INSTR. SERVICES INC
433 S. ARCH ST.
JANESVILLE, WIS. 53545
89 Wiring
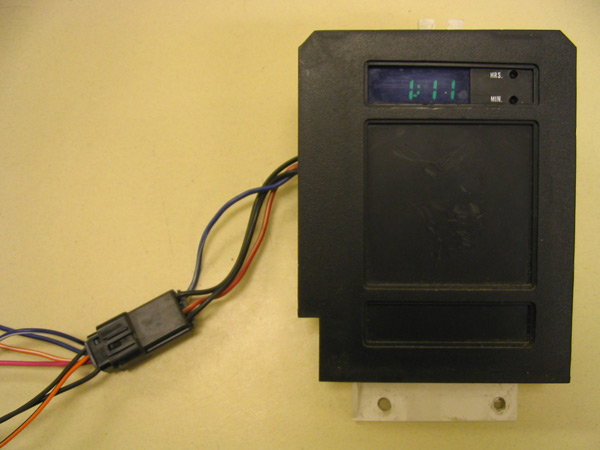
The '89 clock versions I've found are the flat back bulb lit type clock. Of the two bulb types, this one is the brightest lit of the two styles. I attribute this to it's design, with the light being put flush into the back like the gauge cluster lights, and shining directly behind the clock face, compared to being pulled back from the clock face like the '90 model. Both use the same light bulb type, No.74 . It also uses the same Molex connectors as the '88 and '90 clock versions.
It's a pretty simple wiring it uses, having just two grounds, and constant power to the clock itself, and then a switched power for the light bulb. At the time of writing this, I don't have the actual dash side Molex to say what the wires are, but it's wired almost identically to the '90 clock side wise, so would think that it would be most probable that it wires the same dash side.
clock side dash side
blue/black A not known ............. ground
<empty> B not known ............. not used
red/tan C not known ............. constant 12v power
black D not known ............. ground
<empty> E not known ............. not used
<empty> F not known ............. not used
<empty> G not known ............. not used
blue/white H not known ............. switched 12v power
written on the back panel: BORG INSTRUMENTS INC
CLOCK No.74 BULB
56002814
FOR SERVICE SEND TO:
INSTR. SERVICES INC.
433 S. ARCH ST.
JANESVILLE, WIS. 53545
90 Wiring

The '90 version back lit clock is similar in casing to the '91 casing in material, but uses a back lighting by way of a No.74 bulb, just as the '89 clock, and is green in illumination colour. This is due to a green 'filter' they put between the light and the clock image on the LCD. The drawback though is that with this model, they place another piece sticking out the back of the module, pulling the light away from the clock face, which I've personally found in daylight impossible to read, unless shadows by ones' hand. The wiring is similar to the '89 model, but wires are solid colours [except for the red] , and much thicker than the thin telephone like wires that the previous one uses. As well, this is the only model that isn't sealed, and can be taken apart quite easily once the back screws have been removed. I however didn't do this, as using a similar clock as the '89, once the clock is opened up, the rubber that sits between the clock and the clock LCD face breaks off far to easily. There is also two different wiring methods I've seen used with this clock, one being just the plain 4-wire connection, and the other having a full harness but not being utilized, which I call version A, and the former one version B. Depending what clock one wants to switch out to if they so desire, will depend how easy or hard to do upon which harness is installed. The two harness versions are as follows:
VVersion A wiring
clock side dash side
black A black ................... ground
<empty> B orange/black ........ not used
red C pink .................... 12v power
black D black .................. ground
<empty> E <empty> ............. not used
<empty> F orange/white ....... not used
<empty> G dark blue ............ not used
dark blue H dark blue/white ..... switched 12v power
VVersion B wiring
clock side dash side
black A black ................... ground
<empty> B <empty> .............. not used
red C pink .................... 12v power
black D black .................. ground
<empty> E <empty> ............. not used
<empty> F <empty> ............. not used
<empty> G <empty> ............ not used
blue/white H dark blue/white ..... switched 12v power
*I've however not been able to ascertain to predict which version will have which wiring, as there has never seemed to be a pattern. Just some are, and some aren't. Another example of this that I have run in is with my XJ Pioneer '90. Mine had the harness in place for the overhead console, and the temp sensor wiring. Someone else I know has the same model but without the harness at all. Seems at this point to just be a flip of the coin on which one you have, or find.
written on the back panel: 56002814
XJ L.C.D. CLOCK
SUPPLIER: ZEMCO
081149 9024C
MADE IN TAIWAN
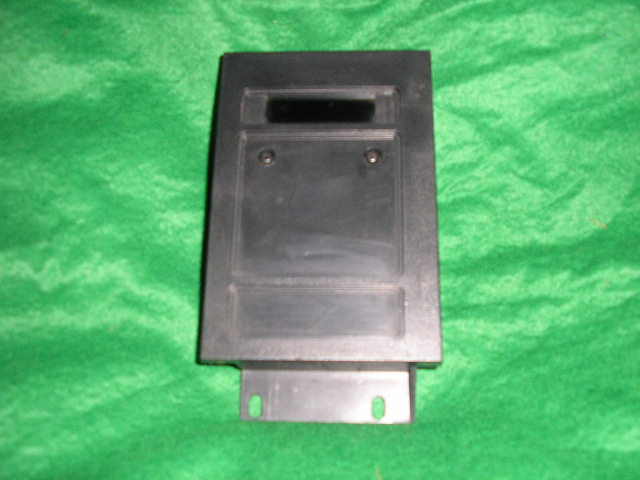
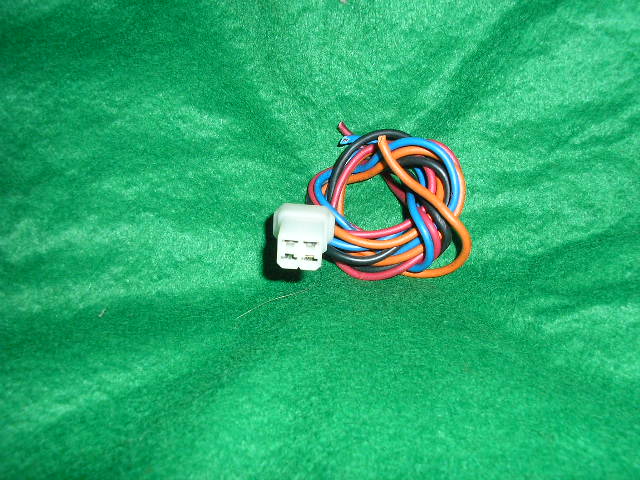
91 Wiring
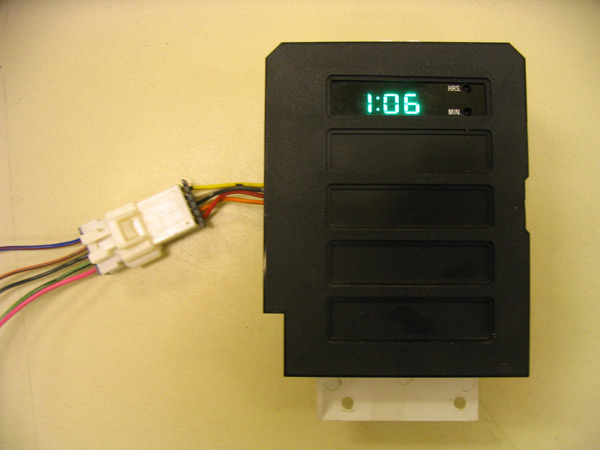
All '91 models I have seen have this model. I'm unsure of '90's models past '91 as I've not come across any to verify any differences.
The front bezel matches that of the idiot light panel on the right side of the steering wheel. There appears to be 4 holes that are left for future considerations for lights and info panels, but unsure. Could easily be modified and used for other uses as well, such as an alarm LED, or other such things ( see further down ). The colour of the clock is green, but when done without the front panel on, it's actually the more common blue cast, and is closer to the colour of the overhead console. This is due to the plastic front insert being green, where as the overhead console is a smoke grey. To match an overhead console, this could be easily accomplished by replacing the plate with the same smoke grey plate, that seems to be used in the '88 models. I'm planning on doing this since I have several clocks at my disposal at present. As far as I can tell on the wiring, and from the experience of putting in a '91 overhead console into a '90 Pioneer, the colours following that install would be as follows:
clock side dash side
red A pink ........................ 12v power
orange B green/black ............. switched 12v power **
black C black ...................... ground
white D orange/black ............ panel dimmer
yellow E blue/red .................... lights on input
With this in mind, it would be pretty easily to be able to hardwire this into early model jeeps with the light type clocks. You would just have to know your own jeeps' wire colours as there seems that there was a lot of changes from the '90 to '91 models.
** I would think that this wire is similar to a white/black on the overhead console, and is an ignition switched 12v power for the lighting of the clock. I've tested and as long as the 12v power is connected, it will keep time, but illuminates only when the switched 12v power is turned on. Interestingly, while disconnected for a while, and reconnecting, the clock seems to retain memory of it's last time. For how long I don't know as I didn't test it.
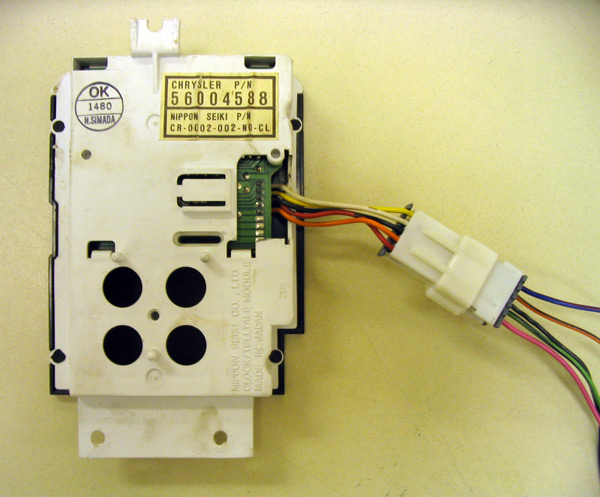
written on the back you'll find: CHRYSLER P/N
56004588
NIPPON SEIKI P/N
CR-0002-002-NO-CL
NIPPON SEIKI CO. , LTD
CLOCK/TELLTALE MODULE
MADE IN JAPAN
Don's modified '91 Clock
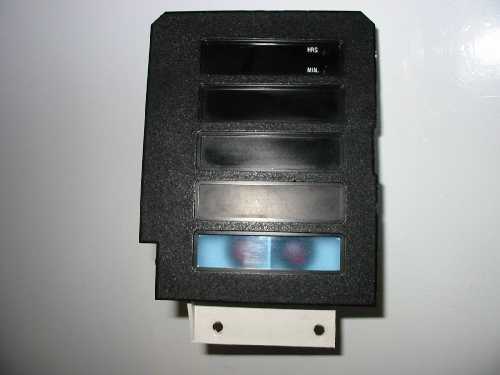
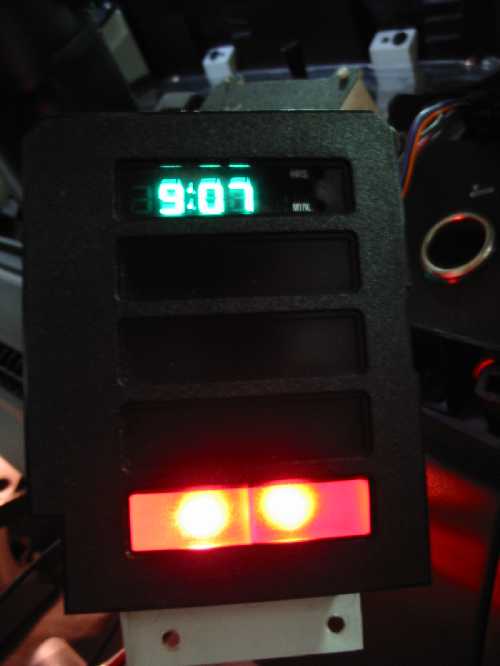
Don from Arab Alabama has used the idea by Pedraic to add some warning lights into the 91 clock. The holes are 1/2" and except bulb holders used for indicators etc or LED ones as he has used. They are shielded from one another so 4 separate lights can be used to alert you. Be useful to light up for those that have wired a 1st gear lock out or torque converter switches etc. He found the black plastic in front of the original bulb holes not to be translucent like what is in front of the clock. He has used a cover from a CD case to add in front of it but some tinted Perspex etc could also be utilized for a more factory look. He opened the clock cover by cutting the 4 small black plastic pins on each corner with a utility knife. The black plastic is held on by two further pins inside which then allow it to be removed and a opaque lens made to fit. Either replace the whole bottom two panels or half as shown, then touch weld them into place with a small soldering iron. Cover goes back on same way, with the iron used like plastic welding and easily removable if you have to go back inside.
He has since changed it to adding a temp sender from a W124 Mercedes Benz after a little trimming.
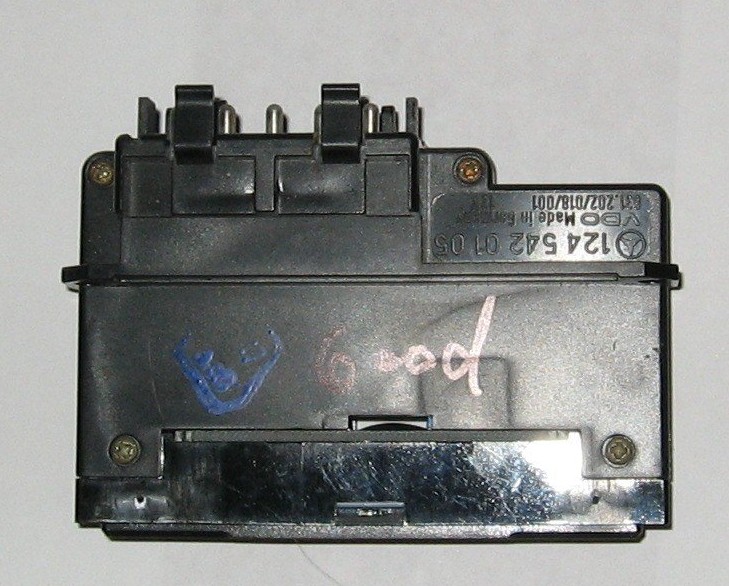
The following details was provided to me by Bart James from the UK.
This type of clock was fitted in all our XJ's from 1992 to early 1997.
James Stuver, " stewie", from Phoenix Arizona provided the following.
I have added a dash clock to my 95 LHD XJ twice
now. The first time I added a clock from a 89. But a little while later I
found a 91 dash clock. I seen on your site where you have pictures posted of
the extra indicator lights on it. I like the idea a lot but I cant say that
I loved the way the example looked.
So I used that idea and put a spin on it. I put a LED in two of the
indicator light positions- one lights up with my front off road lights and
the other is hooked to my aux. back-up light. I was wanting to keep my
install a lot cleaner than using just a CD case so I hit my local junkyards.
I found where various cars had their instrument cluster removed and/or
partially disassembled and grabbed the indicator light panels or filters. I
grabbed a wide variety so that I could decide just which ones I liked the
best. I cut out a high beam indicator for the front and a light bulb
indicator for the back up lights. I cut them out and affixed them to the
back of the faceplate of the clock.
Since they were adapted from different applications they do not fit without
some work. I have one small seam visible from the outside of the unit, but
you would have to be looking to see it. With the indicators off it looks
factory. Even with the indicators on it looks factory!
[Index]