Falcon BA rear disc conversion
This write-up details a conversion I was asked
to design to compliment the Ford Falcon BA
front conversion I had done earlier. However the company is no longer
trading but will leave the write up here for information on how I did it. It will convert the drums to disc brakes
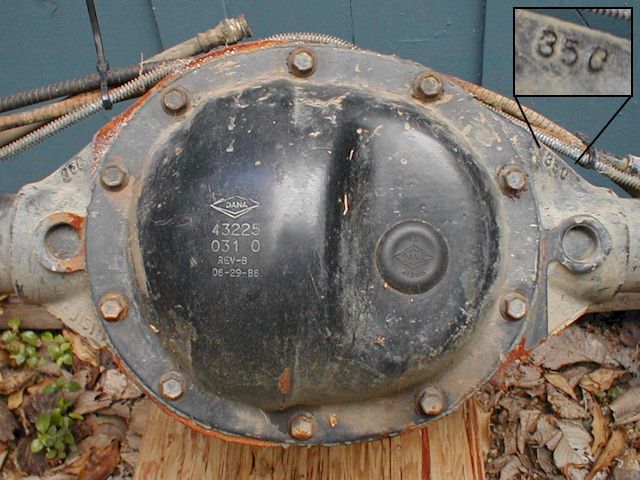
on all Cherokee XJ's from 84-01 with the factory
D35 which looks like this or if upgraded to
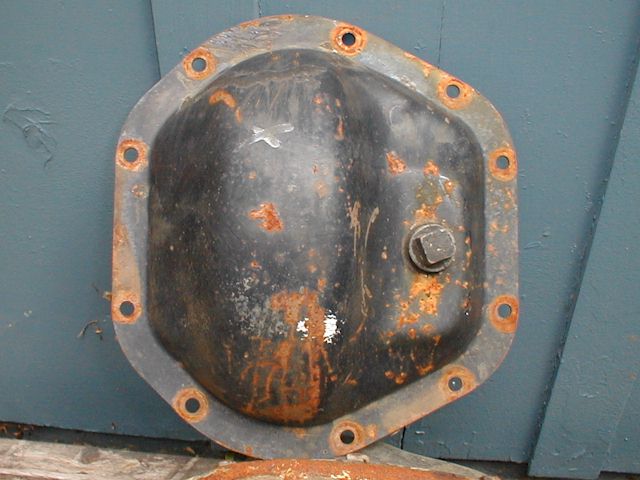
the D44 if fitted later. Also Wrangler TJ's from 96 to 07 with the
Australian stock D44 which looks like this
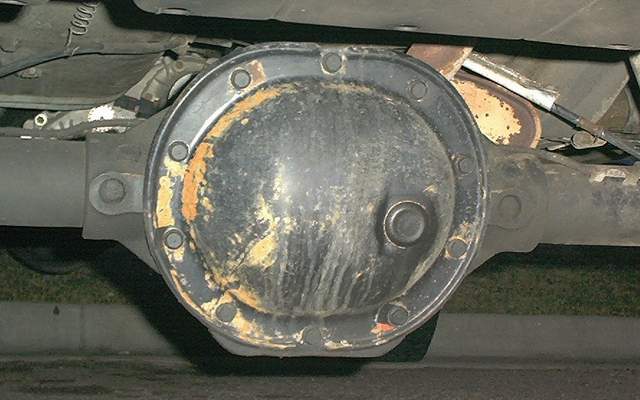
or D35 if overseas. Will also fit the Chrysler 8.25
which looks like this axle as well. Not known if it will suit ABS
equipped axles though as sensor would have to be re-mounted on the new
backing plate. In the USA I have seen most just pull the fuse or remove the
ABS completely to get more under bonnet room and better braking off road and
on gravel. There is a difference depending on what axle you have, and if for a Cherokee XJ, if before
the model update in mid 1997 which has the handbrake cable running up the
centre, or the later which runs down the left frame rail before splitting.
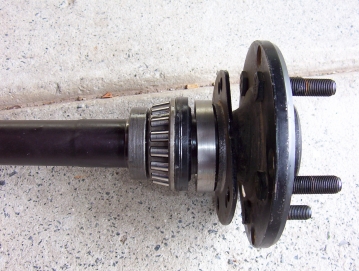
If you have fitted a early axle from before 1990, like the D44 that I have
shown here, they have a different bolt pattern on the
axle housing flange.
This BA kit will also only fits 15" wheels if
they are 'not' Jeep original ones as the high stock offset does not allow
enough room. Most aftermarket rims will fit even if 15" as have a
backspacing of 4.5" or less of back spacing rather than the stocks 5.25".
However the same kit but with Falcon AU II and III series calipers ( same
caliper but different cradle ) and 287 mm rotors will fit perfectly if running stock 15" Jeep wheel still.
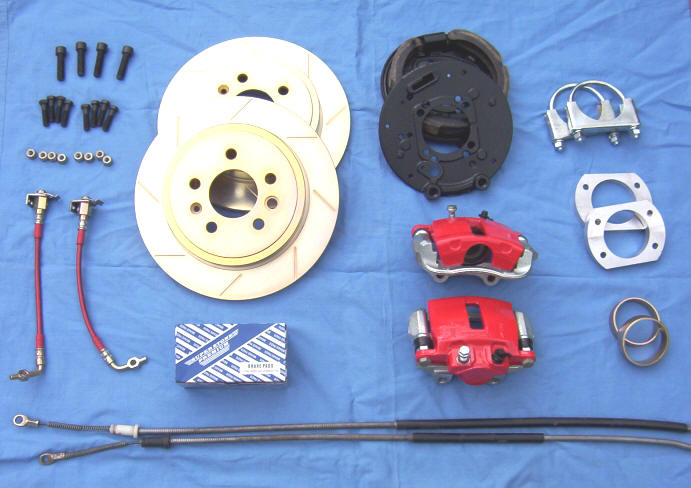
This was sold as a kit and came complete with everything you need,
but no longer available. If wanting to make up your own you will need the
following:
2x
left and right 303 mm slotted rotors
2x
left and right BA single piston calipers
2x
pairs of police compound pads ( #SSP1086 )
2x
braided stainless steel ADR approved brake lines
2x
stainless steel brake line brackets
2x
stainless steel brake line clips
2x
brake banjo bolts
4x
copper washers
2x
backing plate spacers
2x
backing plates with handbrake shoes
2x
D44 seal ring spacers ( for D44 kit )
8x
3/8x2" bolts Grade 8
8x
3/8" Washers ( for D35 kit )
4x
12x45mm cap screws Grade 12.9
2x
handbrake cables brackets with U bolts and nuts
2x R
clips for axle end of handbrake outer
2x
handbrake cables
The only thing I would
definitely recommend is fitting longer wheel studs as they are too short to
begin with and the extra thickness of the rotor over
the drum makes it even worse. Use either Ford Falcon XF or EA 'FRONT' wheel studs.
These will also locate the rotor better as are matched to the size of the
holes in the rotor. I have heard
that front Jeep wheel studs are also suitable.
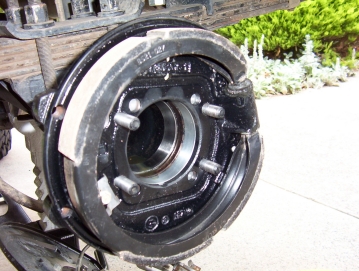
After supporting the axle with stands and removed the wheels, pull
the drums off. If a D35 ( not necessary on a D44 ), you will also have to
remove the diff cover to access the diff centre to remove the C clips
holding in the axle. To remove the axles on a D35, follow the
write up I have here on changing an axle
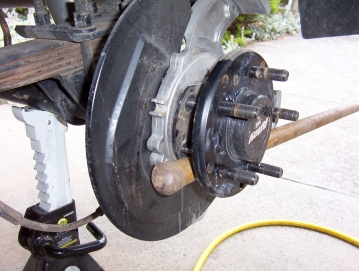
seal which would be a good idea to do at the same time anyway. For a D44 you
only need to remove the 4 retaining nuts which hold both the axle and drum
backing plate in place. Just put the transmission in neutral so you can
rotate the axle with a broom handle or similar through the wheel studs
lining up the large hole in the axle flange with the nuts.
With a D35 you should be able to just pull the axle
free once the C clips are out but the D44 you will need to lever it out by
placing something between the backing plate and the back of the axle flange like
shown. Once the axle is free, undo the hard line and take off the drum backing
plate. You can gently clamp the flex line coming down from the frame to stop all
the brake fluid escaping while working on it. Now is also a good time to replace
the wheel studs with longer ones from some old front hubs or from the front of a
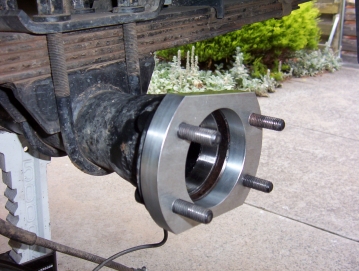
EA Falcon. Fit the four 2"x3/8" bolts through
the housing flange each side after the old ones have been removed and clearance
the heads of the new bolts on one side if needed to make them sit flat against
the back of the housing flange. Slide on the spacer next.
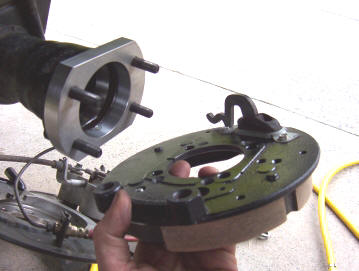
Fit the stainless steel bracket for the end of the
flex hose if not already fitted ( not shown ) to the backing plate into the two
holes provided at the top. The L bracket can be riveted on with the head on the
inside and have the bracket facing so that the riveted side is facing towards
the front ( i.e. the rivets will end up under the flex line fitting as shown in
the picture later in the write up). Fit the backing plate so that the handbrake
lever is pointing down and at the rear. If you have a D35 or Chrysler 8.25 you
can already fit washers and retaining nyloc
nuts and torque to 64 Nm/47 ft-lbs. Even better then the washers would be adding
the D44 axle retaining plate instead. D44's must do the following.
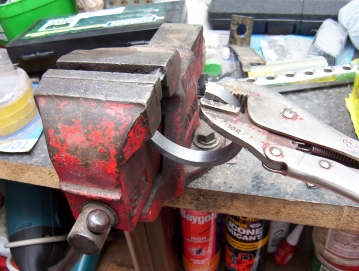
D44's also need to fit seal retaining rings supplied which
the D35 do not have to make up for the thickness of the spacer and difference in
thickness of the backing plates. You can either press off the bearings and seal
and replace them at the same time, as most likely will be damaged in doing so,
or split the ring as shown above. I just cut the ring through with a hacksaw and
then opening them up as shown until I had a gap equal to the axle diameter of
about 2". Place the axle so that the ring ends up in-between the retainer and
the seal and close it back up again. I used a old axle nut ( not shown ) on one
side between the ring and the vice as it got closer to being closed up and while
making it round. Compare it to the seal for roundness. The gap does not have to
be completely closed, it does not seal anything, and it will be more so once you
insert it inside the spacer but get it as close as possible now to make it
easier.
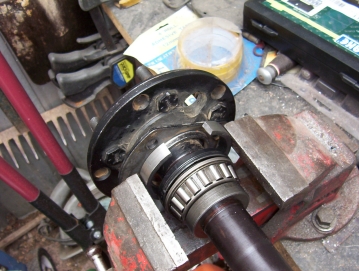
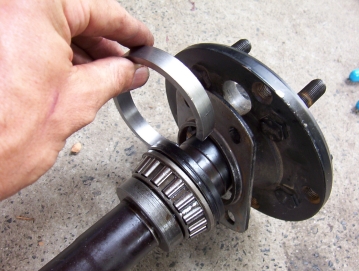
So the order should be: retaining plate, seal ring,
seal, bearing, bearing retainer. Slide the axle back in but place some sealant
around the outside of the seal and the housing where it sits so it will not leak
if re-using the old seal. Try to push the seal through the backing plate hole
while keeping the axle out as much as possible for more room to work. I got the
split ring to fit in next by pushing the gap in it closed with a screw driver
pushing on each side. Have one side just hooked in the hole and held there with
one screw driver while using the other screw driver through the axe hole to push
it in. Once you have the retaining plate over the bolts, fit the nuts on through
the axle flange hole. I found it easier to have a smaller nut already inside the
socket so that the nut you are fitting is right at the end. Gradually do up each
nut only a bit so that the seal and ring get pulled in evenly. Finally once
seated, build the torque up to 64 Nm/47 ft-lb.
[NEXT
PAGE]
[Index]